Pipeline 调试模式 (实验性)#
概述#
调试模式目前是一项 实验性 功能。
当您使用 DALI Pipeline 时,您必须预先定义操作图。在每次迭代中,操作符图在后端执行 - 用户无法访问中间状态,只能访问 Pipeline 输出。这可以提高性能,但会使 Pipeline 的实验和调试更加困难(有关 DALI 执行过程的更多信息,请访问文档)。调试模式允许您在数据在图中处理时访问数据。在标准 DALI 模式下,操作符输出是符号的 (DataNode)。在调试模式下,这些输出变为 DataNodeDebug,其中包含底层数据。
注意#
调试模式并非旨在快速运行,在此模式下,您的 Pipeline 性能将大大降低,仅用于实验目的。
调试模式下的种子生成与标准模式下的工作方式不同(它是确定性的,但不同)。如果您希望在调试模式下获得与标准模式下相同的结果,请使用
seed参数初始化操作符。对操作符的直接调用仅在
pipeline_def函数的范围内有效,您不能在pipeline_def之外以这种方式使用它们。
定义调试 Pipeline#
由于调试模式仍处于开发阶段,其功能可能会发生变化,因此可以从实验版本的 pipeline_def 访问,该版本的工作方式与标准版本相同,但允许您进行调试。要使用调试模式
将标准版本的
nvidia.dali.pipeline_def更改为其实验等效版本nvidia.dali.pipeline.experimental.pipeline_def使用参数
debug=True定义 Pipeline
让我们采用一个简单的 Pipeline,它读取图像并旋转它们,并在其上试用调试模式。
[1]:
import nvidia.dali.fn as fn
from nvidia.dali.pipeline.experimental import pipeline_def

image_dir = "../data/images"
max_batch_size = 8


@pipeline_def(batch_size=max_batch_size, num_threads=1, device_id=0, debug=True)
def simple_pipeline():
    jpegs, labels = fn.readers.file(
        file_root=image_dir, random_shuffle=True, initial_fill=21
    )
    images = fn.decoders.image(jpegs, device="cpu")
    rotated_images = fn.rotate(images, angle=10.0, fill_value=0)

    return rotated_images, labels
调试模式的基本用途是打印操作符返回的对象。它为您提供了许多您可能想要检查的信息。
[2]:
@pipeline_def(batch_size=max_batch_size, num_threads=1, device_id=0)
def simple_pipeline_with_print():
    jpegs, labels = fn.readers.file(file_root=image_dir, random_shuffle=True)
    images = fn.decoders.image(jpegs, device="cpu")

    print(images)

    rotated_images = fn.rotate(images, angle=10.0, fill_value=0)

    return rotated_images, labels


pipe = simple_pipeline_with_print(debug=True)
pipe.build()
pipe_out = pipe.run()
DataNodeDebug(
    name="__Image_2",
    data=TensorListCPU(
             [[[[ 1  0  0]
               [ 1  0  0]
               ...
               [ 6  0  0]
               [ 6  0  0]]

              [[ 1  0  0]
               [ 1  0  0]
               ...
               [ 6  0  0]
               [ 6  0  0]]

              ...

              [[74 48 35]
               [71 45 32]
               ...
               [18  8  7]
               [11  1  0]]

              [[72 46 33]
               [67 41 28]
               ...
               [18  8  7]
               [12  2  1]]]


             [[[1 1 1]
               [1 1 1]
               ...
               [0 0 0]
               [0 0 0]]

              [[1 1 1]
               [1 1 1]
               ...
               [0 0 0]
               [0 0 0]]

              ...

              [[4 2 3]
               [4 2 3]
               ...
               [1 1 1]
               [1 1 1]]

              [[4 2 3]
               [4 2 3]
               ...
               [1 1 1]
               [1 1 1]]]


             ...


             [[[255 255 255]
               [255 255 255]
               ...
               [ 86  46  55]
               [ 86  46  55]]

              [[255 255 255]
               [255 255 255]
               ...
               [ 86  46  55]
               [ 86  46  55]]

              ...

              [[158 145 154]
               [158 147 155]
               ...
               [ 93  38  41]
               [ 93  38  41]]

              [[157 145 155]
               [158 146 156]
               ...
               [ 93  38  41]
               [ 93  38  41]]]


             [[[178 190 202]
               [178 190 202]
               ...
               [ 77  87  97]
               [ 76  86  96]]

              [[178 190 202]
               [178 190 202]
               ...
               [ 77  87  97]
               [ 77  87  97]]

              ...

              [[192 192 192]
               [188 188 188]
               ...
               [231 228 221]
               [234 231 224]]

              [[188 188 188]
               [195 195 195]
               ...
               [224 221 214]
               [234 231 224]]]],
             dtype=DALIDataType.UINT8,
             layout="HWC",
             num_samples=8,
             shape=[(669, 640, 3),
                    (427, 640, 3),
                    (480, 640, 3),
                    (427, 640, 3),
                    (427, 640, 3),
                    (409, 640, 3),
                    (427, 640, 3),
                    (425, 640, 3)]))
以这种方式使用它使您可以轻松地在标准模式和调试模式之间切换。
[3]:
pipe_standard = simple_pipeline_with_print()
pipe_standard.build()
pipe_out = pipe_standard.run()
DataNode(name="__Image_6", device="cpu")
在调试模式下,每次调用 run 时,都会执行 Pipeline 的代码(这样您就可以在每次迭代中访问 Pipeline 的状态),这与标准模式相反,在标准模式下,定义 Pipeline 的代码仅在调用 build 时执行一次。
请注意,每次调用 run 时,我们都会获得不同的打印结果。此外,您可以在 GPU 上像标准 DALI Pipeline 一样使用它。
[4]:
@pipeline_def(batch_size=max_batch_size, num_threads=1, device_id=0)
def simple_pipeline_with_print():
    jpegs, labels = fn.readers.file(file_root=image_dir, random_shuffle=True)
    images = fn.decoders.image(jpegs, device="mixed")

    print(jpegs)

    rotated_images = fn.rotate(images, angle=10.0, fill_value=0)

    return rotated_images, labels


pipe = simple_pipeline_with_print(debug=True)
pipe.build()
for _ in range(5):
    pipe.run()
DataNodeDebug(
    name="__File_8[0]",
    data=TensorListCPU(
             [[255 216 ... 255 217]
             [255 216 ... 255 217]
             ...
             [255 216 ... 255 217]
             [255 216 ... 255 217]],
             dtype=DALIDataType.UINT8,
             num_samples=8,
             shape=[(35731,),
                    (24253,),
                    (30716,),
                    (40177,),
                    (23894,),
                    (25958,),
                    (91537,),
                    (24441,)]))
DataNodeDebug(
    name="__File_8[0]",
    data=TensorListCPU(
             [[255 216 ... 255 217]
             [255 216 ... 255 217]
             ...
             [255 216 ... 255 217]
             [255 216 ... 255 217]],
             dtype=DALIDataType.UINT8,
             num_samples=8,
             shape=[(20069,),
                    (35646,),
                    (33781,),
                    (50295,),
                    (29762,),
                    (35941,),
                    (25486,),
                    (41063,)]))
DataNodeDebug(
    name="__File_8[0]",
    data=TensorListCPU(
             [[255 216 ... 255 217]
             [255 216 ... 255 217]
             ...
             [255 216 ... 255 217]
             [255 216 ... 255 217]],
             dtype=DALIDataType.UINT8,
             num_samples=8,
             shape=[(34115,),
                    (20716,),
                    (23382,),
                    (39469,),
                    (26287,),
                    (39469,),
                    (35646,),
                    (26287,)]))
DataNodeDebug(
    name="__File_8[0]",
    data=TensorListCPU(
             [[255 216 ... 255 217]
             [255 216 ... 255 217]
             ...
             [255 216 ... 255 217]
             [255 216 ... 255 217]],
             dtype=DALIDataType.UINT8,
             num_samples=8,
             shape=[(23382,),
                    (24253,),
                    (91537,),
                    (50295,),
                    (35941,),
                    (30716,),
                    (24441,),
                    (25958,)]))
DataNodeDebug(
    name="__File_8[0]",
    data=TensorListCPU(
             [[255 216 ... 255 217]
             [255 216 ... 255 217]
             ...
             [255 216 ... 255 217]
             [255 216 ... 255 217]],
             dtype=DALIDataType.UINT8,
             num_samples=8,
             shape=[(41063,),
                    (20716,),
                    (33781,),
                    (20069,),
                    (23894,),
                    (35731,),
                    (25486,),
                    (29762,)]))
而在标准模式下,打印只执行一次(在调用 build 时),run 调度后端已定义图的执行。
[5]:
pipe = simple_pipeline_with_print(debug=False)
pipe.build()
for _ in range(5):
    pipe.run()
DataNode(name="__File_13[0]", device="cpu")
附加功能#
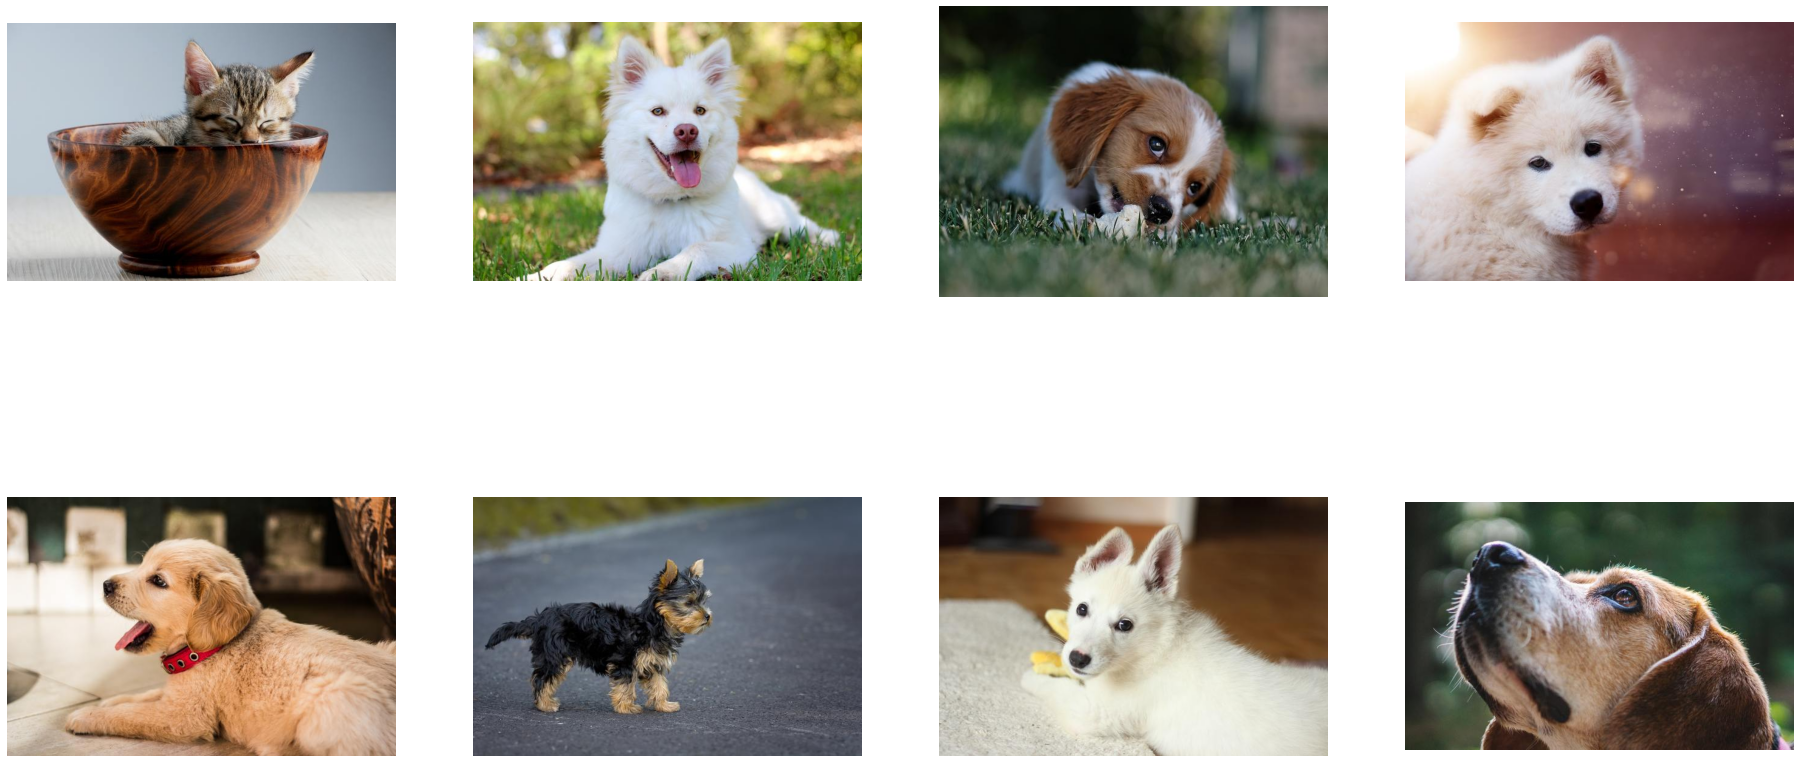
调试模式为数据操作提供了一些附加功能。例如,我们可以可视化作为 Pipeline 中间步骤生成的数据。
首先,让我们定义一个辅助函数,该函数可用于显示一批图像。
[6]:
import matplotlib.gridspec as gridspec
import matplotlib.pyplot as plt

%matplotlib inline


def show_images(image_batch):
    columns = 4
    rows = (max_batch_size + 1) // (columns)
    plt.figure(figsize=(32, (32 // columns) * rows))
    gs = gridspec.GridSpec(rows, columns)
    for j in range(rows * columns):
        plt.subplot(gs[j])
        plt.axis("off")
        plt.imshow(image_batch.at(j))
数据访问#
通过在操作符返回的 DataNodeDebug 上调用 .get(),您可以直接访问底层的 TensorList,这对于标准 DataNode 是不可能的。
[7]:
@pipeline_def(batch_size=8, num_threads=1, device_id=0, debug=True)
def simple_pipeline_with_show():
    jpegs, labels = fn.readers.file(file_root=image_dir, random_shuffle=True)
    images = fn.decoders.image(jpegs, device="cpu")

    show_images(images.get())

    rotated_images = fn.rotate(images, angle=10.0, fill_value=0)

    return rotated_images, labels


pipe = simple_pipeline_with_show(debug=True)
pipe.build()
pipe_out = pipe.run()
您可以检查数据的形状。
[8]:
iter = 0


@pipeline_def(batch_size=8, num_threads=1, device_id=0, debug=True)
def simple_pipeline_with_shape():
    jpegs, labels = fn.readers.file(file_root=image_dir, random_shuffle=True)
    images = fn.decoders.image(jpegs, device="cpu")

    print(f"Iteration {iter}, shapes={images.shape()}")

    rotated_images = fn.rotate(images, angle=10.0, fill_value=0)

    return rotated_images, labels


pipe = simple_pipeline_with_shape(debug=True)
pipe.build()
for _ in range(5):
    pipe_out = pipe.run()
    iter += 1
Iteration 0, shapes=[(427, 640, 3), (427, 640, 3), (427, 640, 3), (427, 640, 3), (480, 640, 3), (597, 640, 3), (425, 640, 3), (427, 640, 3)]
Iteration 1, shapes=[(427, 640, 3), (427, 640, 3), (485, 640, 3), (480, 640, 3), (446, 640, 3), (409, 640, 3), (427, 640, 3), (480, 640, 3)]
Iteration 2, shapes=[(669, 640, 3), (480, 640, 3), (425, 640, 3), (425, 640, 3), (427, 640, 3), (425, 640, 3), (485, 640, 3), (427, 640, 3)]
Iteration 3, shapes=[(427, 640, 3), (427, 640, 3), (480, 640, 3), (427, 640, 3), (446, 640, 3), (480, 640, 3), (427, 640, 3), (669, 640, 3)]
Iteration 4, shapes=[(480, 640, 3), (597, 640, 3), (409, 640, 3), (480, 640, 3), (427, 640, 3), (425, 640, 3), (427, 640, 3), (425, 640, 3)]
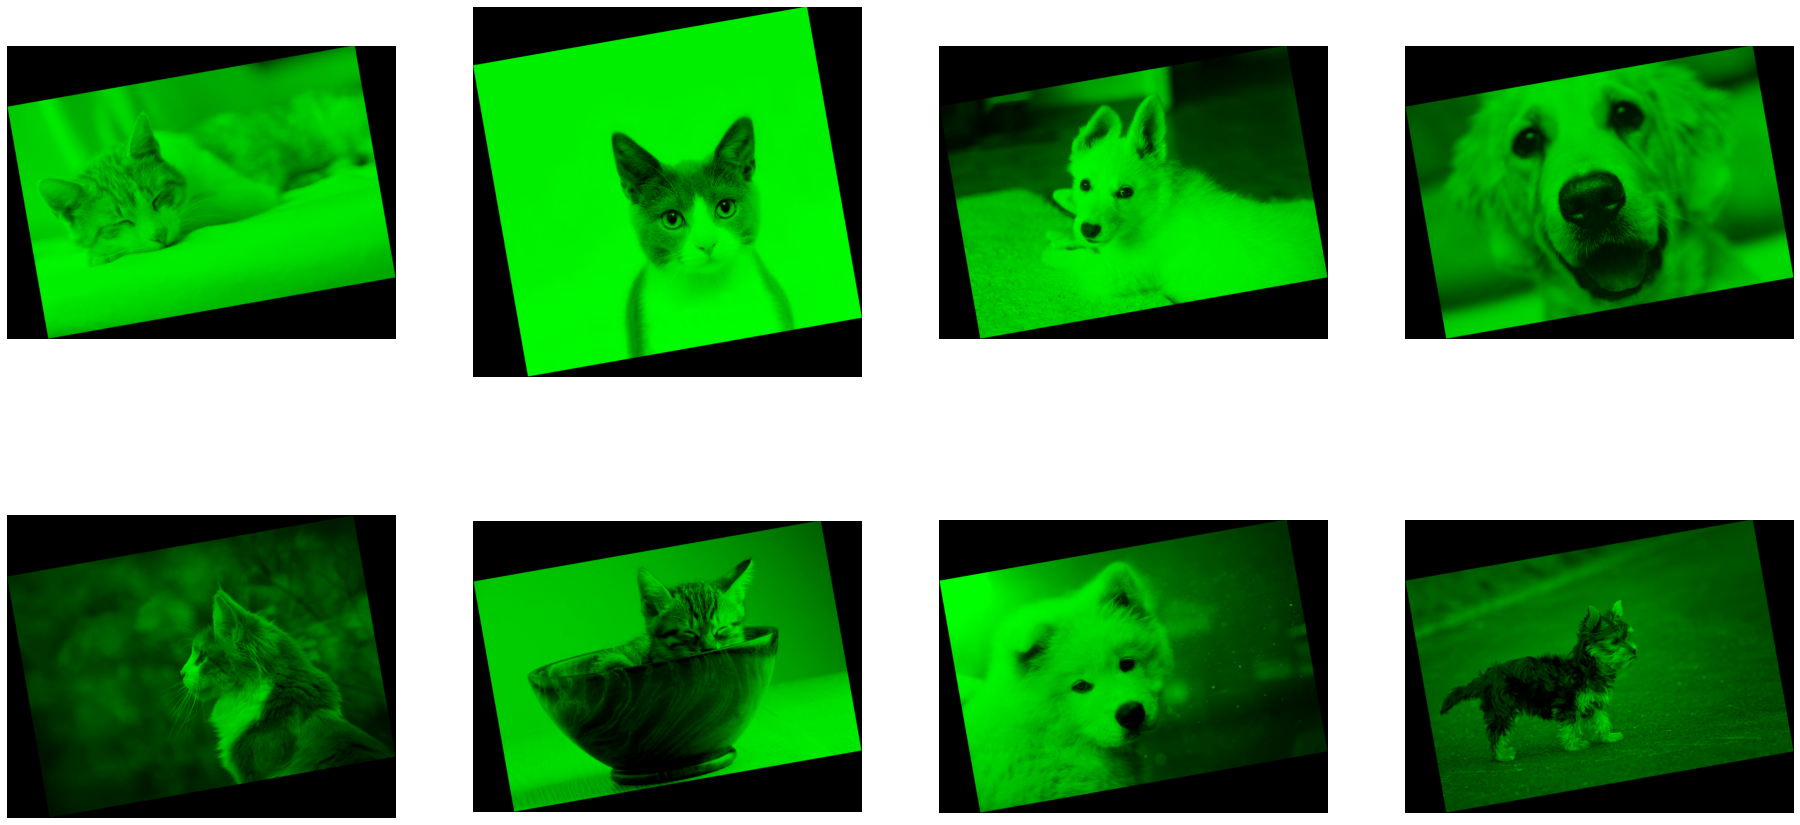
数据修改#
您可以修改数据(例如,通过将其强制转换为 NumPy ndarray 或 PyTorch 张量),然后将其直接传递给操作符。调试模式下的操作符接受与 外部源操作符 相同的源。
[9]:
import numpy as np


@pipeline_def(batch_size=8, num_threads=1, device_id=0, debug=True)
def simple_pipeline_with_modification():
    jpegs, labels = fn.readers.file(file_root=image_dir, random_shuffle=True)
    images = fn.decoders.image(jpegs, device="cpu")

    images = [np.array(tensor) for tensor in images.get()]
    for image in images:
        image[:, :, [0, 2]] = 0

    rotated_images = fn.rotate(images, angle=10.0, fill_value=0)
    show_images(rotated_images.get())

    return rotated_images, labels


pipe = simple_pipeline_with_modification(debug=True)
pipe.build()
pipe_out = pipe.run()
警告#
由于调试模式旨在尽可能接近地模拟标准模式的执行,因此您无法更改操作符的顺序。例如,这是不允许的
[10]:
iter = 0


@pipeline_def(batch_size=8, num_threads=1, device_id=0, debug=True)
def corrupted_pipeline():
    jpegs, labels = fn.readers.file(file_root=image_dir, random_shuffle=True)
    images = fn.decoders.image(jpegs, device="cpu")

    if iter == 1:
        images = fn.crop(images, crop=[256, 256])

    rotated_images = fn.rotate(images, angle=10.0, fill_value=0)
    show_images(rotated_images.get())

    return rotated_images, labels


pipe = corrupted_pipeline(debug=True)
pipe.build()
for _ in range(2):
    try:
        pipe_out = pipe.run()
    except RuntimeError as err:
        print(f"Error: {err}")
    iter += 1
Error: Unexpected operator 'crop'. Debug mode does not support changing the order of operators executed within the pipeline.