3D 变换#
在这个例子中,我们演示了 3D WarpAffine、旋转和调整大小
Warp 操作符#
所有 warp 操作符都通过在变换后的坐标处采样源图像来计算输出像素
这样,每个输出像素只计算一次。
如果源坐标没有精确指向像素中心,则会根据 interp_type 参数中指定的插值方法,对相邻像素的值进行插值或取最近的像素。
仿射变换#
源采样坐标 \(x_{src}, y_{src}, z_{src}\) 根据以下公式计算
其中 \(x, y\) 是目标像素的坐标,矩阵表示逆向(目标到源)仿射变换。\(\begin{vmatrix} m_{00} & m_{01} & m_{02} \\ m_{10} & m_{11} & m_{12} \\ m_{20} & m_{21} & m_{22} \end{vmatrix}\) 块表示组合的旋转/缩放/剪切变换,\(t_x, t_y, t_z\) 是平移向量。
3D 旋转#
旋转操作符是根据仿射变换实现的,但在内部计算变换矩阵。输出大小会自动调整,大小奇偶性也会进行调整,以减少体积中心附近的模糊。旋转通过指定轴(作为向量)和角度(以度为单位)来定义。
旋转矩阵(源到目标)计算如下
其中 \(u, v, w\) 是归一化的 axis 向量,\(\alpha\) 是从度转换为弧度的 angle。
请注意,内部使用逆矩阵来实现目标到源的映射,这正是操作的实际实现方式。
3D 调整大小#
3D 调整大小与 2D 调整大小大致相同。与 Warp 和 Rotate 不同,Resize 支持更广泛的重采样方法选择,其中许多方法使用抗锯齿。有关 Resize 操作符的详细描述,请参阅 Resize 教程。
用法示例#
首先,让我们导入必要的模块。
[1]:
from nvidia.dali.pipeline import Pipeline
import nvidia.dali.ops as ops
import nvidia.dali.types as types
import nvidia.dali.fn as fn
import numpy as np
import matplotlib.pyplot as plt
import math
import itertools
让我们定义一些体积测试数据和用于显示它的实用程序。
[2]:
import cv2


def centered_scale(in_size, out_size, scale):
    tx = (in_size[1] - out_size[1] / scale) / 2
    ty = (in_size[0] - out_size[0] / scale) / 2
    return np.array([[1 / scale, 0, tx], [0, 1 / scale, ty]])


def project_volume(volume, out_size, eye_z, fovx=90, zstep=0.25):
    out_shape = out_size
    if len(volume.shape) > 3 and volume.shape[-1] > 1:
        out_shape += [volume.shape[-1]]
    output = np.zeros(out_shape)
    in_size = volume.shape[1:3]
    fovx_z = math.tan(math.radians(fovx / 2)) * volume.shape[2] / out_size[1]

    def project_slice(volume, plane_z):
        plane_index = int(plane_z)
        volume_slice = volume[plane_index]
        scale = volume_slice.shape[1] / fov_w
        M = centered_scale(in_size, out_size, scale)
        return cv2.warpAffine(
            volume_slice,
            M,
            dsize=(out_size[1], out_size[0]),
            flags=cv2.WARP_INVERSE_MAP + cv2.INTER_LINEAR,
        )

    for plane_z in np.arange(0, volume.shape[0], zstep):
        z = plane_z - eye_z
        fov_w = z * fovx_z
        z0 = np.clip(math.floor(plane_z), 0, volume.shape[0] - 1)
        z1 = np.clip(math.ceil(plane_z), 0, volume.shape[0] - 1)
        projected_slice = project_slice(volume, z0)
        # trilinear interpolation
        if z1 != z0:
            slice1 = project_slice(volume, z1)
            q = plane_z - np.floor(plane_z)
            projected_slice = (projected_slice * (1 - q) + slice1 * q).astype(
                np.uint8
            )

        output += projected_slice

    return output


def perspective(volume, max_size):
    window_size = 300
    (h, w) = volume.shape[1:3]
    if h > w:
        w = window_size * w // h
        h = window_size
    else:
        h = window_size * h // w
        w = window_size
    return project_volume(volume, [h, w], -volume.shape[2]) * (1 / 255.0)


import matplotlib.gridspec as gridspec


def draw_volume(volume, title):
    captions = [
        "XY middle slice",
        "ZY middle slice",
        "XZ middle slice",
        "perspective",
    ]
    shape = volume.shape
    persp = perspective(volume, 300)
    persp *= 1.0 / persp.max()
    persp = persp.clip(0, 1)

    axes = (1, 0, 2) if len(shape) > 3 else (1, 0)
    images = [
        volume[shape[0] // 2, :, :],
        volume[:, :, shape[2] // 2].transpose(axes),
        volume[:, shape[1] // 2, :],
        persp,
    ]
    for i in range(len(images)):
        if len(images[i].shape) == 3 and images[i].shape[2] == 1:
            images[i] = images[i][:, :, 0]

    fig = plt.figure(figsize=(16, 18))
    plt.suptitle(title, fontsize=18)
    columns = 2
    rows = int(math.ceil(len(images) / columns))
    gs = gridspec.GridSpec(rows, columns)

    for i in range(len(images)):
        plt.subplot(gs[i])
        plt.axis("off")
        plt.title(captions[i])
        plt.imshow(images[i], origin="lower")
[3]:
import os

test_data_root = os.environ["DALI_EXTRA_PATH"]
base_dir = os.path.join(
    test_data_root, "db", "3D", "MRI", "Knee", "Jpegs", "STU00001"
)


def LoadData(dir):
    imgs = []
    i = 0
    path = os.path.join(base_dir, dir, "%i.jpg")
    while True:
        img = cv2.imread(path % i, cv2.IMREAD_GRAYSCALE)
        if img is None:
            break
        i += 1
        imgs.append(img[::-1, :, np.newaxis])
    a = (np.stack(imgs, axis=0) / 255).astype(np.float32)
    return a


def GetData():
    return [LoadData("SER00008")]
现在,让我们定义 pipeline。变换参数是硬编码的,但轴、角度和矩阵参数可以指定为 CPU 张量。warp 矩阵也可以作为常规输入传递给 WarpAffine 操作符,在这种情况下,它们可以作为 GPU 张量传递。有关确切用法,请参阅 Warp 示例。
[4]:
pipe = Pipeline(
    batch_size=1,
    num_threads=3,
    device_id=0,
    exec_pipelined=True,
    exec_async=True,
)
with pipe:
    data = fn.external_source(
        source=GetData, device="gpu", layout="DHWC", dtype=types.FLOAT
    )

    # scale only Z axis
    resized = fn.resize(
        data, resize_z=224, mode="stretch", interp_type=types.INTERP_LANCZOS3
    )

    angle = fn.random.uniform(range=(-20, 20), seed=123)
    axis = fn.random.uniform(range=(-1, 1), shape=[3])
    rotated = fn.rotate(
        resized,
        angle=angle,
        axis=axis,
        interp_type=types.INTERP_LINEAR,
        fill_value=0,  # force out-of-bounds pixels to 0
    )

    warped = fn.warp_affine(
        resized,
        size=(200, 320, 320),
        matrix=(1, 1, 0, -180, 0, 1, 0.2, -20, 0, 0, 1, 10),
        interp_type=types.INTERP_LINEAR,
        fill_value=0,  # force out-of-bounds pixels to 0
    )

    pipe.set_outputs(data, resized, rotated, warped, axis, angle)

pipe.build()
最后,我们可以运行 pipeline 以获得预处理的体积。
[5]:
pipe_out = pipe.run()
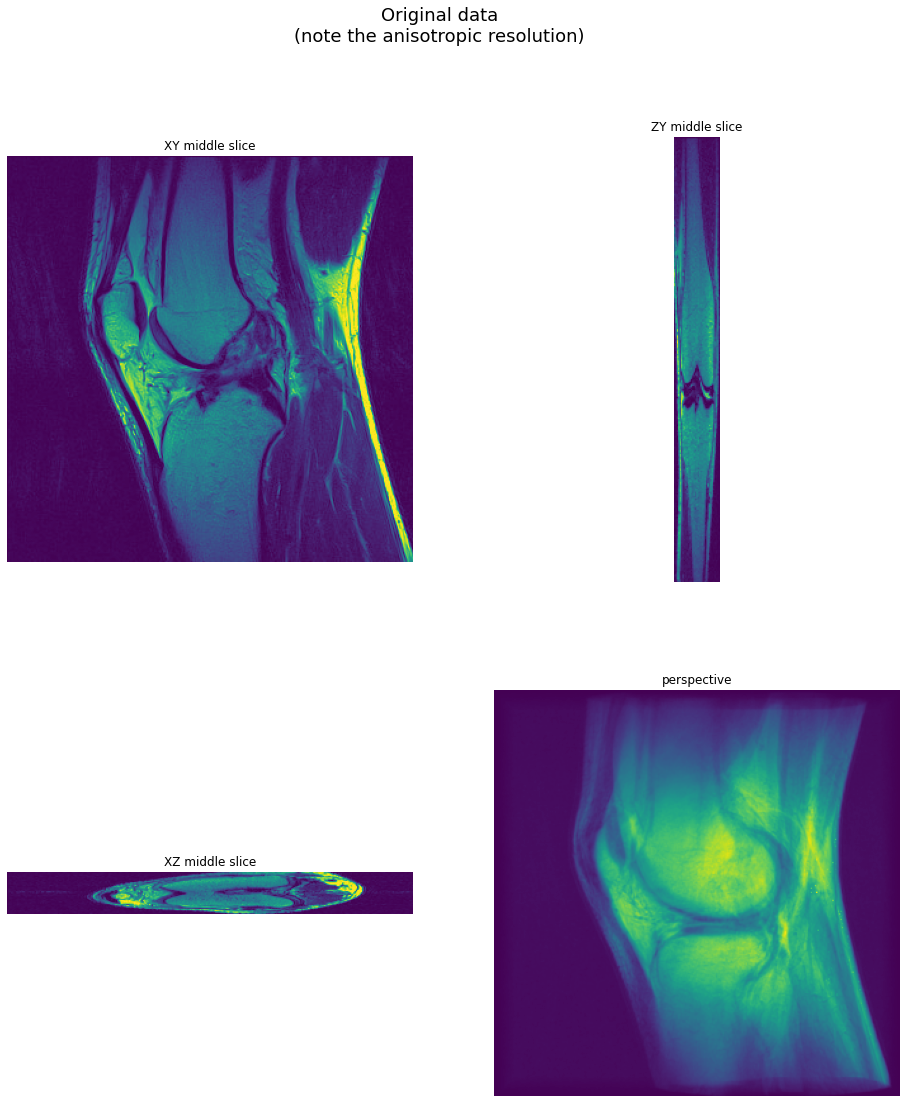
示例输出#
输出显示为三个中间切片(XY、ZY 和 XZ)和一个透视投影。透视投影是通过沿像素对应的射线积分强度获得的。
[6]:
draw_volume(
    pipe_out[0].as_cpu().at(0),
    "Original data\n(note the anisotropic resolution)",
)
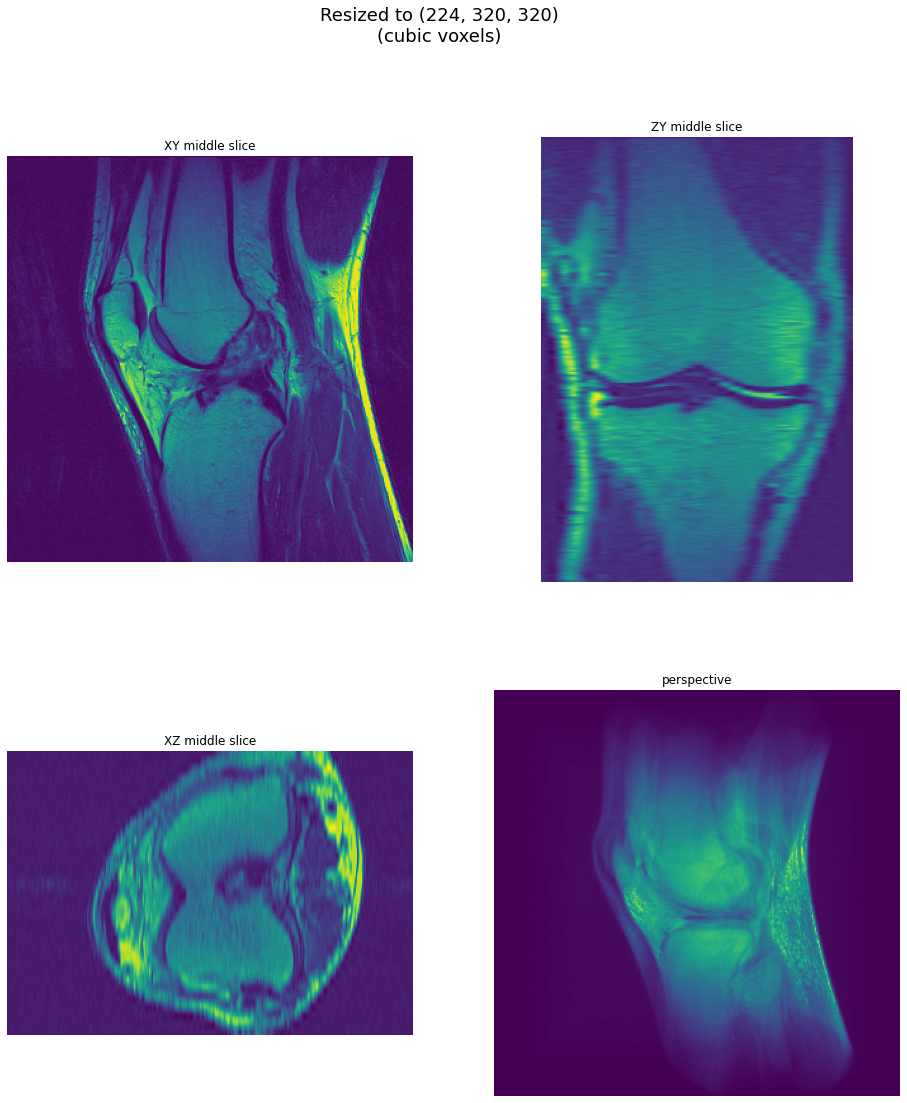
结果:调整大小#
每个切片的分辨率远高于切片之间的分辨率 - 让我们看看调整大小以实现立方体素后的数据。
[7]:
vol = pipe_out[1].as_cpu().at(0)
draw_volume(vol, "Resized to {}\n(cubic voxels)".format(vol.shape[:-1]))
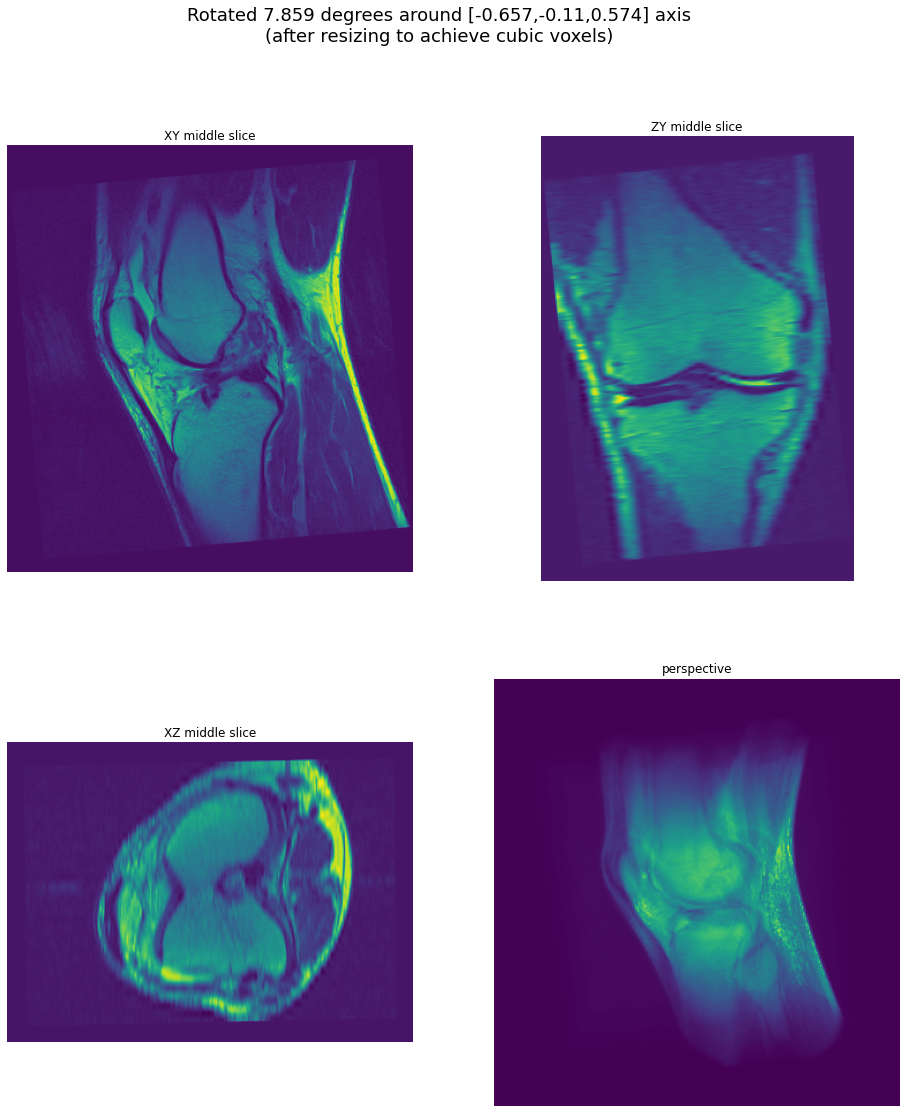
结果:旋转#
现在让我们看看旋转后的体积 - 在调整大小以实现立方体素之后。
[8]:
angle = pipe_out[-1].at(0)
axis = pipe_out[-2].at(0).tolist()
draw_volume(
    pipe_out[2].as_cpu().at(0),
    "Rotated {:.3f} degrees around [{:.3},{:.3},{:.3}] axis".format(
        angle, axis[0], axis[1], axis[2]
    )
    + "\n(after resizing to achieve cubic voxels)",
)
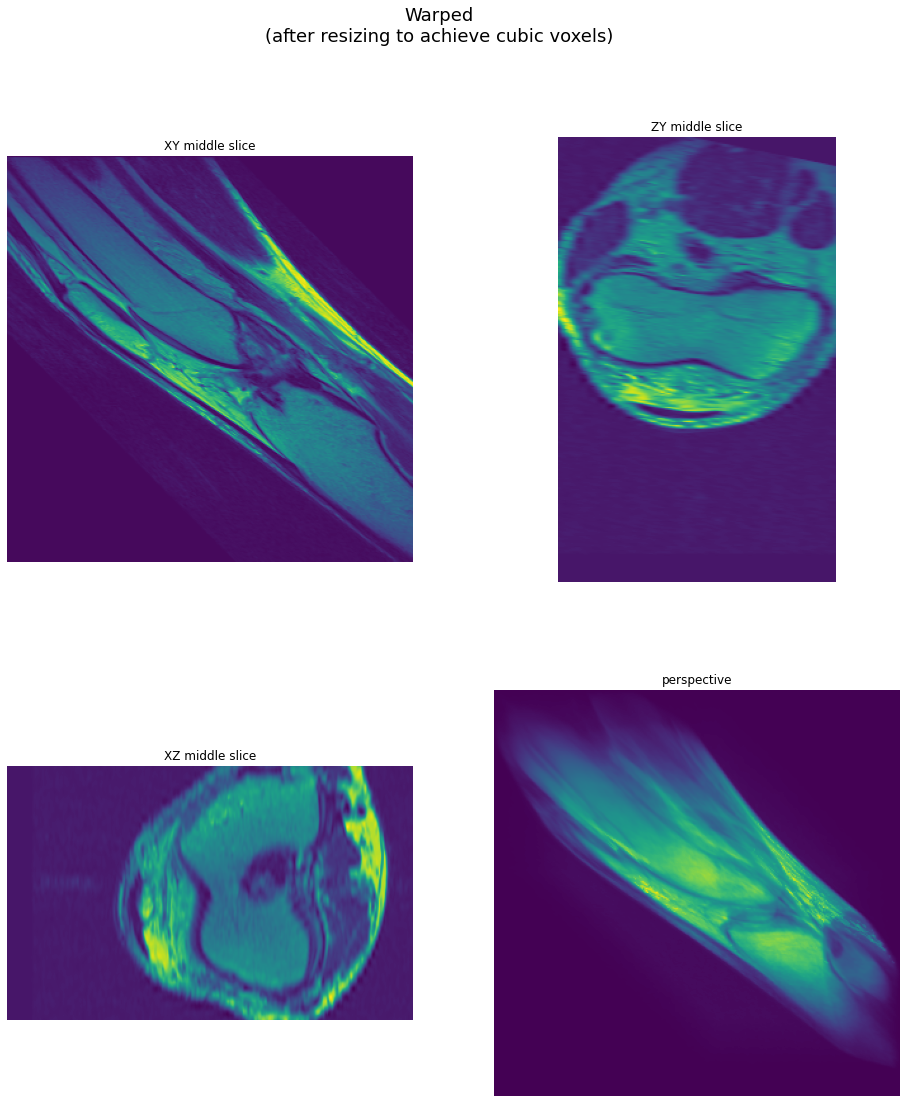
结果:WarpAffine#
最后,让我们看看应用仿射变换的结果。
[9]:
draw_volume(
    pipe_out[3].as_cpu().at(0),
    "Warped\n(after resizing to achieve cubic voxels)",
)