应用程序开发工作流程#
GXF 应用程序,也称为图,可以通过使用 python / C++ 编程或使用 Graph Composer 工具在无代码环境中创建。以下描述了所有这些方法。
Python 应用程序开发#
GXF 框架提供了丰富的 python API,可以轻松创建图。以下部分描述了使用 python 创建 GXF 应用程序的工作流程。
Python API 设置#
先决条件(如果已完成,请跳过)
安装 Graph Composer 运行时 debian 后,GXF Python core API 位于
/opt/nvidia/graph-composer/core。请参阅安装使用工具
registry同步用户所需的 GXF 扩展。请参阅同步扩展
步骤
安装用户所需的 GXF 扩展
例如,对于常用的扩展
registry extn install -e StandardExtension
registry extn install -e PythonCodeletExtension
registry extn install -e MultimediaExtension
registry extn install -e SampleExtension
扩展将安装到默认 GXF 工作区路径
/var/tmp/gxf/.cache/gxf_workspace。1/var/tmp/gxf/.cache/gxf_workspace 2└── gxf 3 ├── core -> /opt/nvidia/graph-composer/core 4 ├── multimedia 5 ├── python_codelet 6 ├── sample 7 └── std
将工作区路径添加到 python 路径
建议实践
在
/home/$USER/.local/lib/python<VERSION>/site-packages/gxf.pth创建一个gxf.pth文件,并将 GXF 工作区路径添加到此文件。python 中的示例命令
import os
import site
# /var/tmp/gxf/.cache/gxf_workspace
default_extensions_path = get_default_extensions_path()

# /home/<USER_NAME>/.local/lib/python<VERSION>/site-packages
user_site_packages_dir = site.getusersitepackages()

# Construct the path to the .pth file
# /home/<USER_NAME>/.local/lib/python<VERSION>/site-packages/gxf.pth
pth_file_path = os.path.join(user_site_packages_dir, "gxf.pth")

# Write the path to the .pth file
with open(pth_file_path, "w") as pth_file:
    pth_file.write(default_extensions_path)

print(f"Created gxf.pth file at {pth_file_path} with the following content:")
print(default_extensions_path)
注意
或者,可以通过更新
PYTHONPATH环境变量将 GXF 工作区添加到 python 路径export PYTHONPATH=$PYTHONPATH:/var/tmp/gxf/.cache/gxf_workspace
ComputeEntity#
ComputeEntity 在图中自动添加一个具有基本调度项的实体。可以使用 python 绑定将以 c++ 实现的 codelet 添加到 ComputeEntity。
组合图的步骤
创建一个 GXF 图对象
为图对象设置时钟和调度器
添加带有 codelet 的 ComputeEntity
连接 ComputeEntity 的发射器和接收器
加载扩展、运行和销毁的图
示例图
import os
from gxf.core import Graph
from gxf import std
from gxf.std import RealtimeClock
from gxf.std import GreedyScheduler
from gxf.std import ComputeEntity
from gxf.sample import PingTx
from gxf.sample import PingRx

def main():
    g = Graph()
    clock = std.set_clock(g, RealtimeClock(name='clock'))
    std.set_scheduler(g, GreedyScheduler(
        max_duration_ms=1000000, clock=clock))

    g.add(ComputeEntity("tx", count=5)).add_codelet(PingTx(clock=clock))
    g.add(ComputeEntity("rx")).add_codelet(PingRx())
    std.connect(g.tx.signal, g.rx.signal)

    g.load_extensions()
    g.run()
    g.destroy()

if __name__ == "__main__":
    main()
PyComputeEntity#
PyComputeEntity 在图中自动添加一个具有基本调度项的实体。Python codelet 可以添加到 PyComputeEntity 中。
组合图的步骤
通过继承 CodeletAdapter 实现 python codelet
创建一个 GXF 图对象
为图对象设置时钟和调度器
添加带有 python codelet 的 PyComputeEntity
连接 ComputeEntity 的发射器和接收器
加载扩展、运行和销毁的图
带有 Python codelet 实现的示例图
import os
import numpy as np
from gxf.core import Graph
import gxf.std as std
from gxf.std import RealtimeClock
from gxf.std import GreedyScheduler
from gxf.python_codelet import CodeletAdapter
from gxf.core import MessageEntity
from gxf.python_codelet import PyComputeEntity
from gxf.std import Tensor

# implement a GXF Codelet
class PyPingTx(CodeletAdapter):
    def __init__(self, some_param="what"):
        super().__init__()
        self.txs = ["tx"]
        self.some_param = some_param

    def start(self):
        self.params = self.get_params()
        self.count = 1
        pass

    def tick(self):
        msg = MessageEntity(self.context())
        t = Tensor(np.array([1+self.count, 2+self.count, 3+self.count]))
        Tensor.add_to_entity(msg, t)
        self.tx.publish(msg, 1)
        print("PyPingTx " + self.name() + ": Message Sent: " + str(self.count))
        self.count+=1
        return

    def stop(self):
        pass


# implement a GXF Codelet
class PyPingRx(CodeletAdapter):
    def __init__(self):
        super().__init__()
        self.rxs = ["input"]

    def start(self):
        self.count = 1
        pass

    def tick(self):
        msg = self.input.receive()
        t = Tensor.get_from_entity(msg)
        assert(np.array_equal(np.array(t), [1+self.count, 2+self.count, 3+self.count]))
        print("PyPingRx " + self.name() + ": Message Received: " + str(self.count))
        self.count +=1
        return

    def stop(self):
        return


def main():
    g = Graph()
    clock = std.set_clock(g, RealtimeClock(name='clock'))
    std.set_scheduler(g, GreedyScheduler(max_duration_ms=1000000, clock=clock))

    ptx = g.add(PyComputeEntity("PingTx", count=5))
    ptx.add_codelet("somename", PyPingTx(some_param="some_value"))
    prx = g.add(PyComputeEntity("PingRx", count = 5))
    prx.add_codelet("codelet", PyPingRx())
    std.connect(g.PingTx.tx, prx.input)

    g.load_extensions()
    g.run()
    g.destroy()

if __name__ == "__main__":
    main()
与其他框架的张量零拷贝#
GXF 支持不同深度学习框架和库(如 NumPy、CuPy、PyTorch、Tensorflow 等)之间的零拷贝张量数据交换。
有关 API 详情,请参阅 张量
从其他框架到 GXF#
import numpy as np
import cupy as cp
np_tensor = np.random.rand(3, 4)
cp_tensor = cp.random.rand(3, 4)
from gxf.std import Tensor
gxf_tensor_host = Tensor.as_tensor(np_tensor)
gxf_tensor_cuda = Tensor.as_tensor(cp_tensor)
然后,张量数据可以由消息实体包装在 GXF 图中传输,例如以下示例中的 gxf_msg_out
Tensor.add_to_entity(gxf_msg_out, gxf_tensor_host, "out_tensor_on_host")
Tensor.add_to_entity(gxf_msg_out, gxf_tensor_cuda, "out_tensor_on_cuda")
从 GXF 到其他框架#
NumPy / CuPy asarray()
np_tensor = np.asarray(gxf_tensor_host)
cp_tensor = cp.asarray(gxf_tensor_cuda)
NumPy / CuPy from_dlpack()
np_tensor = np.from_dlpack(gxf_tensor_host)
cp_tensor = cp.from_dlpack(gxf_tensor_cuda)
示例应用程序#
import os
import cupy as cp
import numpy as np

import gxf.std as std
from gxf.core import (
  Graph,
  MessageEntity
)
from gxf.std import (
  Entity,
  GPUDevice,
  GreedyScheduler,
  RealtimeClock,
  Tensor,
)
from gxf.python_codelet import (
  PyComputeEntity,
  CodeletAdapter,
)

class TensorPairGenerator(CodeletAdapter):
  """Python codelet to generate a stream of tensors on tick()

  Transmitter:
    * host_out
    Transmits one message containing one pair of GXF Tensors zero-copied from NumPy, on every tick()
    * cuda_out
    Transmits one message containing one pair of GXF Tensors zero-copied from CuPy, on every tick()
  """

  def __init__(self):
    super().__init__()
    self.txs = ["host_out", "cuda_out"]

  def start(self):
    self.params = self.get_params()

    rows = self.params.get("rows", 16)
    cols = self.params.get("cols", 64)
    self.shape = (rows, cols)
    self.dtype = np.float32
    return

  def tick(self):
    gxf_msg_out_cuda = MessageEntity(self.context())
    gxf_msg_out_host = MessageEntity(self.context())

    # Initialize a pair of tensors using NumPy
    np1 = np.arange(self.shape[0] * self.shape[1], dtype=self.dtype).reshape(self.shape)
    np2 = np.ascontiguousarray(np1.transpose())

    # Convert NumPy tensors to GXF tensors
    # GXF implements zero-copy from NumPy tensor
    for i, arr in enumerate([np1, np2]):
        gxf_tensor = Tensor.as_tensor(arr)
        Tensor.add_to_entity(gxf_msg_out_host, gxf_tensor, f"host_tensor{i + 1}")

    # Initialize a pair of cuda tensors using CuPy
    cp1 = cp.asarray(np1)
    cp2 = cp.asarray(np2)

    # Convert CuPy tensors to GXF tensors
    # GXF implements zero-copy from CuPy tensor, via gxf.Tensor as_tensor() and from_dlpack()
    for i, dev_arr in enumerate([cp1, cp2]):
        gxf_tensor_cuda = Tensor.as_tensor(dev_arr)
        Tensor.add_to_entity(gxf_msg_out_cuda, gxf_tensor_cuda, f"cuda_tensor{i + 1}")

    self.host_out.publish(gxf_msg_out_host)
    self.cuda_out.publish(gxf_msg_out_cuda)

    return

  def stop(self):
    pass


class DotProduct(CodeletAdapter):
  """Python codelet to do dot product of a pair of tensors.

  Receiver:
    * rx
    Receives one message containing one pair of GXF Tensors zero-copied from NumPy or CuPy, on every tick()

  Transmitter:
    * tx
    Transmits one message containing one GXF Tensor zero-copied from NumPy or CuPy, on every tick()

  The `device` parameter can be set to either 'cpu' or 'gpu'.
  """

  def __init__(self):
    super().__init__()
    self.txs = ["tx"]
    self.rxs = ["rx"]

  def start(self):
    self.params = self.get_params()

    # use NumPy or CuPy based on the 'device' parameter
    device = self.params.get("device", "cpu")
    if (not isinstance(device, str) or device.lower() not in ["cpu", "gpu"]):
        raise ValueError("device parameter must be one of {'cpu', 'gpu'}")
    self.xp = cp if device == "gpu" else np

  def tick(self):
    xp = self.xp
    gxf_msg_in = self.rx.receive()

    # Get GXF tensors from GXF graph
    gxf_tensors = Tensor.find_all_from_entity(gxf_msg_in)
    np.testing.assert_equal(len(gxf_tensors), 2)

    # Convert GXF tensor to NumPy / CuPy tensor
    # GXF implements zero-copy interface to NumPy / CuPy tensor, via NumPy / CuPy asarray() or from_dlpack()
    xp_tensor_in0 = xp.asarray(gxf_tensors[0])
    xp_tensor_in1 = xp.asarray(gxf_tensors[1])

    # NumPy / CuPy libraries to process NumPy / CuPy tensors
    xp_tensor_out = xp.dot(xp_tensor_in0, xp_tensor_in1)

    gxf_msg_out = MessageEntity(self.context())

    # Convert NumPy / CuPy tensor back to GXF Graph
    # GXF implements zero-copy from NumPy / CuPy tensor, via gxf.Tensor as_tensor() and from_dlpack()
    gxf_tensor = Tensor.as_tensor(xp_tensor_out)
    Tensor.add_to_entity(gxf_msg_out, gxf_tensor, "")
    self.tx.publish(gxf_msg_out)

  def stop(self):
    pass


class VerifyEqual(CodeletAdapter):
  """Python codelet to compare a GPU tensor to a CPU tensor to within a tolerance.

  Receiver:
    * host_in
    Receives one message containing one GXF Tensor zero-copied from NumPy, on every tick()
    * cuda_in
    Receives one message containing one GXF Tensor zero-copied from CuPy, on every tick()
  """

  def __init__(self):
    super().__init__()
    self.rxs = ["host_in", "cuda_in"]

  def start(self):
    self.params = self.get_params()

  def tick(self):
    gxf_msg_in_host = self.host_in.receive()
    gxf_msg_in_cuda = self.cuda_in.receive()

    # Get GXF tensors from GXF graph
    gxf_tensors_cuda = Tensor.find_all_from_entity(gxf_msg_in_cuda)
    np.testing.assert_equal(len(gxf_tensors_cuda), 1)
    gxf_tensors_host = Tensor.find_all_from_entity(gxf_msg_in_host)
    np.testing.assert_equal(len(gxf_tensors_host), 1)

    # Convert GXF tensor to NumPy / CuPy tensor
    # GXF implements zero-copy interface to NumPy / CuPy tensor, via NumPy / CuPy asarray() or from_dlpack()
    cp_tensor = cp.asarray(gxf_tensors_cuda[0])
    np_tensor = np.asarray(gxf_tensors_host[0])

    # NumPy / CuPy libraries to process NumPy / CuPy tensors
    # Check if the two arrays are element-wise equal within a tolerance
    cp.testing.assert_allclose(cp_tensor, np_tensor, rtol=1e-5)
    return

  def stop(self):
    pass


class DLPackSimpleApp:

  def run(self, count=20):
    g = Graph()
    clock = std.set_clock(g, RealtimeClock(name="clock"))
    std.set_scheduler(g, GreedyScheduler(max_duration_ms=1000000, clock=clock))
    std.enable_job_statistics(g, clock=clock)

    # create the tensor generator entity
    source_entity = g.add(PyComputeEntity("TensorPairGenerator", count=count))
    source_entity.add_codelet(
        "tensor_pair_generator",
        TensorPairGenerator(),
        # Codelet own params
        rows=16,
        cols=64,
    )

    # create the host matrix multiply entity
    process_entity_host = g.add(PyComputeEntity("DotProductHost", count=-1))
    process_entity_host.add_codelet(
        "host_dot_product",
        DotProduct(),
        # Codelet own params
        device="cpu",
    )

    # create the device matrix multiply entity
    process_entity_cuda = g.add(PyComputeEntity("DotProductCuda", count=-1))
    process_entity_cuda.add_codelet(
        "cuda_dot_product",
        DotProduct(),
        # Codelet own params
        device="gpu",
    )

    # create the tensor verification entity
    sink_entity = g.add(PyComputeEntity("VerifyEqual", count=-1))
    sink_entity.add_codelet(
        "verify_equal",
        VerifyEqual(),
    )

    std.connect(source_entity.host_out, process_entity_host.rx)
    std.connect(source_entity.cuda_out, process_entity_cuda.rx)
    std.connect(process_entity_host.tx, sink_entity.host_in)
    std.connect(process_entity_cuda.tx, sink_entity.cuda_in)

    # add a GPUDevice for use by the default entity group
    g.add(Entity("GPU_0")).add(GPUDevice(name="GPU_0", dev_id=0))

    g.load_extensions(workspace=self._get_default_extensions_path())
    g.run_async()
    g.wait()
    g.destroy()

  # default gxf extension path base, /var/tmp/gxf/.cache/gxf_workspace
  def _get_default_extensions_path(self):
    home_dir = os.path.expanduser("~")
    return os.path.join(home_dir, ".cache", "gxf_workspace")


if __name__ == "__main__":
  app = DLPackSimpleApp()
  app.run()
UCX 传输 / 接收#
在远程主机或设备上发送和接收数据。例如,系统 1 将带有设备数据的张量传输到远程系统 2。
注意
示例应用程序中引用了实体 UCXSource、UCXSink 和 UCX
未来的 App API 将包装 UCXSource、UCXSink、UCX 实体实现,并公开更简洁的更高级别 API,用于分布式执行
带有 UCX Tx 的图#
远程进程 1 通过 UCX 发射器发送带有设备数据的张量。
具有主机或设备内存的本地数据通过 UCX 上下文、UCX 发射器传输到远程主机或设备。
在常规图之上需要以下组件
包含 UCX 上下文的 UCX 实体
包含 UCX 发射器的 UCXSink 实体
class PyPingTx(CodeletAdapter):
  """ Python codelet to send a msg on tick()

  Python implementation of Ping Tx.
  Sends a message to the transmitter on every tick()
  """

  def __init__(self):
    super().__init__()
    self.txs = ["tx"]

  def start(self):
    self.params = self.get_params()

    self.allocator = Allocator.get(self.context(), self.cid(), self.params["allocator"])
    self.shape = self.params.get("shape", [1, 2])

  def tick(self):
    msg = MessageEntity(self.context())

    # add ones tensor allocated on cupy
    cp_tensor = cp.ones(self.shape)
    gxf_tensor = Tensor.as_tensor(cp_tensor)
    Tensor.add_to_entity(msg, gxf_tensor, "ones_tensor")
    # add uninitialized tensor allocated by gxf allocator
    tensor_on_allocator = Tensor.add_to_entity(msg, "zeros_tensor")
    td = TensorDescription(
        name="zeros_tensor",
        storage_type=MemoryStorageType.kDevice,
        shape=Shape(self.shape),
        element_type=PrimitiveType.kFloat32,
        bytes_per_element=4
    )
    tensor_on_allocator.reshape(td, self.allocator)

    self.tx.publish(msg, 1)
    return

  def stop(self):
    pass


def run_ucx_tx_graph():
  g = Graph()
  g.set_severity(logging.DEBUG)
  clock = std.set_clock(g, RealtimeClock(name='clock'))
  std.enable_job_statistics(g, clock=clock)
  std.set_scheduler(g, GreedyScheduler(
      max_duration_ms=5000, clock=clock, stop_on_deadlock=False))
  g.add(Entity("mem_pool")).add(
      BlockMemoryPool(
          "device_image_pool",
          storage_type=1,
          block_size=1920 * 1080 * 4,
          num_blocks=150,
      )
  )
  # g.add(UCX("ucx", allocator=g.mem_pool.device_image_pool))
  g.add(UCX("ucx"))

  g.add(PyComputeEntity("PingTx", count=5)).add_codelet(
      "pingtx",
      PyPingTx(),
      allocator=g.mem_pool.device_image_pool,
      shape=[2, 3],
  )
  g.add(UCXSink("sink", count=-1, address="localhost", port=13338))

  std.connect(g.PingTx.tx, g.sink.input)

  g.load_extensions()
  g.run()
  g.destroy()

if __name__ == '__main__':
  run_ucx_tx_graph()
带有 UCX Rx 的图#
远程进程 2 通过 UCX 接收器接收带有设备数据的张量。
UCX 上下文,UCX 接收器将来自远程主机或设备的数据接收到本地主机或设备上。
在常规图之上需要以下组件
包含 UCX 上下文的 UCX 实体
包含 UCX 接收器的 UCXSource 实体
class PyPingRx(CodeletAdapter):
  """ Python codelet to send a msg on tick()

  Python implementation of Ping Tx.
  Sends a message to the transmitter on every tick()
  """

  def __init__(self):
    super().__init__()
    self.rxs = ["rx"]

  def start(self):
    self.params = self.get_params()

    self.shape_expected = self.params.get("shape_expected", [1, 2])
    self.expected_ones = cp.ones(self.shape_expected)
    self.expected_zeros = cp.zeros(self.shape_expected)

  def tick(self):
    msg = self.rx.receive()

    ones_tensor = Tensor.get_from_entity(msg, "ones_tensor")
    actual_ones = cp.asarray(ones_tensor)
    cp.testing.assert_allclose(actual_ones, self.expected_ones, rtol=1e-5)
    print("Correctly received tensor from remote CuPy over UCX:\n" + str(actual_ones))

    zeros_tensor = Tensor.get_from_entity(msg, "zeros_tensor")
    actual_zeros = cp.asarray(zeros_tensor)
    cp.testing.assert_allclose(actual_zeros, self.expected_zeros, rtol=1e-5)
    print("Correctly received tensor from remote Allocator over UCX:\n" + str(actual_zeros))

    return

  def stop(self):
    return

def run_ucx_rx_graph():
  g = Graph()
  g.set_severity(logging.DEBUG)
  clock = std.set_clock(g, RealtimeClock(name="clock"))
  std.enable_job_statistics(g, clock=clock)
  std.set_scheduler(g, GreedyScheduler(
      max_duration_ms=5000, clock=clock, stop_on_deadlock=False))
  g.add(Entity("mem_pool")).add(
      BlockMemoryPool(
          "device_image_pool",
          storage_type=1,
          block_size=1920 * 1080 * 4,
          num_blocks=150,
      )
  )
  g.add(UCX("ucx", allocator=g.mem_pool.device_image_pool))

  g.add(UCXSource("source", address="localhost", port=13338))
  g.add(PyComputeEntity("PingRx", count=-1)).add_codelet(
      "pingrx",
      PyPingRx(),
      allocator=g.mem_pool.device_image_pool,
      shape_expected=[2, 3],
  )

  std.connect(g.source.output, g.PingRx.rx)

  g.load_extensions()
  g.run()
  g.destroy()

if __name__ == '__main__':
  run_ucx_rx_graph()
UCXSource、UCXSink 和上下文实现的参考#
from gxf.serialization import Endpoint
from gxf.multimedia import VideoBuffer
from gxf.core import Entity
from gxf.std import Forward
from gxf.std import DoubleBufferTransmitter, DoubleBufferReceiver
from gxf.std import DownstreamReceptiveSchedulingTerm, CountSchedulingTerm
from gxf.std import UnboundedAllocator
from gxf.std import MessageAvailableSchedulingTerm

class UCXSource(Entity):
  """UCXSource Entity containing all the requied components to receive data on ucx address:port"""

  def __init__(self, name, address="0.0.0.0", port=13337, count=-1, capacity=1, min_message_reception=1,
              allocator_type=None, **kwargs):
    super().__init__(name, True)
    self._address = address
    self._port = port
    self._count = count
    self._capacity = capacity
    self._min_message_reception = min_message_reception
    self._allocator_type = allocator_type
    self._kwargs = kwargs
    self.add(UnboundedAllocator(name="allocator"))
    self.add(UcxSerializationBuffer(
        name="serialization_buffer", allocator=self.allocator))
    self.add(UcxReceiver(name="input", port=self._port, address=self._address,
            buffer=self.serialization_buffer))
    self.add(MessageAvailableSchedulingTerm(name='mast', receiver=self.input,
                                            min_size=min_message_reception))
    self.add(DoubleBufferTransmitter(name="output", capacity=capacity))
    # 'in' is a keyword in python. can't access as an attribute
    self.add(Forward(name="forward"))
    self.forward._params["in"] = self.input
    self.forward._params["out"] = self.output
    self.add(DownstreamReceptiveSchedulingTerm(name='drst', transmitter=self.output,
                                              min_size=min_message_reception))
    if count >= 0:
        self.add(CountSchedulingTerm(name="cst", count=self.count))


class UCXSink(Entity):
  """UCXSink Entity containing all the required components to push data on a ucx address:port"""

  def __init__(self, name, address="0.0.0.0", port=13337, count=-1, capacity=1, min_message_available=1,
              allocator_type=None, **kwargs):
    super().__init__(name, True)
    self._address = address
    self._port = port
    self._count = count
    self._capacity = capacity
    self._min_message_available = min_message_available
    self._allocator_type = allocator_type
    self._kwargs = kwargs
    self.add(UnboundedAllocator(name="allocator"))
    self.add(UcxSerializationBuffer(
        name="serialization_buffer", allocator=self.allocator))
    self.add(UcxTransmitter(name="output", port=self._port,
            buffer=self.serialization_buffer, receiver_address=self._address))
    self.add(DoubleBufferReceiver(name="input", capacity=capacity))
    # in is a keyword in python. can't access as an attribute
    self.add(Forward(name="forward"))
    self.forward._params["in"] = self.input
    self.forward._params["out"] = self.output
    self.add(MessageAvailableSchedulingTerm(name='mast', receiver=self.input,
                                            min_size=min_message_available))
    if count >= 0:
      self.add(CountSchedulingTerm(name="cst", count=self._count))


class UCX(Entity):
  """UCX Entity requied to add UCXSource and UCXSink"""

  def __init__(self, name, allocator=None):
    super().__init__(name, True)
    if not allocator:
      allocator = self.add(UnboundedAllocator(name="allocator"))
    self.add(UcxComponentSerializer(
      name="component_serializer", allocator=allocator))
    self.add(UcxEntitySerializer(name="entity_serializer",
      component_serializers=[self.component_serializer]))
    self.add(UcxContext(name="ucx_context",
      serializer=self.entity_serializer))
注意
在现有 Python API 之上,Python App API 将在未来版本中提供。
Python App API 将类似于 C++ App API
[即将推出] 更多示例应用程序将在 GXF github repo https://github.com/NVIDIA-AI-IOT/deepstream_gxf_ref_apps 中提供
C++ 应用程序开发#
通过 YAML 文档创建 GXF 应用程序的传统方法包括在 yaml 文件中组合实体,该文件由 GXE 运行时以及扩展清单执行。GXF 应用程序层通过允许用户以编程方式创建应用程序来简化此过程。此层的实现编译在共享动态库 libgxf_app.so 中,并打包在 GXF 运行时 debian 安装程序中。有关 C++ 应用程序层的 API 参考,请参阅 GXF App C++ API。
此层的基本构建块包括图实体、段和应用程序。
图实体#
GXF 图由一个或多个实体组成,这些实体由多个组件组成。这些组件通常包括 codelet 以及其他组件,如资源、调度项和消息队列(发射器和接收器)。nvidia::gxf::GraphEntity 类简化了在应用程序中创建和管理可编程图实体的过程。
应用程序中的图实体使用 nvidia::gxf::Segment::makeEntity<T>(...) api 创建。这是一个模板化的 api,它接受参数包的参数。模板类型用于指定要添加到实体中的 codelet 类型,参数包用于指定要添加的其余组件以及 codelet 本身的参数。
这是一个包含 PingTx codelet 的实体的示例,以 yaml 表示
下面的示例创建了一个简单的图实体,该实体由 nvidia::gxf::PingTx codelet 组成。
// create a codelet to generate 10 messages
auto tx_entity = makeEntity<PingTx>("Tx", makeTerm<CountSchedulingTerm>("count", Arg("count", 10)));
调度项使用 makeTerm api 创建,参数值列表以 Args 的形式传递。
// create an entity to copy messages from device to host
auto copier = makeEntity<TensorCopier>("Copier", Arg("allocator") = makeResource<UnboundedAllocator>("allocator"), Arg("mode", 1));
可以使用 makeResource api 创建资源,如内存池和分配器。在此示例中,TensorCopier codelet 配置了 UnboundedAllocator。
在创建图实体时,未指定实体的发射器和接收器队列。当实体与另一个实体连接时,这些组件由 connect api 自动添加。与发射器和接收器相关的调度项也由 connect api 自动添加。
段#
段接口是一个单独的运行时上下文,由一个或多个图实体组成。每个段都有自己的调度器及其相应的时钟组件。Segment::Compose() api 是一个虚函数,用于创建段的实体并自定义其属性。段层提供了多个 api,使创建图实体的过程更简单。
一个复杂的分布式应用程序可以由多个相互协作的段组成。段的实体之间的段内连接使用双缓冲发射器和接收器,所有段间连接都使用 UCX 发射器和接收器。
连接图实体#
最简单的连接 api 仅接受源图实体和目标图实体。对于此类实体,假定它们的接口是可比较的。即,发送方实体必须具有仅包含一个 Parameter<Handle<Transmitter>> 的 codelet,并且接收方实体必须具有仅包含一个注册的 Parameter<Handle<Receiver>> 的 codelet。与发射器和接收器相关的调度项也由 connect api 自动添加。自动添加的消息队列和调度项的名称与 codelet 连接到的相应参数键相同。
// create a codelet to generate 10 messages
auto tx_entity = makeEntity<PingTx>("Tx", makeTerm<CountSchedulingTerm>("count", Arg("count", 10)));

// create a codelet to receive the messages
auto rx_entity = makeEntity<PingRx>("Rx");

// add data flow connection tx -> rx
connect(tx_entity, rx_entity);
对于具有包含多个输入和输出的 codelet 的实体,可以在 connect api 中指定连接映射。
void compose() override {
  // create a codelet to generate 10 messages
  auto left_tx = makeEntity<PingTx>(
      "Left Tx", makeTerm<PeriodicSchedulingTerm>("periodic", Arg("recess_period", "50Hz")),
      makeTerm<CountSchedulingTerm>("count", Arg("count", 100)));

  auto right_tx = makeEntity<PingTx>(
      "Right Tx", makeTerm<PeriodicSchedulingTerm>("periodic", Arg("recess_period", "50Hz")),
      makeTerm<CountSchedulingTerm>("count", Arg("count", 100)));

  // create a codelet to receive the messages
  auto multi_ping_rx = makeEntity<MultiPingRx>("Multi Rx");

  // add data flow connection tx -> rx
  connect(left_tx, multi_ping_rx, PortPair{"signal", "receivers"});
  connect(right_tx, multi_ping_rx, PortPair{"signal", "receivers"});

}
应用程序#
Application 类是一个支架层,用于在 GXF 中命令式地创建应用程序。它提供了一个虚拟 compose() 函数,可以在其中构建、配置和相互连接应用程序的各个构建块。Application 类还提供了设置配置文件、加载扩展、创建段和运行应用程序的功能。
application 类扩展了 Segment 类,并在应用程序层中提供了段 api 的所有优点。
在其最简单的形式中,应用程序没有任何段。它具有由调度器管理的多个图实体。以下示例创建了两个图实体并将它们相互连接。
class PingSimpleApp : public Application {
 public:
  void compose() override {
    // create a codelet to generate 10 messages
    auto tx_entity = makeEntity<PingTx>("Tx", makeTerm<CountSchedulingTerm>("count", Arg("count", 10)));

    // create a codelet to receive the messages
    auto rx_entity = makeEntity<PingRx>("Rx");

    // add data flow connection tx -> rx
    connect(tx_entity, rx_entity);

    // configure the scheduler
    setScheduler(SchedulerType::kGreedy);
  }
};

int main(int argc, char** argv) {
  auto app = create_app<PingSimpleApp>();
  app->loadExtensionManifest(kManifestFilename);
  app->compose();
  auto result = app->run();
  return ToResultCode(result);
}
上述示例中的清单文件是一个 YAML 文件,其中包含一个顶级条目“extensions”,后跟 GXF 扩展共享库的文件名列表。
示例
extensions:
- gxf/std/libgxf_std.so
- gxf/sample/libgxf_sample.so
Application 类支持不同的执行模式,这些模式由 ExecutionMode 枚举表示。
不同的模式是
kUnset:默认模式,未设置。kSingleSegment:当应用程序仅包含一个段时使用此模式。kMultiSegment:当应用程序包含在单个进程中并行执行的多个段时使用此模式。kDistributed:当应用程序分布在多个节点上,并且段在不同节点上并行执行时使用此模式。具有复杂执行模式的大型应用程序可以分解为包含多个段的应用程序。以下示例将单段应用程序重构为多段应用程序。各个图实体在段中组合,这些段在应用程序中组合和配置。
class PingTxSegment : public Segment {
 public:
  void compose() override {
    // create a codelet to generate 10 messages
    auto tx_entity = makeEntity<PingTx>("Tx", makeTerm<CountSchedulingTerm>("count", Arg("count", 10)));

    // add a scheduler component and configure the clock
    auto scheduler = setScheduler<Greedy>(Arg("stop_on_deadlock", false), Arg("max_duration_ms", 5000));
  }
};

class PingRxSegment : public Segment {
 public:
  void compose() override {
    // create a codelet to receive the messages
    auto rx_entity = makeEntity<PingRx>("Rx");

    // add a scheduler component and configure the clock
    auto scheduler = setScheduler<Greedy>(Arg("max_duration_ms", 5000), Arg("stop_on_deadlock", false));
  }
};

class PingSegmentApp : public Application {
 public:
  void compose() override {
    auto tx_segment = createSegment<PingTxSegment>("TxSegment");
    auto rx_segment = createSegment<PingRxSegment>("RxSegment");

    // add data flow connection tx -> rx
    connect(tx_segment, rx_segment, {SegmentPortPair("Tx.signal", "Rx.signal")});
  }
};

int main(int argc, char** argv) {
  auto app = create_app<PingSegmentApp>();
  app->loadExtensionManifest(kManifestFilename);
  app->compose();
  auto result = app->run();
  return ToResultCode(result);
}
运行时 Codelet 注册#
应用程序层通过启用 codelet 的运行时注册进一步简化了应用程序的创建过程。所有先前的示例都使用了示例扩展中的预定义 codelet,这些 codelet 已由应用程序预加载。
应用程序层还支持动态注册新 codelet,如下例所示。新的 codelet PingTxRuntime 与它使用的示例应用程序一起定义。新的 codelet 不必包装在扩展库中即可在应用程序中使用。
class PingTxRuntime : public Codelet {
 public:
  virtual ~PingTxRuntime() = default;

  gxf_result_t registerInterface(Registrar* registrar) override {
    Expected<void> result;
    result &= registrar->parameter(signal_, "signal", "Signal", "Transmitter channel publishing messages to other graph entities");
    return ToResultCode(result);
  }

  gxf_result_t tick() override {
    auto message = Entity::New(context());
    if (!message) {
      GXF_LOG_ERROR("Failure creating message entity.");
      return message.error();
    }

    auto result = signal_->publish(message.value());
    GXF_LOG_INFO("Message Sent: %d", this->count);
    this->count = this->count + 1;
    return ToResultCode(message);
  }

 private:
  Parameter<Handle<Transmitter>> signal_;
  int count = 1;
};

class PingRuntimeApp : public Application {
 public:
  void compose() override {
    // create a codelet to generate 10 messages
    auto tx_entity = makeEntity<PingTxRuntime>("Tx", makeTerm<CountSchedulingTerm>("count", Arg("count", 10)));

    // create a codelet to receive the messages
    auto rx_entity = makeEntity<PingRx>("Rx");

    // add data flow connection tx -> rx
    connect(tx_entity, rx_entity);

    // configure the scheduler component
    setScheduler(SchedulerType::kGreedy);
  }
};

int main(int argc, char** argv) {
  auto app = create_app<PingRuntimeApp>();
  app->loadExtensionManifest(kManifestFilename);
  app->compose();
  auto result = app->run();
  return ToResultCode(result);
}
分布式应用程序#
多段应用程序也可以分布在分布式应用程序中的多个节点上。如 分布式 执行 部分介绍,段是正在分布的基本单元。段通过 UCX 发射器和接收器相互通信。
但是,用户无需担心添加 UCX 连接。当在段对上调用 connect() API 时,Application API 实现会自动完成连接。连接的段对可以在单节点/单进程、单节点/多进程或多节点/多进程中运行。无论哪种方式,由于连接的段对之间使用了 UCX 发射器和接收器,因此它被视为分布式执行用例。
与单段应用程序相比,在多段或分布式应用程序中,不是创建和连接实体,而是创建和连接段,如下例所示。
class SampleSegmentApp : public Application {
 public:
  void compose() override {
    // create segments
    auto tx_segment = createSegment<PingTxSegment>("TxSegment");
    auto fwd_segment = createSegment<ForwardSegment>("FwdSegment");
    auto rx_segment = createSegment<PingRxSegment>("RxSegment");

    // connect segments
    connect(tx_segment, fwd_segment, {SegmentPortPair("Tx.signal", "Fwd.in")});
    connect(fwd_segment, rx_segment, {SegmentPortPair("Fwd.out", "Rx.signal")});
  }
};
创建段
- const char *name,
在分布式应用程序中,相同的应用程序二进制文件在多个节点上执行。这不一定意味着一个节点必须执行应用程序中的所有段。每个应用程序二进制实例仅启用源代码中创建的所有段的子集。
可以为每个节点配置其应执行的特定段。这是通过段配置文件完成的,如下所示。如果未提供段配置文件来执行应用程序,则在该实例中启用所有段。
连接段
- std::shared_ptr<nvidia::gxf::Segment> source,
- std::shared_ptr<nvidia::gxf::Segment> target,
- std::vector<SegmentPortPair> port_maps,
段通过 SegmentPortPair 连接以形成全局段连接图。它是一个连接向量,因为我们支持段对之间的一个以上连接。对于最常见的情况,port_maps 大小为 1,即源段和目标段之间只有一个连接。
请注意,源段和目标段未在同一应用程序实例中启用是正常的,启用段的应用程序实例会自动完成相应的 ucx 组件。GraphDriver 稍后会解析两个实例之间的连接地址。
段配置
段配置是一个 YAML 文件,由一个标识符为 segment_config 的节点组成。有 3 种成员类型
segment_config.member:
enabled_segments必需。通过名称指定在源代码中创建的段。segment_config.member:
worker必需。指定驱动程序 IP 和端口;可选地指定其自己的端口。segment_config.member:
driver可选。驱动程序成员可以在任何应用程序实例或独立实例中启用。
例如,我们可以在 3 个远程进程中运行相同的 SampleSegmentApp 可执行二进制文件,并且每个进程执行应用程序中的一个段。进程 1 运行 TxSegment;进程 2 运行 FwdSegment;进程 3 运行 RxSegment。
进程 1 中的实例的段配置
---
segment_config:
- member: enabled_segments
  parameters:
    enabled:
    - TxSegment
- member: worker
  parameters:
    enabled: True
    name: worker_Tx
    port: 50001
    driver_ip: "localhost"
    driver_port: 50000
- member: driver
  parameters:
    enabled: True
    name: driver_50000
    port: 50000
进程 2 中的实例的段配置
---
segment_config:
- member: enabled_segments
  parameters:
    enabled:
    - FwdSegment
- member: worker
  parameters:
    enabled: True
    name: worker_Fwd
    port: 50002
    driver_ip: "localhost"
    driver_port: 50000
进程 3 中的实例的段配置
---
segment_config:
- member: enabled_segments
  parameters:
    enabled:
    - RxSegment
- member: worker
  parameters:
    enabled: True
    name: worker_Rx
    port: 50003
    driver_ip: "localhost"
    driver_port: 50000
注意
在销毁期间完成执行后,C++ App API 中的分布式执行面临段错误;等效的 YAML API 执行未观察到此问题。
用于分布式执行的相同 Python App API 将在未来版本中提供。
[即将推出] 更多示例应用程序将在 GXF github repo https://github.com/NVIDIA-AI-IOT/deepstream_gxf_ref_apps 中提供
Graph Composer#
本节帮助您熟悉使用 Graph Composer 进行应用程序开发的工作流程,其中包括以下内容
启动 Graph Composer
从 NVIDIA Cloud 存储库同步扩展
使用 Graph Composer 创建简单应用程序
运行应用程序
为应用程序创建容器镜像
我们将首先设置系统,并解释 Ubuntu 22.04 x86_64 上 Composer 的基本布局。然后,我们将加载、理解和运行一个简单的应用程序。这将提供对 Composer 工作原理的理解。最后,我们将创建一个简单的应用程序,而无需编写任何代码行。图形开发当前仅在 x86 上受支持。arm64 的 Graph Composer 包可用于在 Jetson 上部署或执行图形。
安装步骤 将所有工具安装在 /opt/nvidia/graph-composer 目录中,并将工具的链接放在 /usr/bin 目录中。您可以访问这些工具,而无需切换到安装目录。安装后,使用终端中的以下命令检查安装是否成功
registry --help
usage: registry [-h] [-v]  ...

positional arguments:

   cache        Perform actions on cache
   repo         Perform actions on repositories
   comp         Perform actions on components
   extn         Perform actions on extensions
   graph        Perform actions on graph

optional arguments:
 -h, --help     show this help message and exit
 -v, --version  Print registry tool and GXF Spec version
container_builder --help
usage: container_builder [-h] [-v] [--log-level {DEBUG,INFO,WARNING,ERROR,CRITICAL}] [--log-file LOG_FILE]  ...

build docker images from config file

positional arguments:

    build               Build container image using config files
    push                Push local container image to remote repo

optional arguments:
  -h, --help            show this help message and exit
  -v, --version         Container Builder Version
  --log-level {DEBUG,INFO,WARNING,ERROR,CRITICAL}
                        set log level, default is INFO
  --log-file LOG_FILE   Optional, set log output file
如果仍然看不到组件,请查看 FAQ 部分。
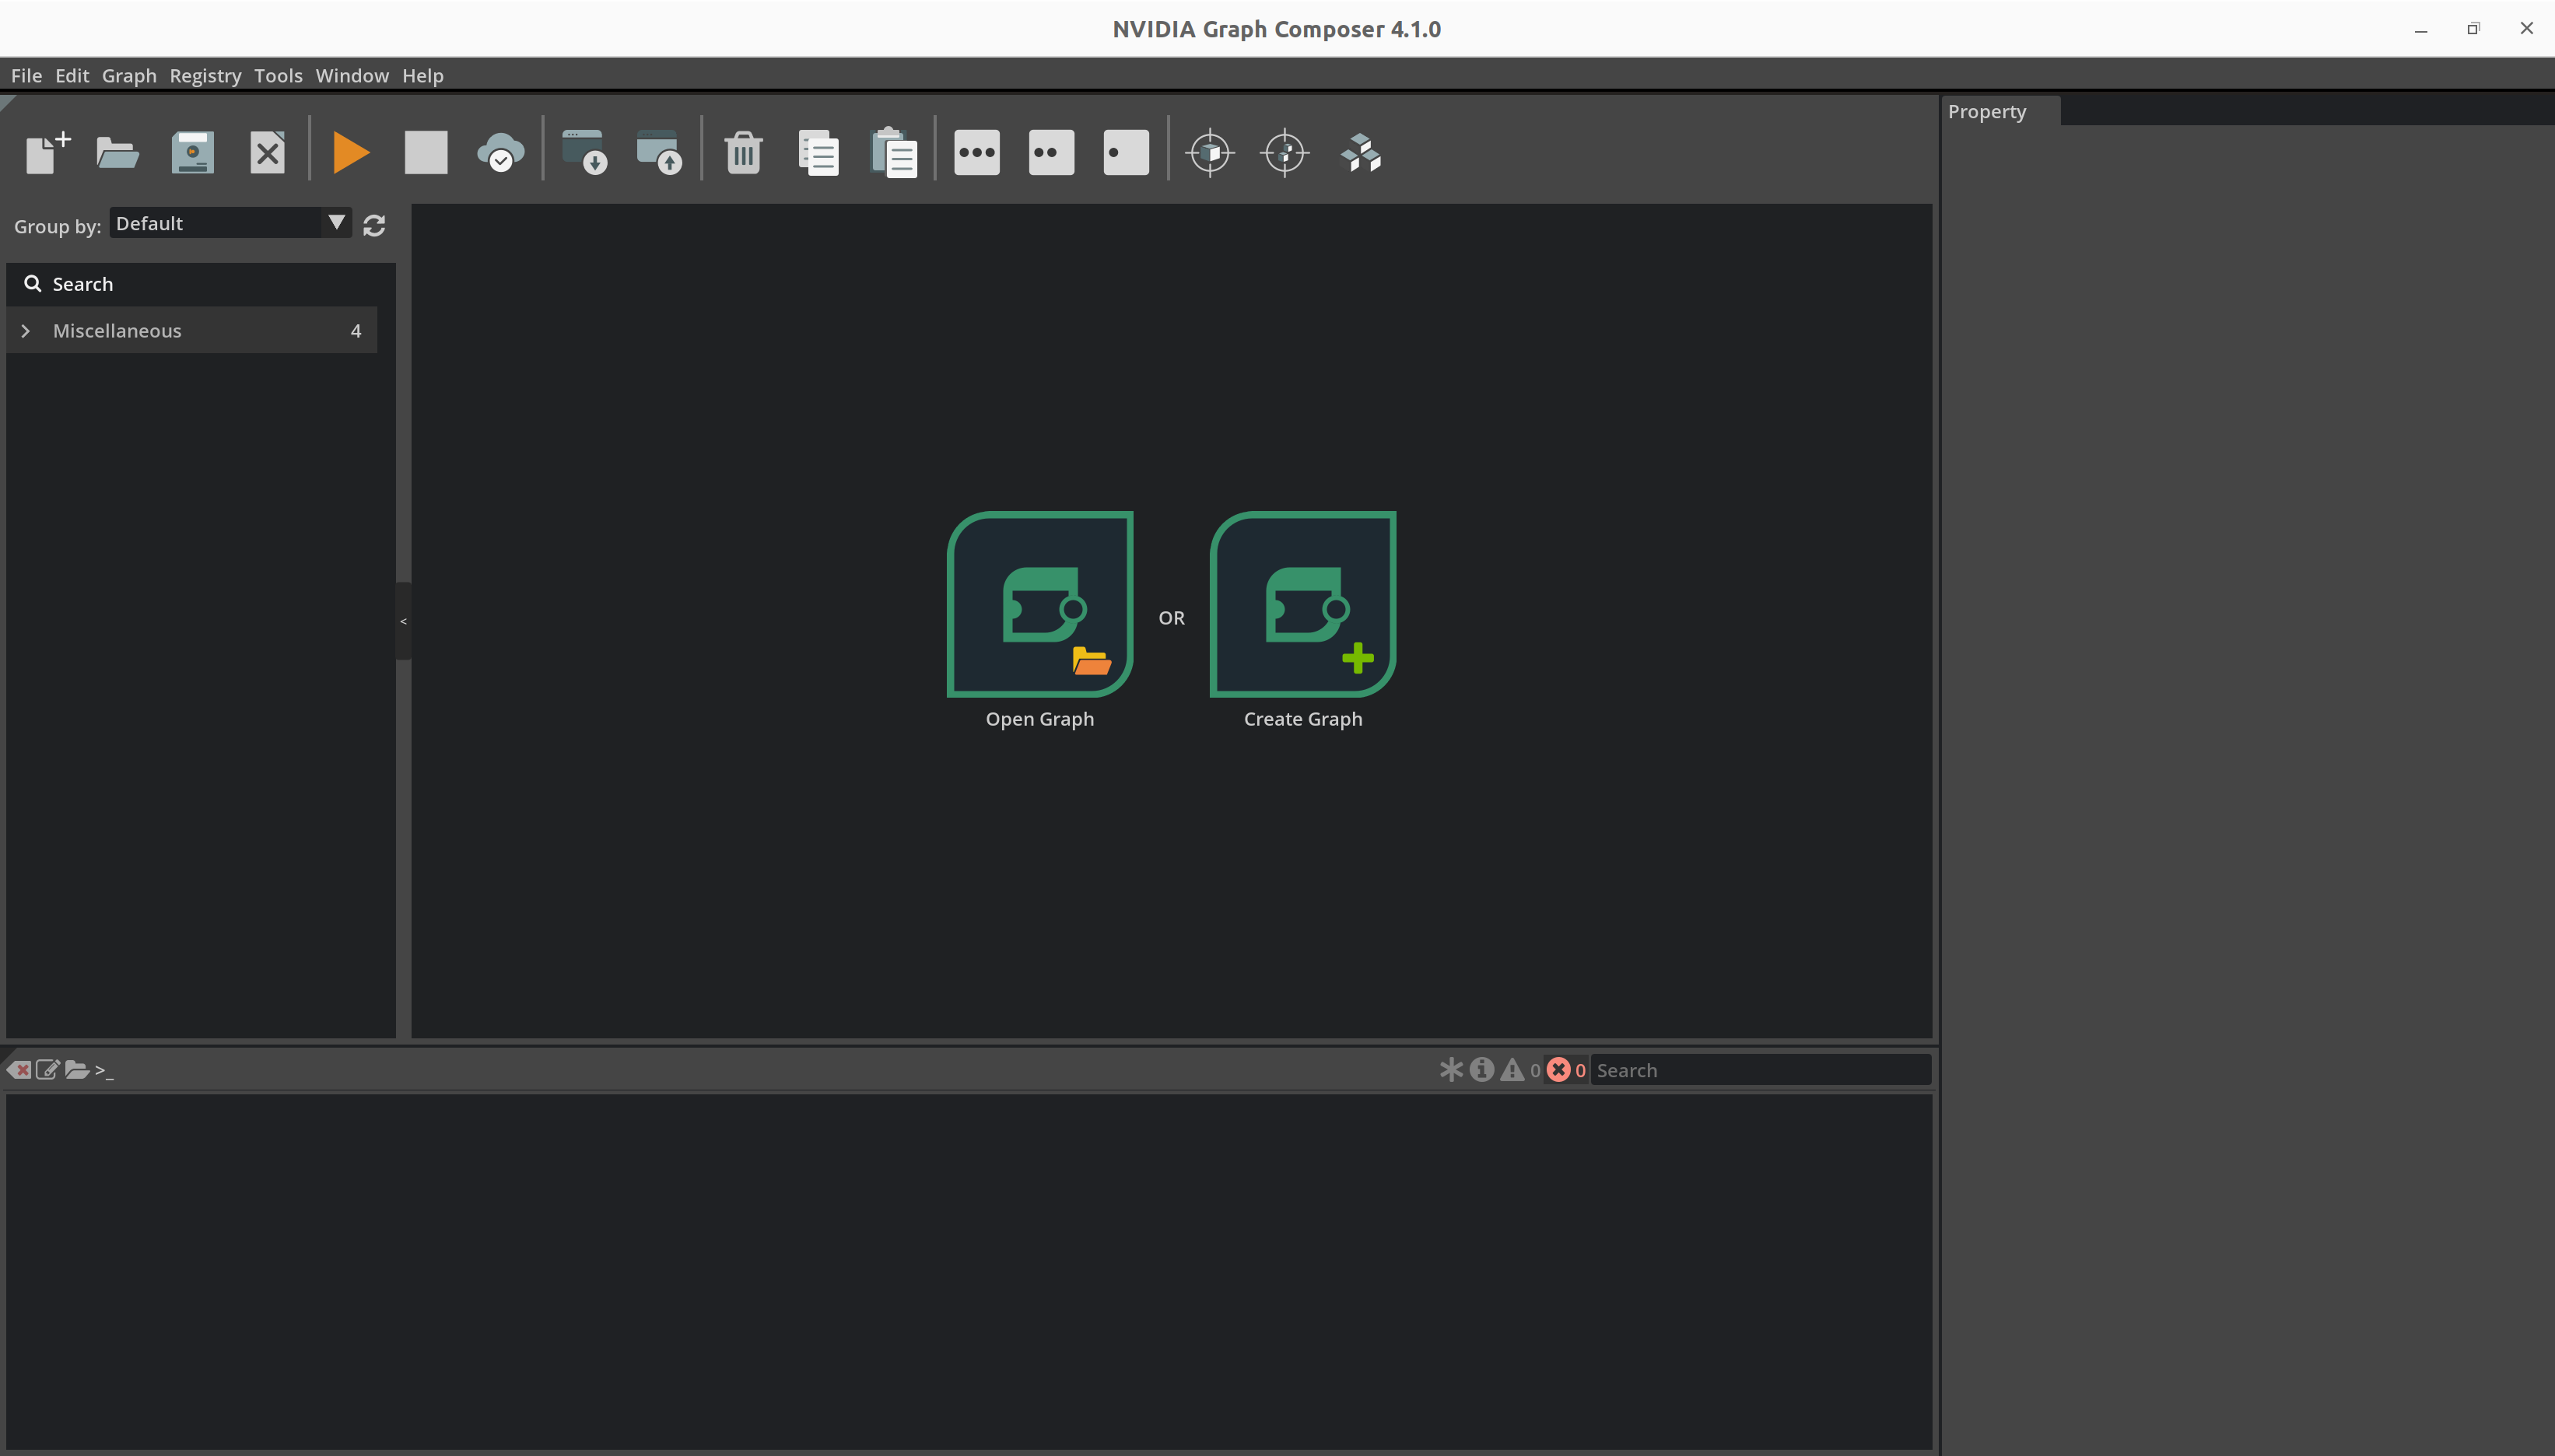
启动 Graph Composer#
启动 Composer 有两种选择
本机工作站
使用以下命令从本机工作站启动 Composer
composer
DeepStream SDK devel 容器镜像
从 DeepStream SDK devel 容器镜像启动 Composer,本地系统上不需要安装
docker pull nvcr.io/nvidia/deepstream:7.1-gc-triton-devel
xhost +
docker run -it --entrypoint /bin/bash --gpus all --rm --network=host -e DISPLAY=${DISPLAY} -v /tmp/.X11-unix/:/tmp/.X11-unix --privileged -v /var/run/docker.sock:/var/run/docker.sock nvcr.io/nvidia/deepstream:7.1-gc-triton-devel
composer
注意
当从 devel 容器镜像使用 Composer 时,用户可能在文件浏览器中浏览“/”文件夹时遇到问题,在这种情况下,他们可以直接键入文件路径或复制并粘贴它。
同步扩展#
在执行任何图形或构建容器之前,必须同步 NGC 公共仓库中的扩展。按照以下步骤同步扩展
通过在终端中运行以下命令,确保 gxf_server 已启动
systemctl --user status gxf_server
如果服务当前正在运行。您将在输出中看到“Active: active (running)”。如果服务未运行,请运行命令 systemctl --user start gxf_server 以启动它。默认情况下,gxf_server 在端口 50051 上运行。可以通过在安装 graph-composer 之前 export GXF_SERVER_PORT=<端口号> 来更改它。要在服务已在安装后自动启动后更改端口,请使用命令 sudo systemctl set-environment GXF_SERVER_PORT=<端口号> 设置新端口。然后,重新启动服务以应用更改,使用命令:systemctl --user restart gxf_server
另请更改 Composer 中的端口号。
- 打开
Preferences窗口。
- 在服务器选项卡中更改端口号。

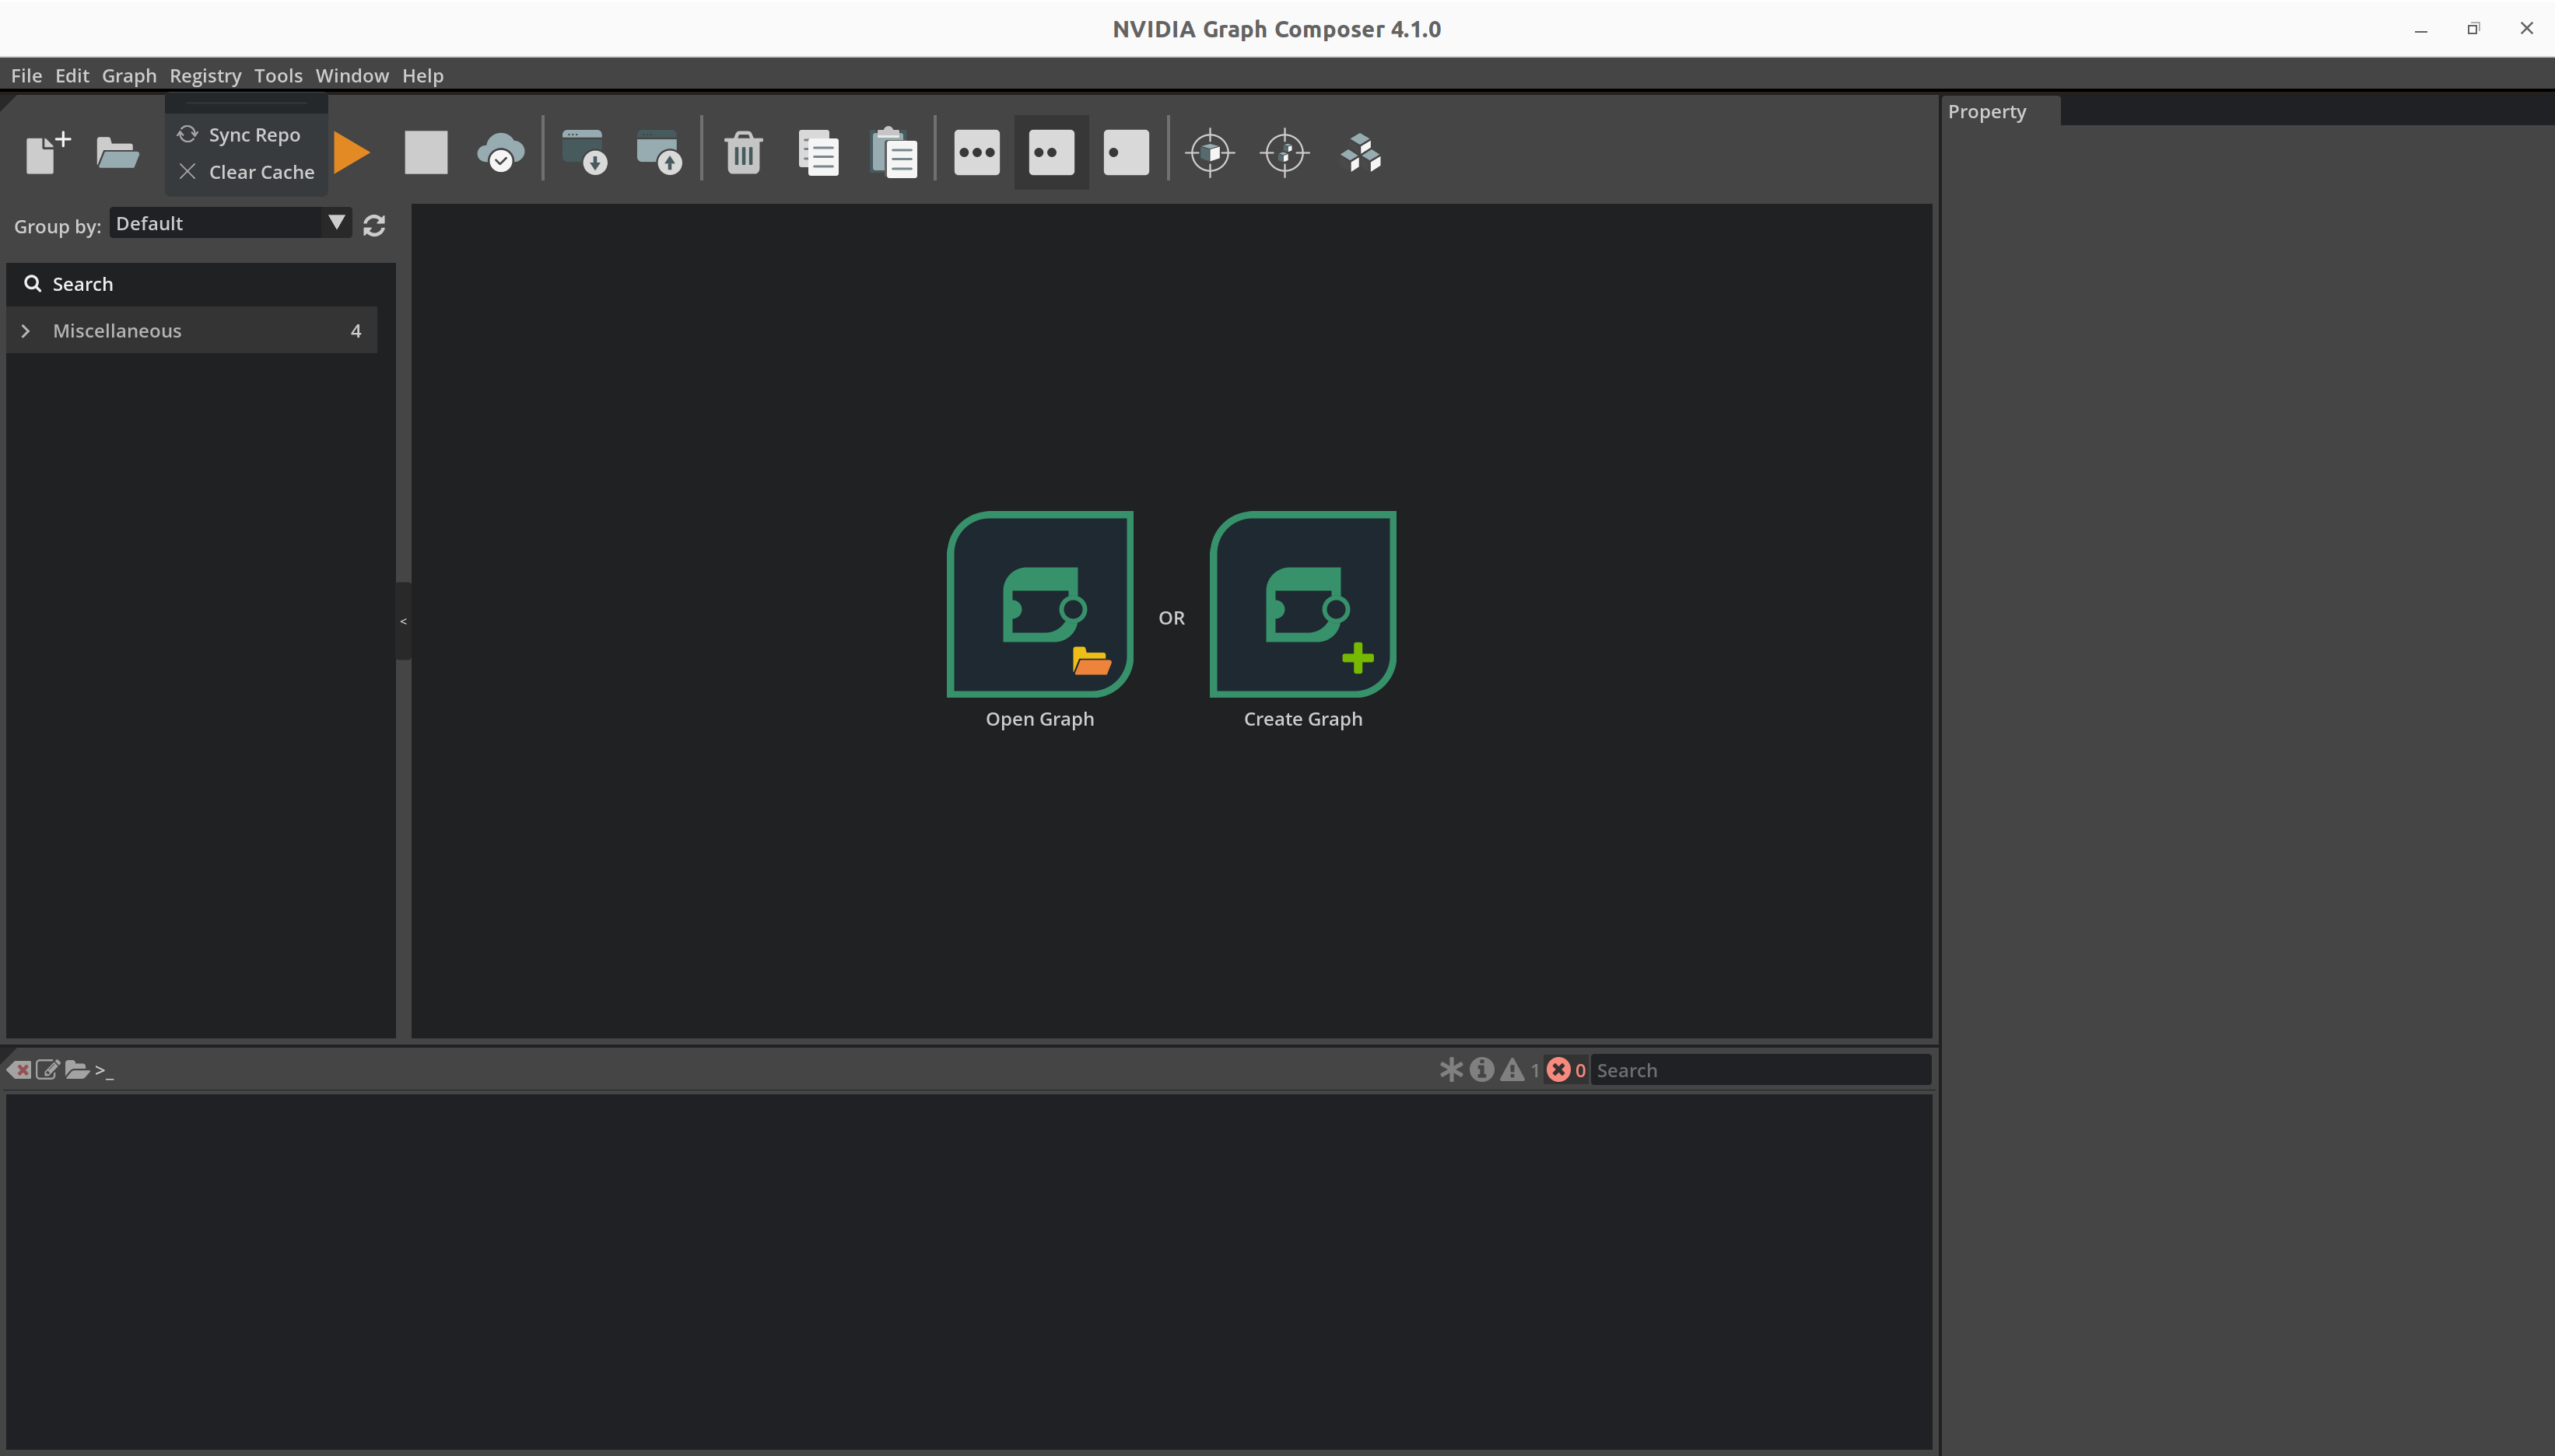
确保没有打开任何图形。如果已打开图形,则必须关闭它才能使注册表菜单可用。

从顶部菜单栏打开
Registry菜单,然后单击Sync Repo
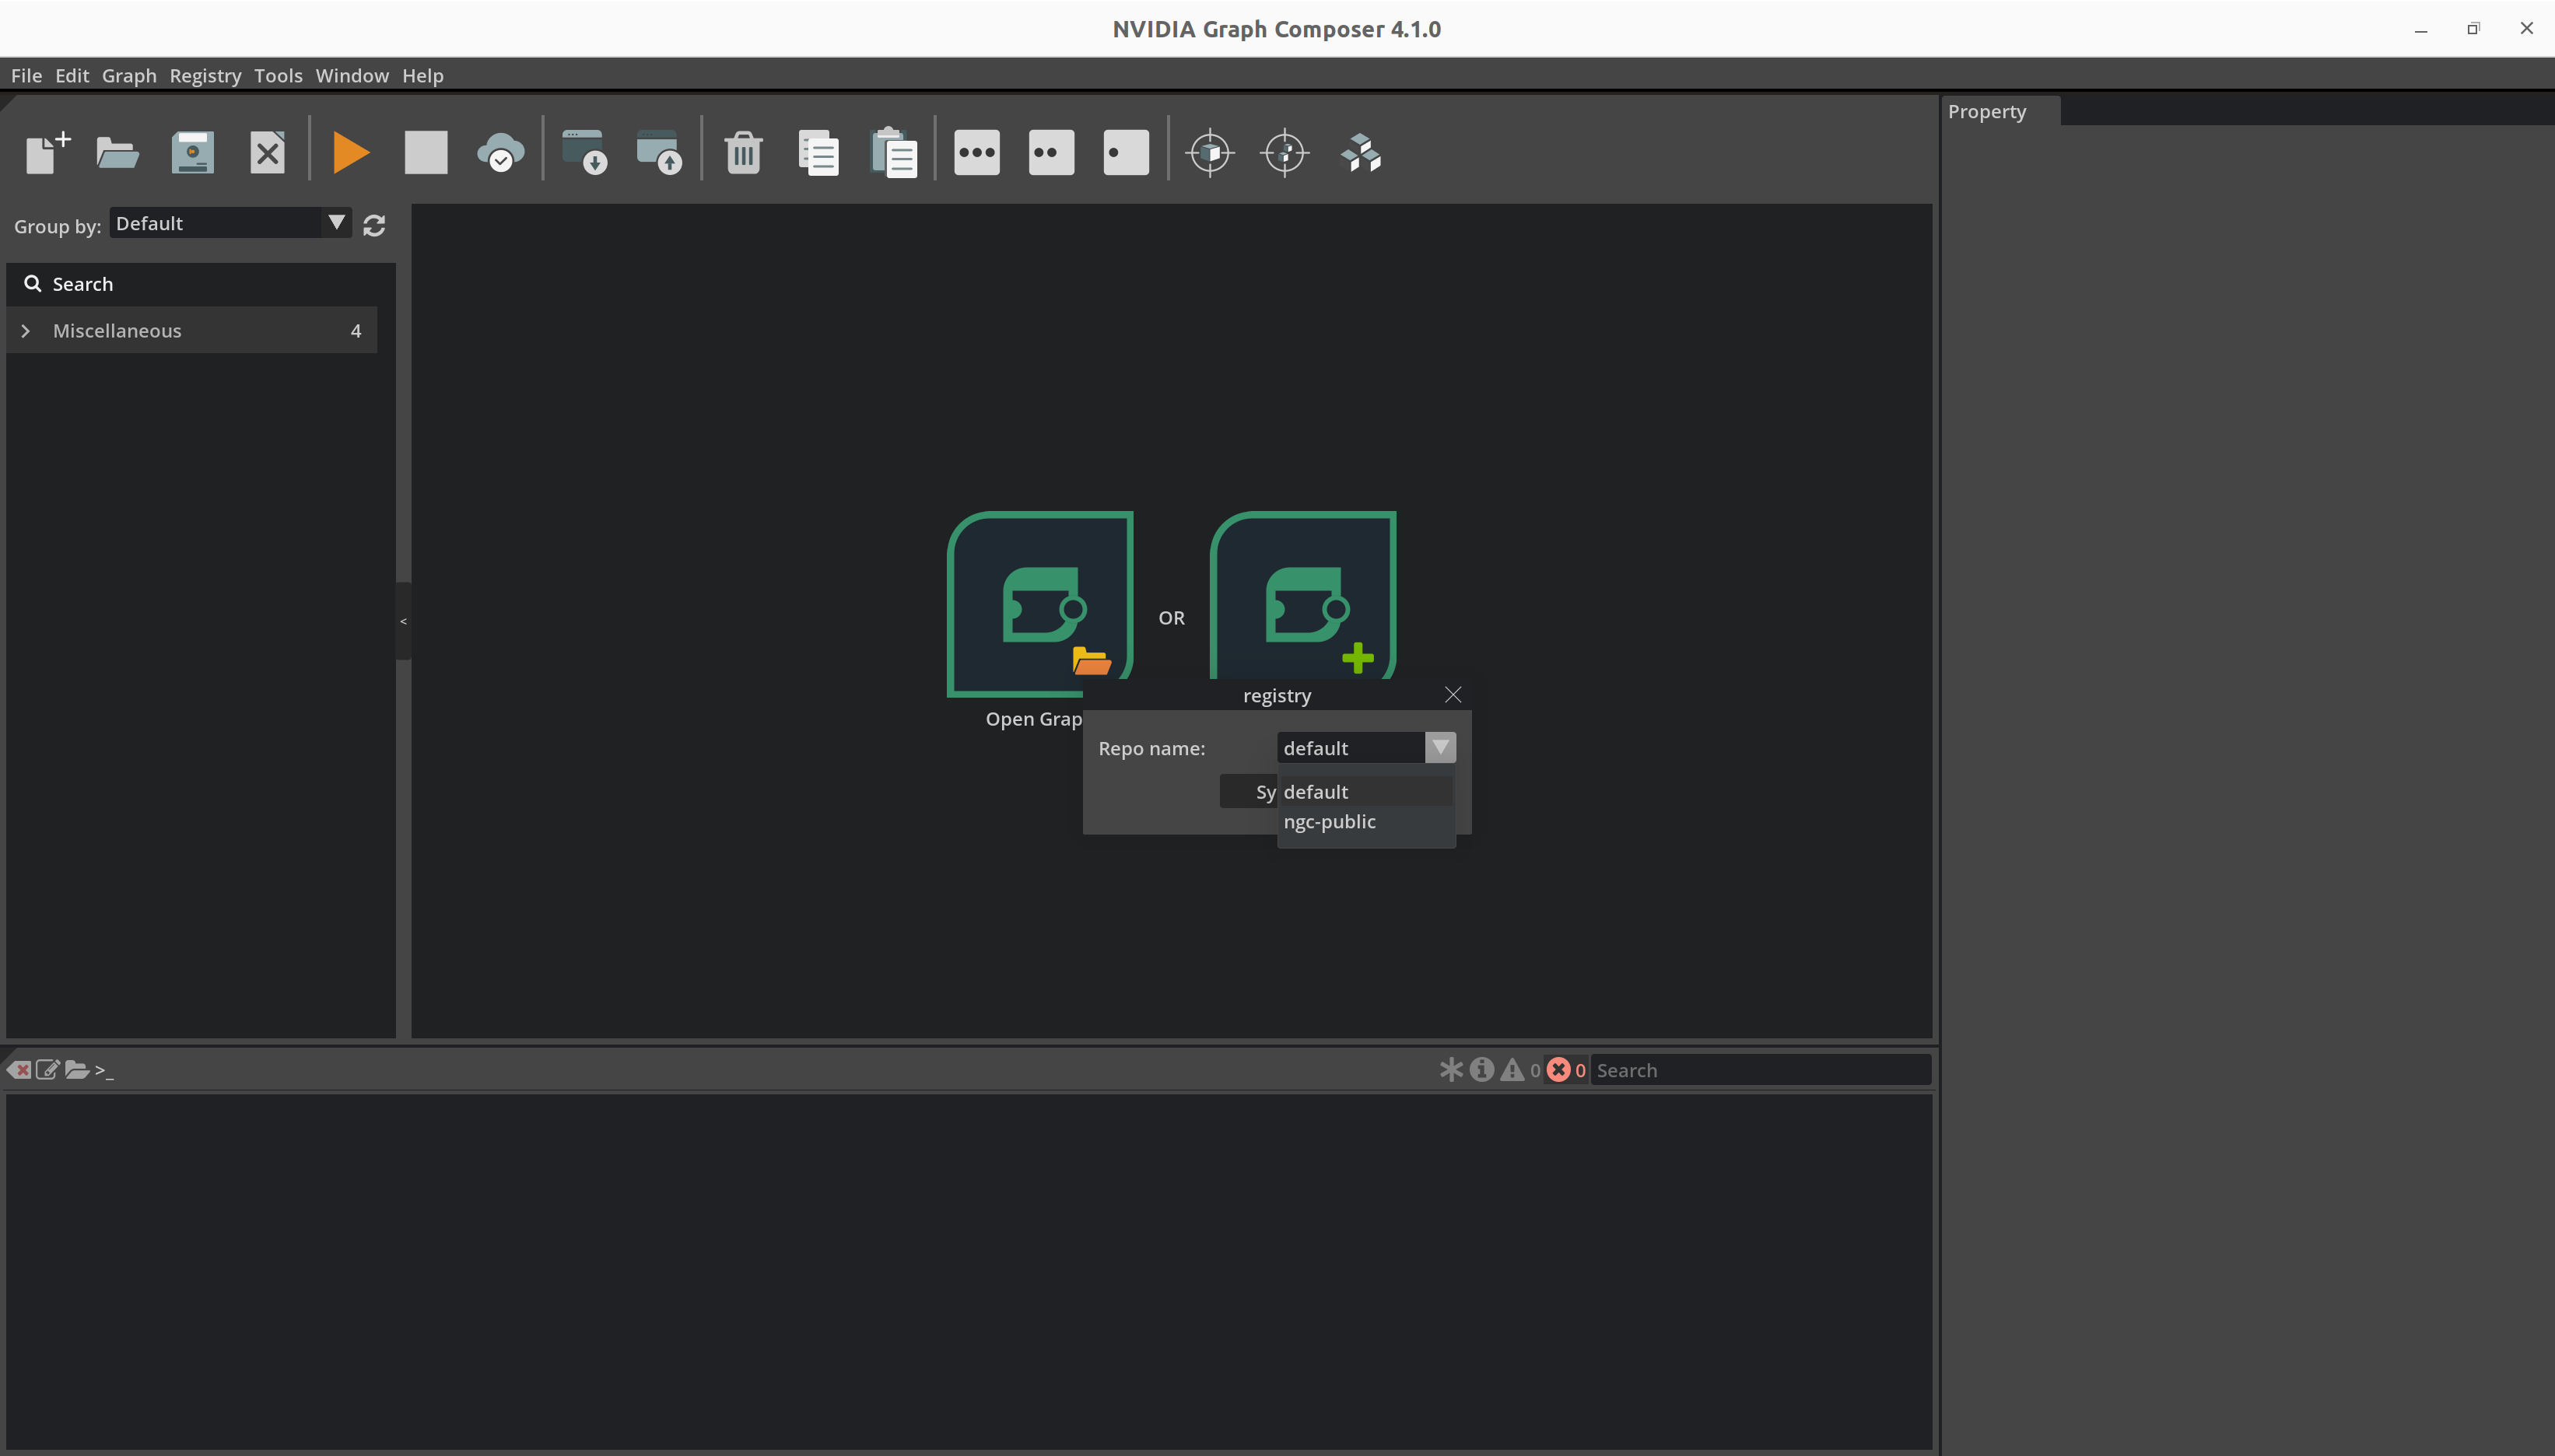
从下拉列表中选择
ngc-public,然后单击Sync
composer 使用进度条报告当前状态。
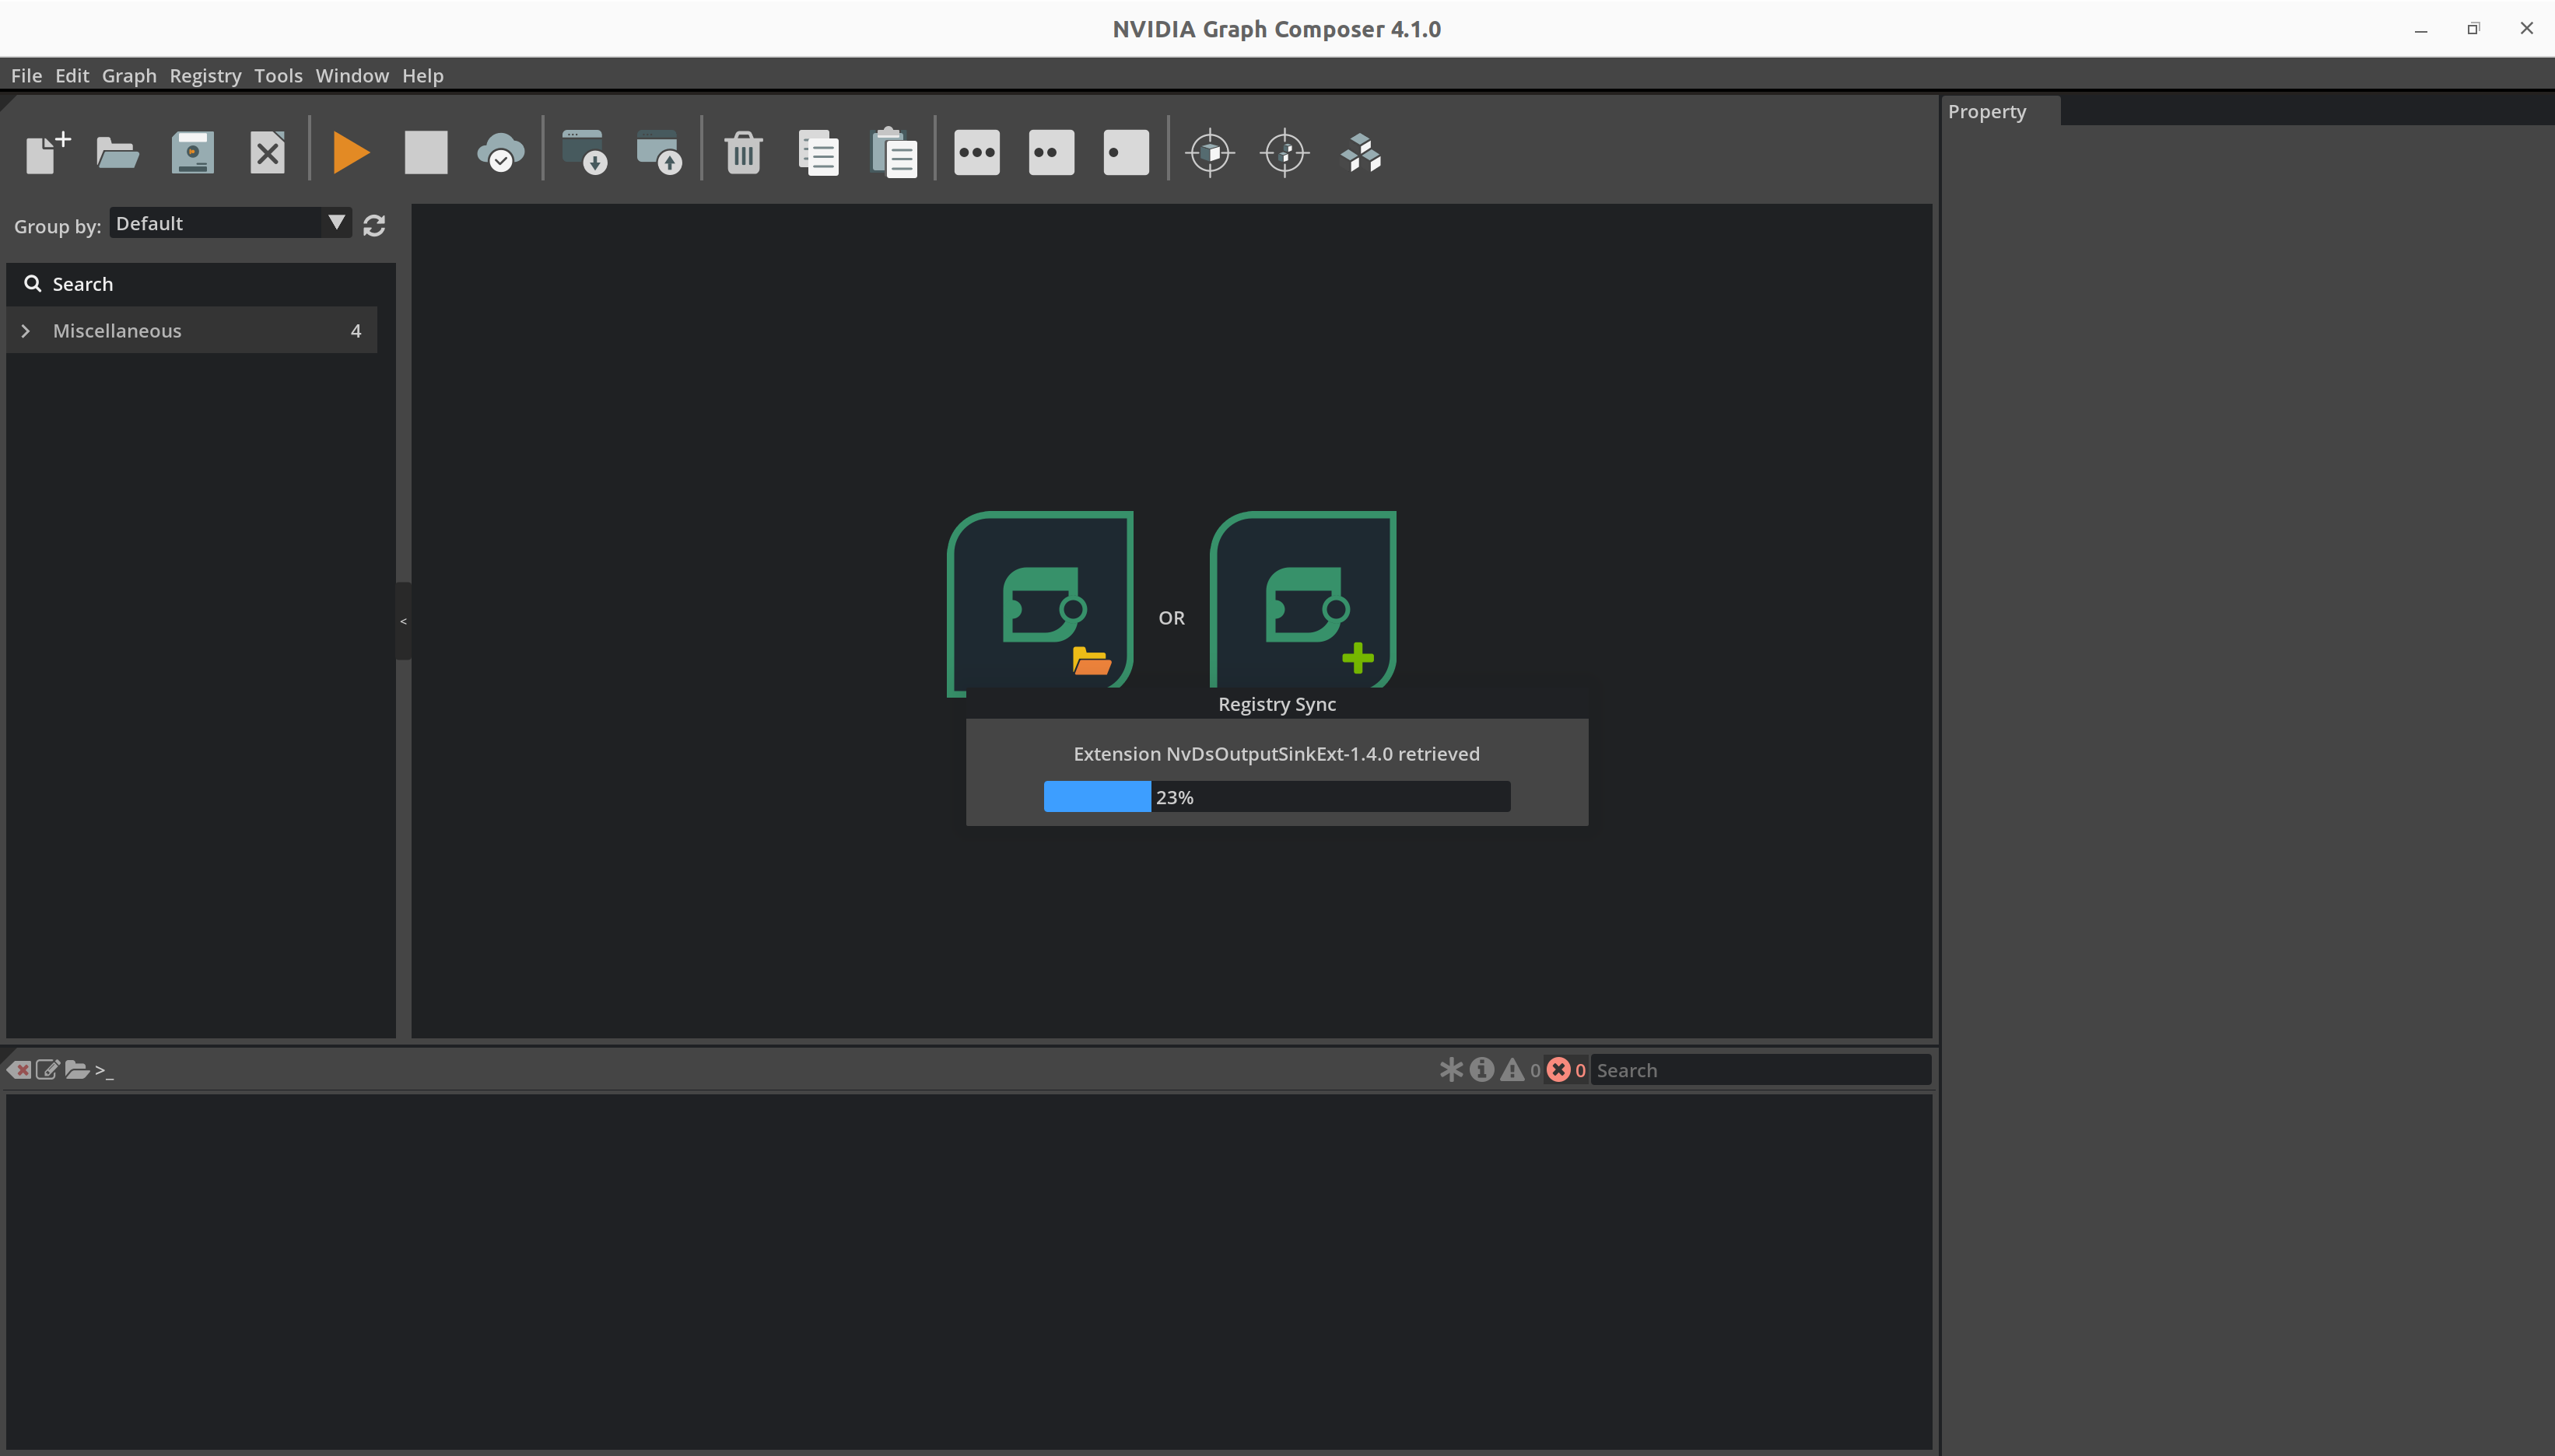
扩展同步完成后,composer 将显示成功消息。
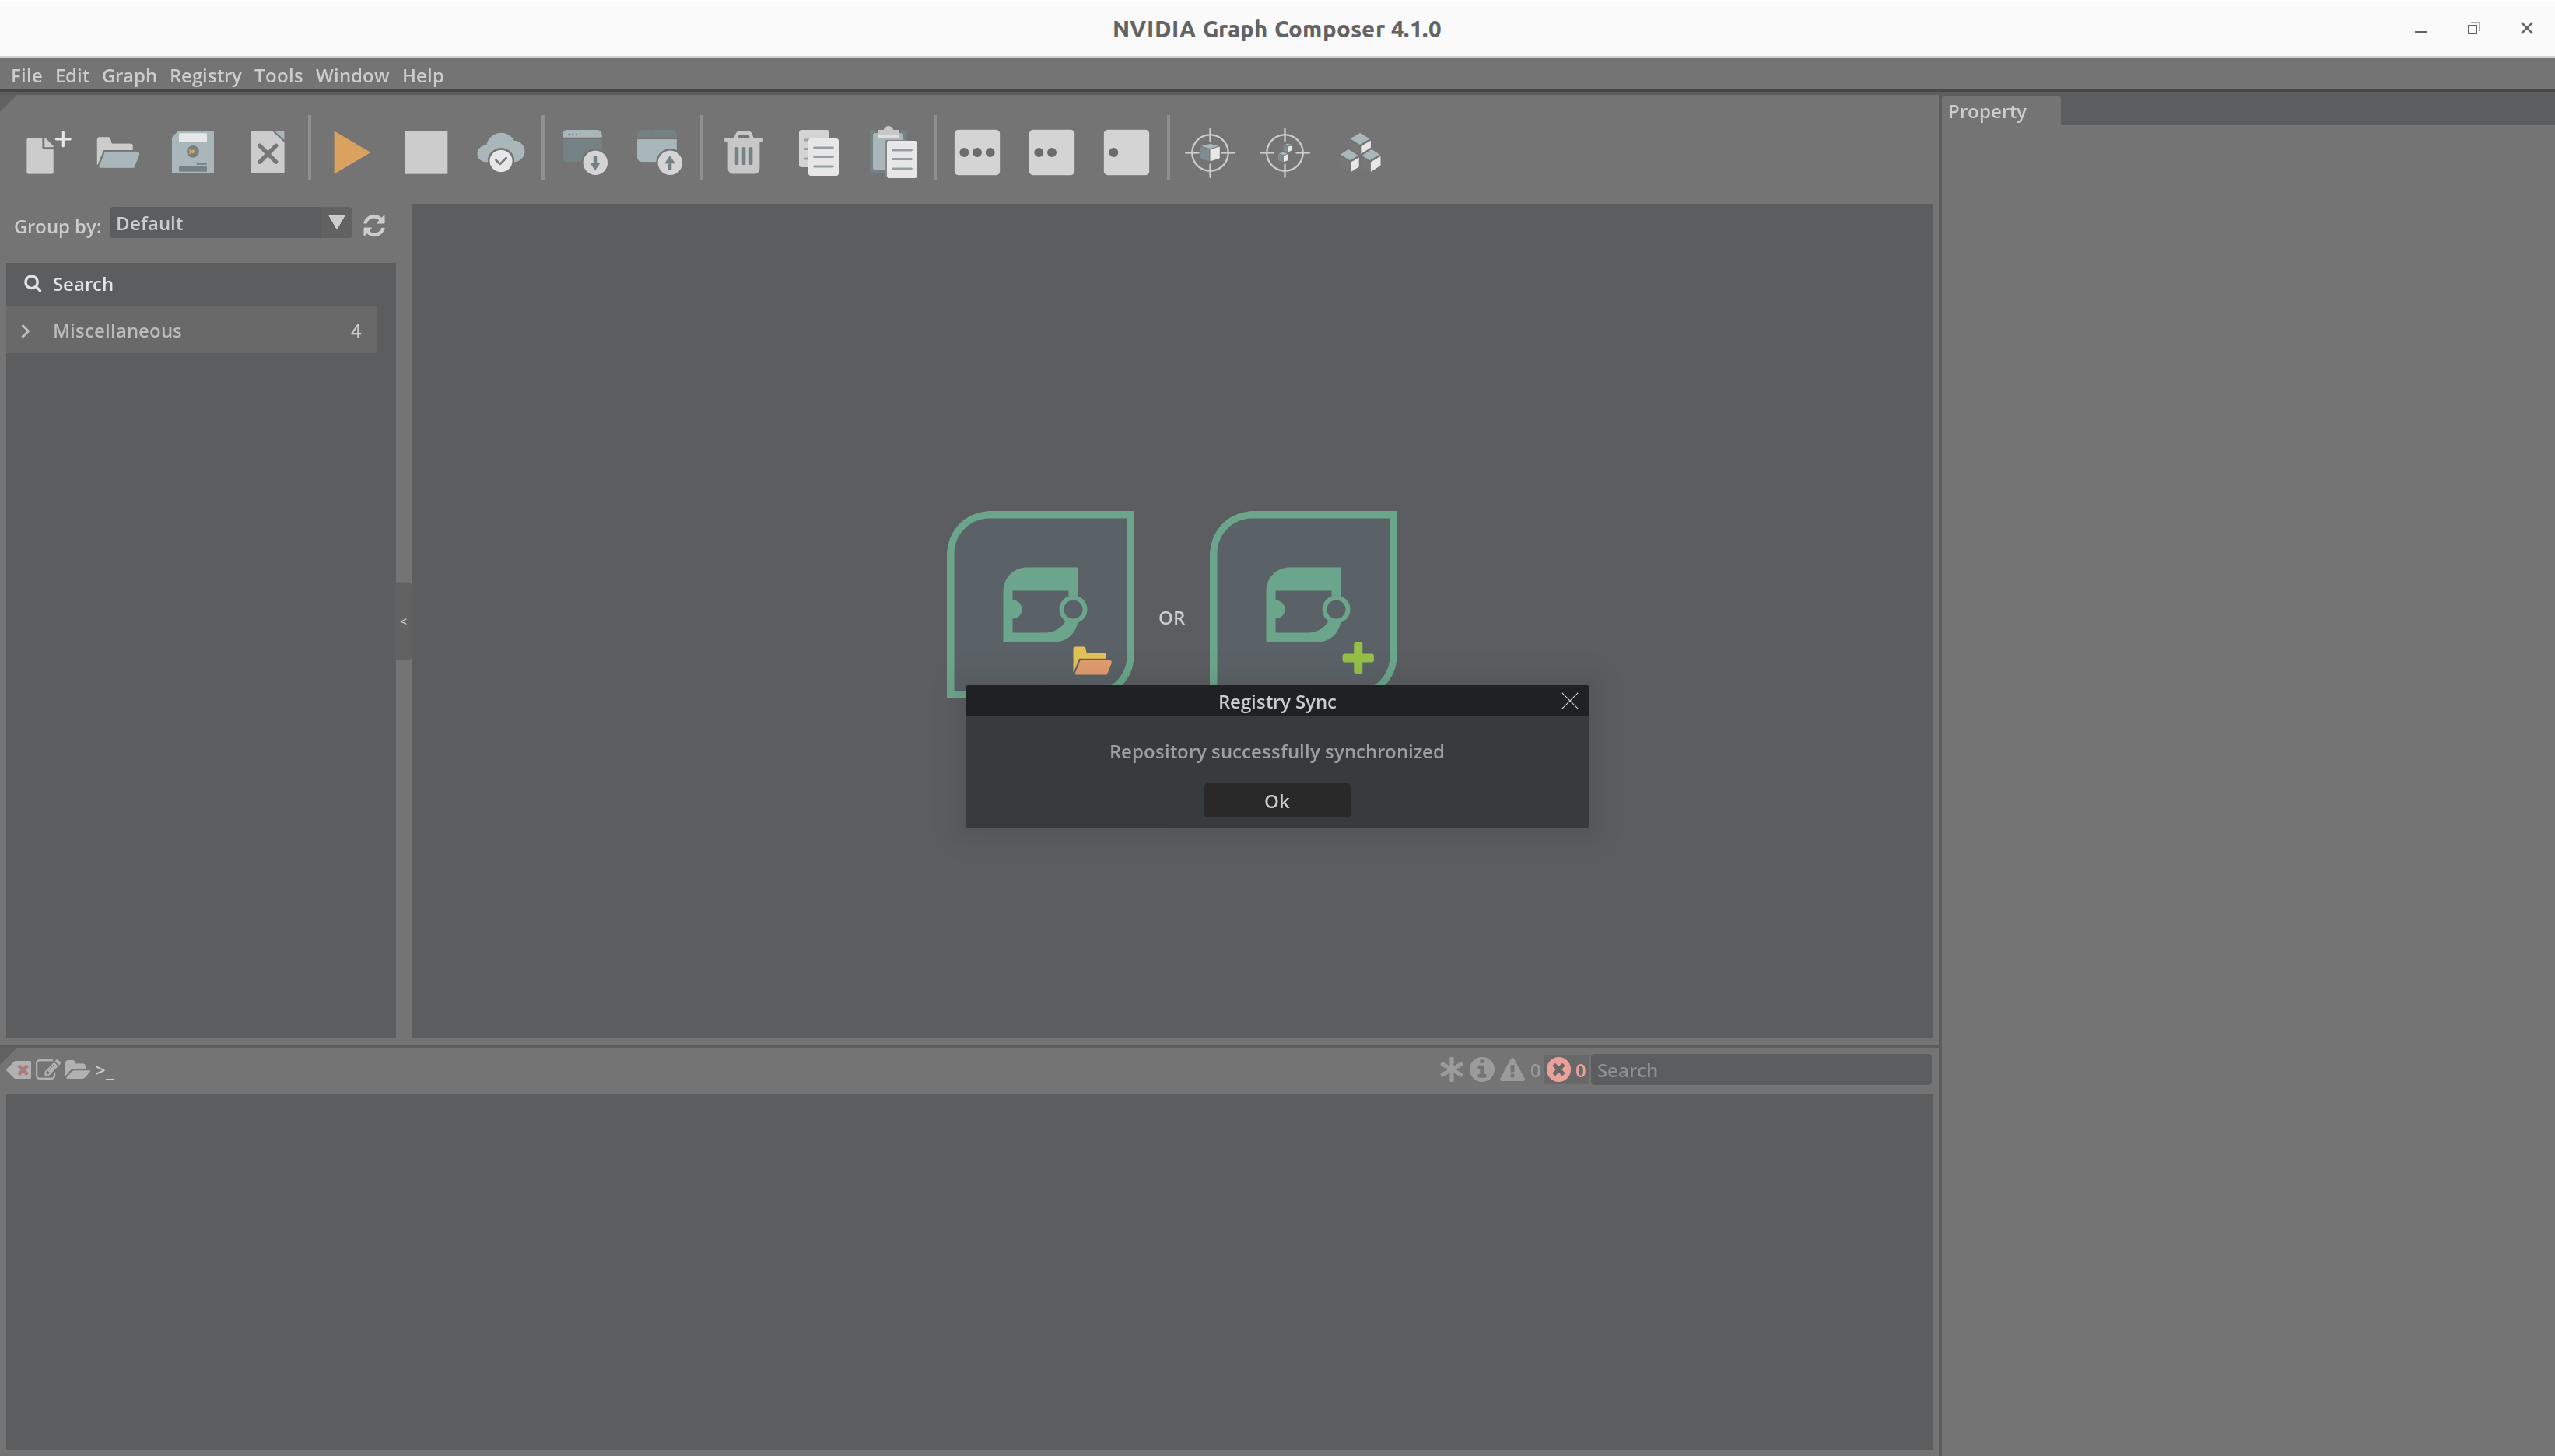
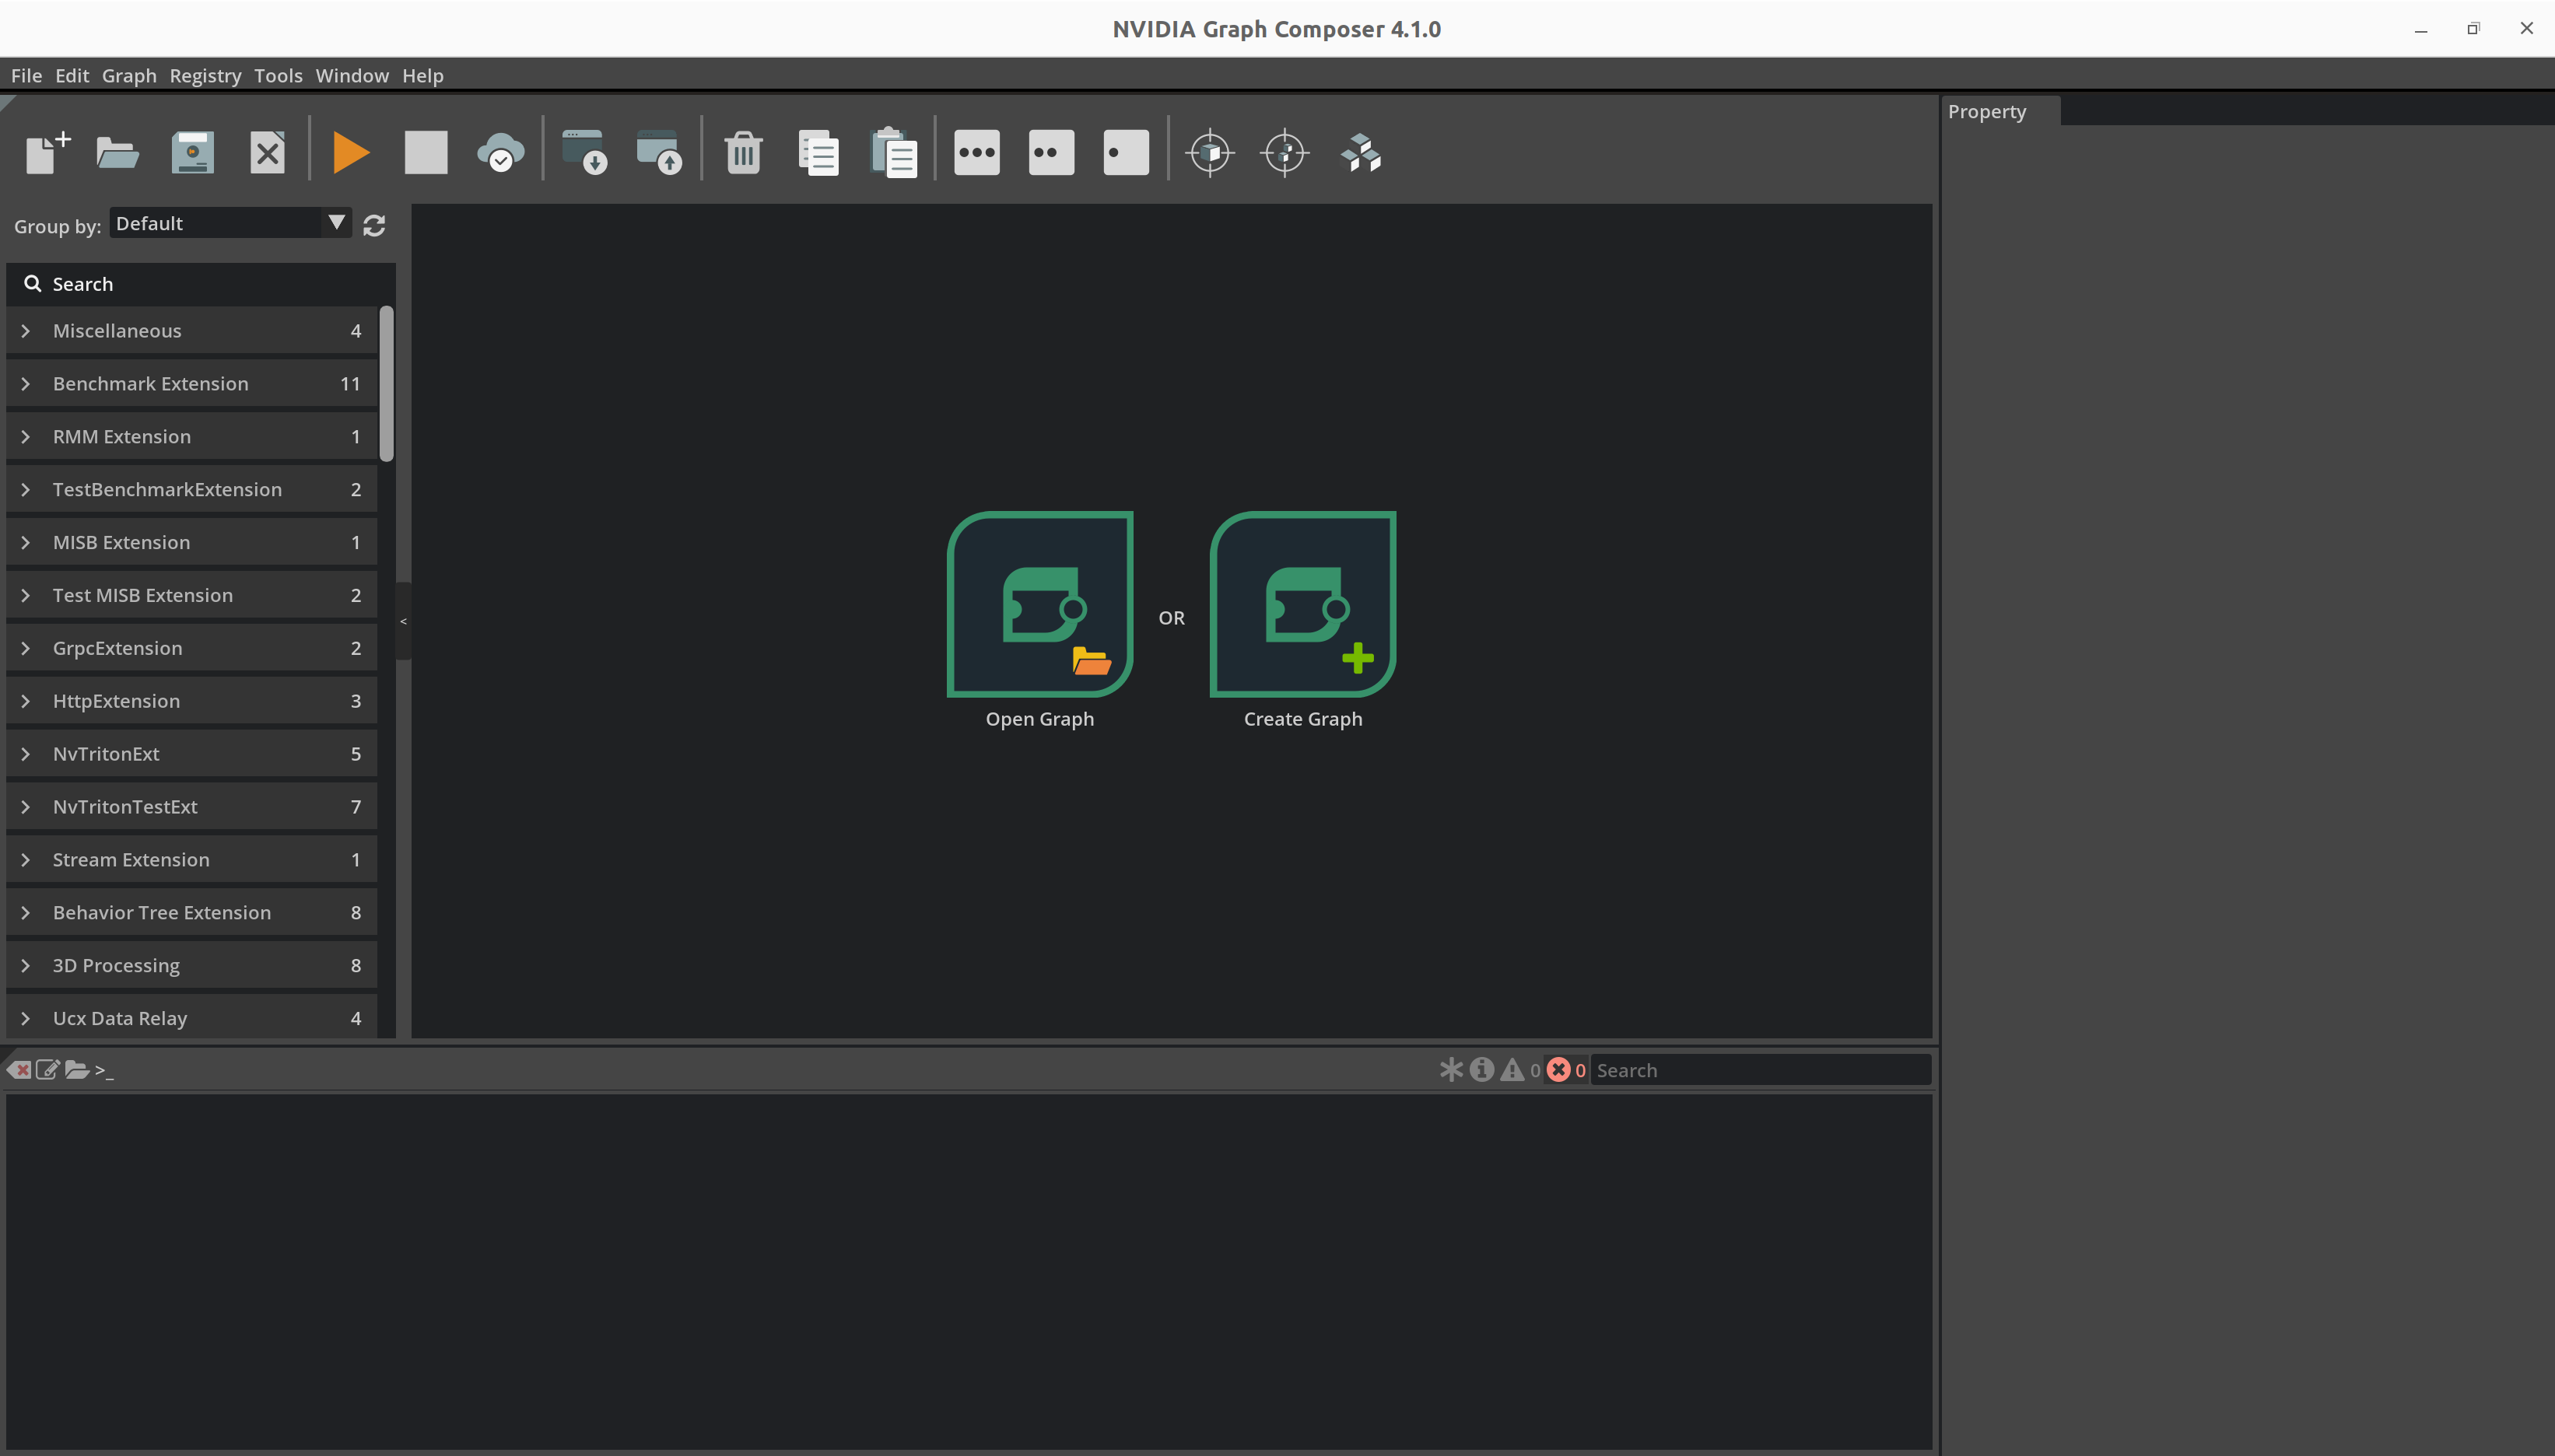
单击“确定”后,composer 会自动刷新组件列表。您可以在右侧的组件列表窗口中看到刷新的列表。
创建图形#
现在,让我们创建一个简单的图形并运行它。在本示例中,我们将使用示例扩展和标准扩展中存在的组件创建一个简单的 Ping 图形。在此 Ping 图形中,我们只是定期从一个实体向另一个实体发送消息,持续一定的计数次数。它使用以下组件
- 发射器
DoubleBufferTransmitter- 这是一个队列,用于保存正在传输的消息。
PingTx- 此组件在每次执行时创建并发布消息。
PeriodicSchedulingTerm- 调度项确定何时执行实体,在本例中为发射器。PeriodicSchedulingTerm 用于定期执行实体。
CountSchedulingTerm- CountSchedulingTerm 用于在一定计数后停止执行。如果您想保持运行,请跳过添加此组件。
- 接收器
DoubleBufferReceiver- 这是一个队列,用于保存其他组件发送的消息。
PingRx- 此组件在每次执行时在 DoubleBufferReceiver 上接收消息。
MessageAvailableSchedulingTerm- 此调度项确定是否已收到新消息,只有这样才会触发 PingRx codelet。
- 调度器
GreedyScheduler- 调度器确定组件的执行顺序。GreedyScheduler 是一个简单的单线程调度器,它按顺序执行组件。
RealtimeClock- 调度器用于跟踪时间的时钟。
按照以下步骤操作
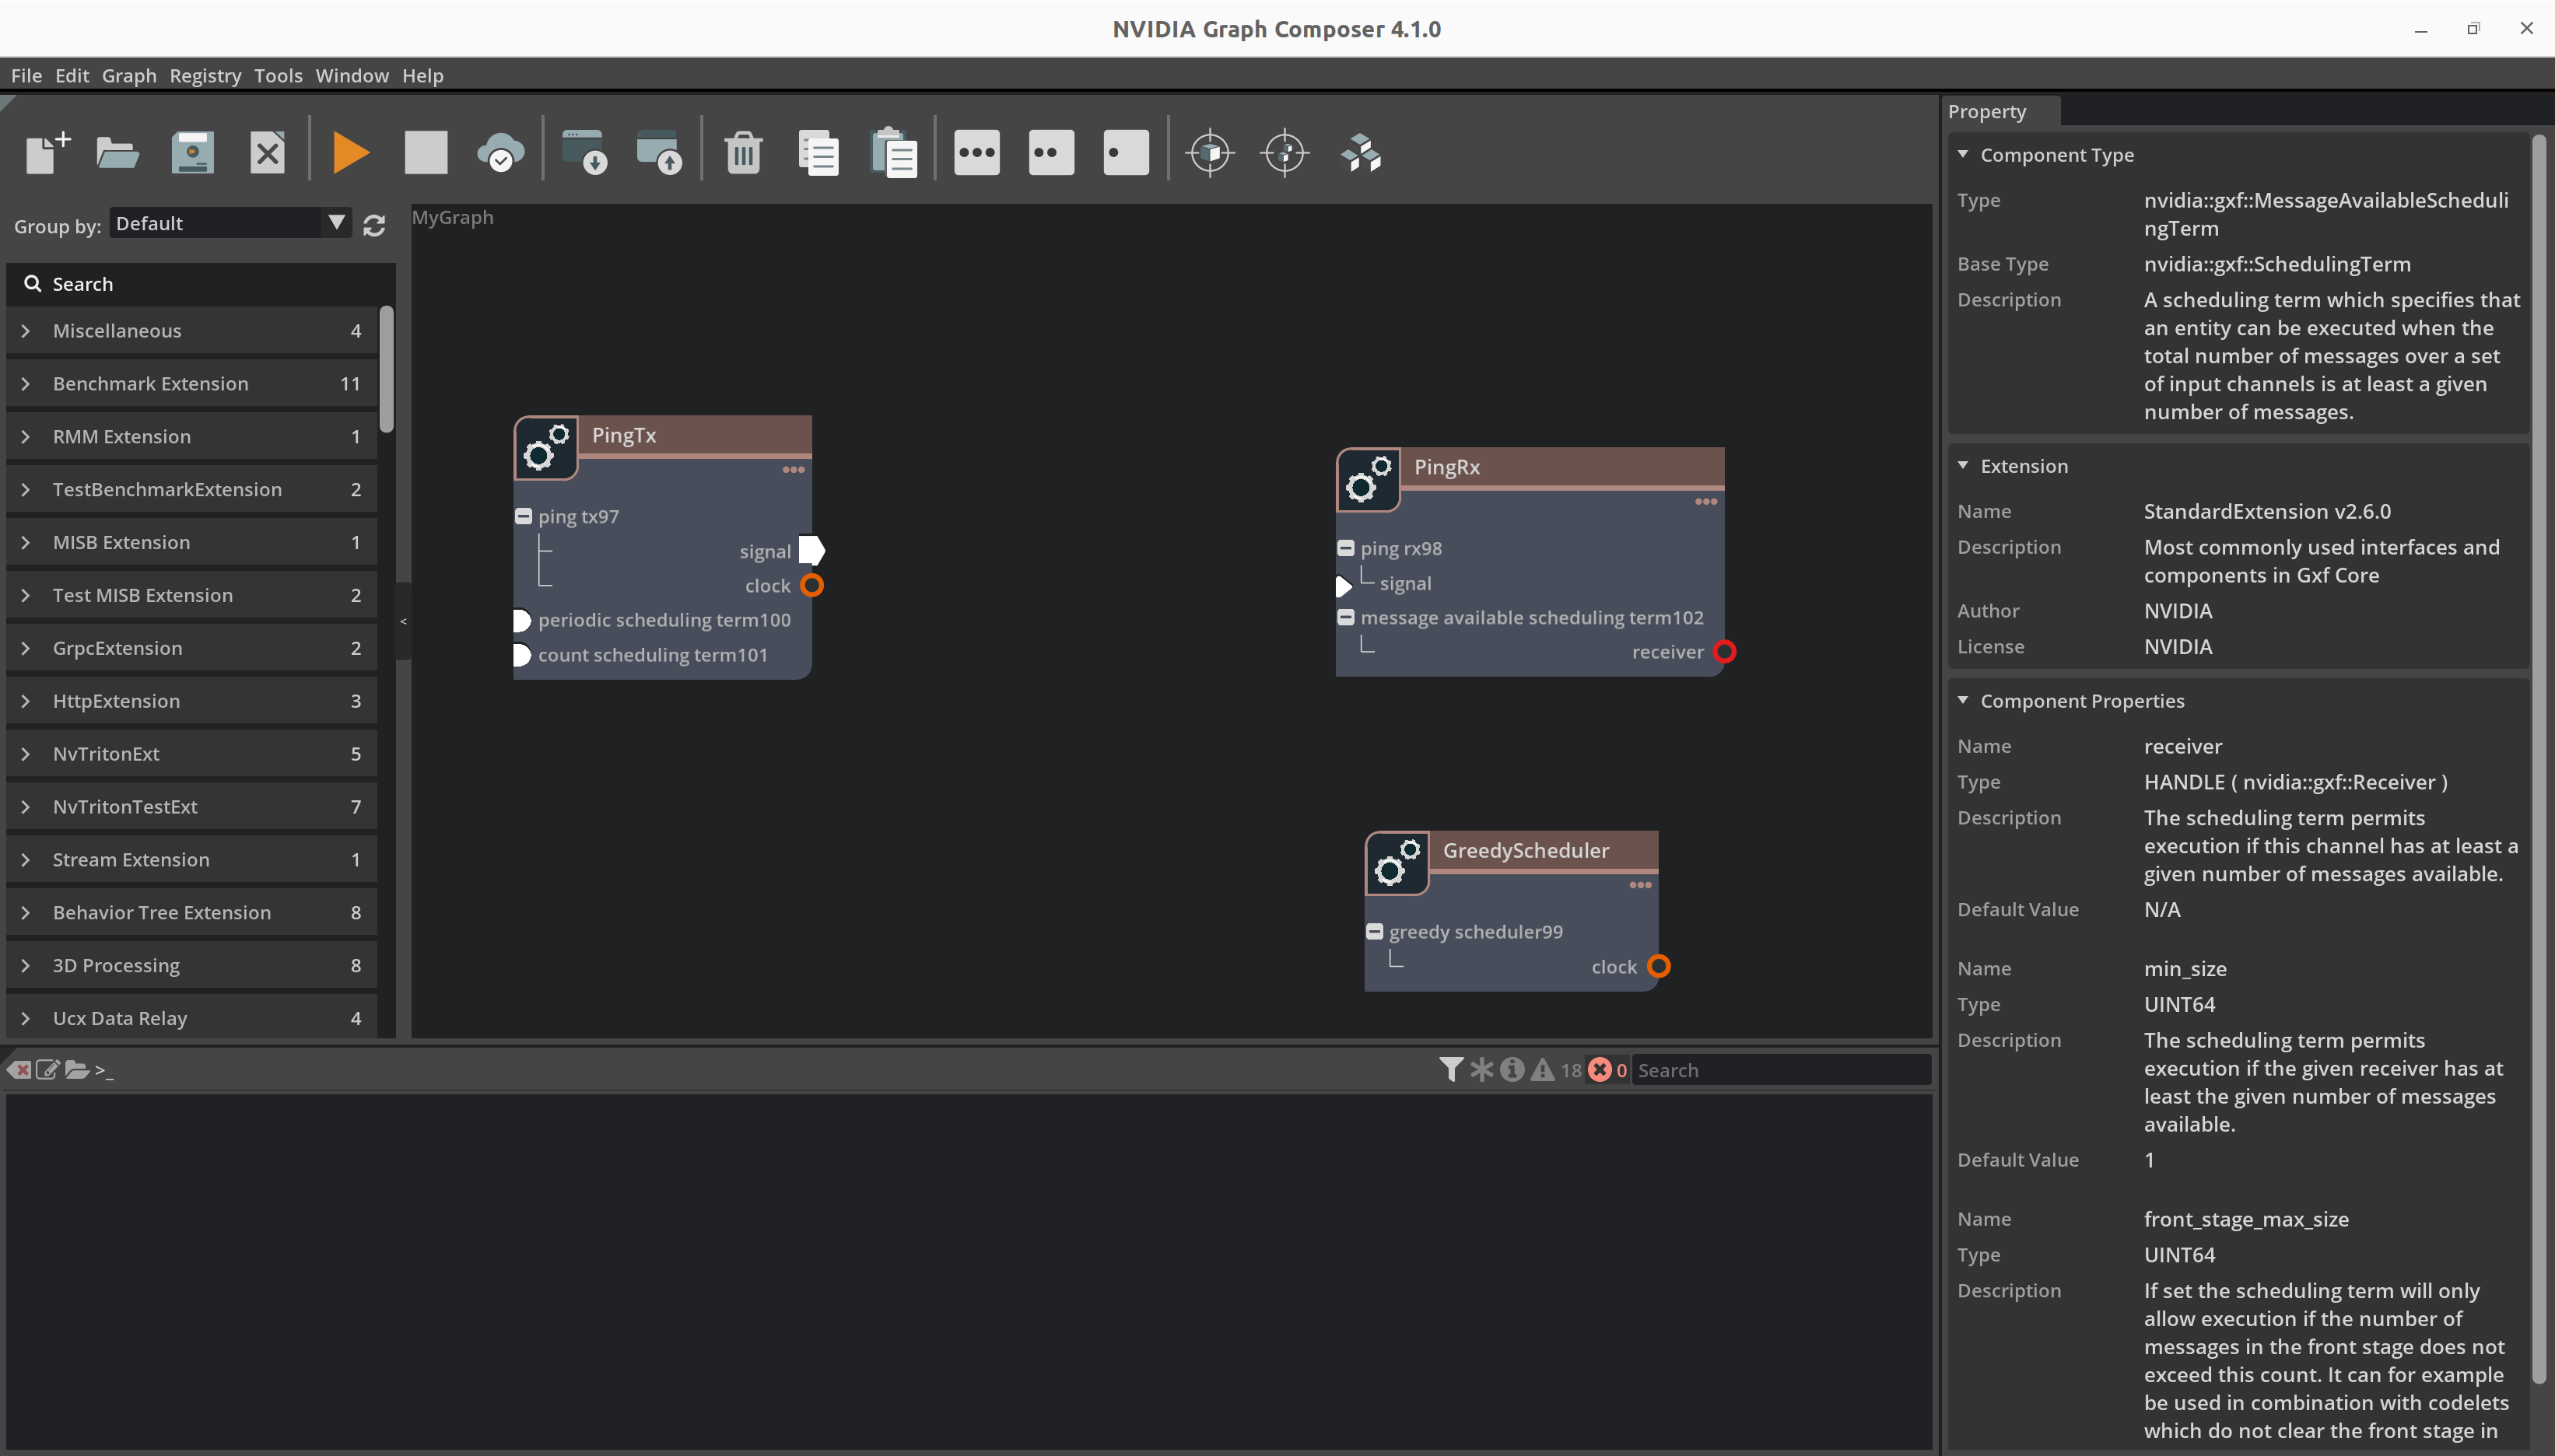
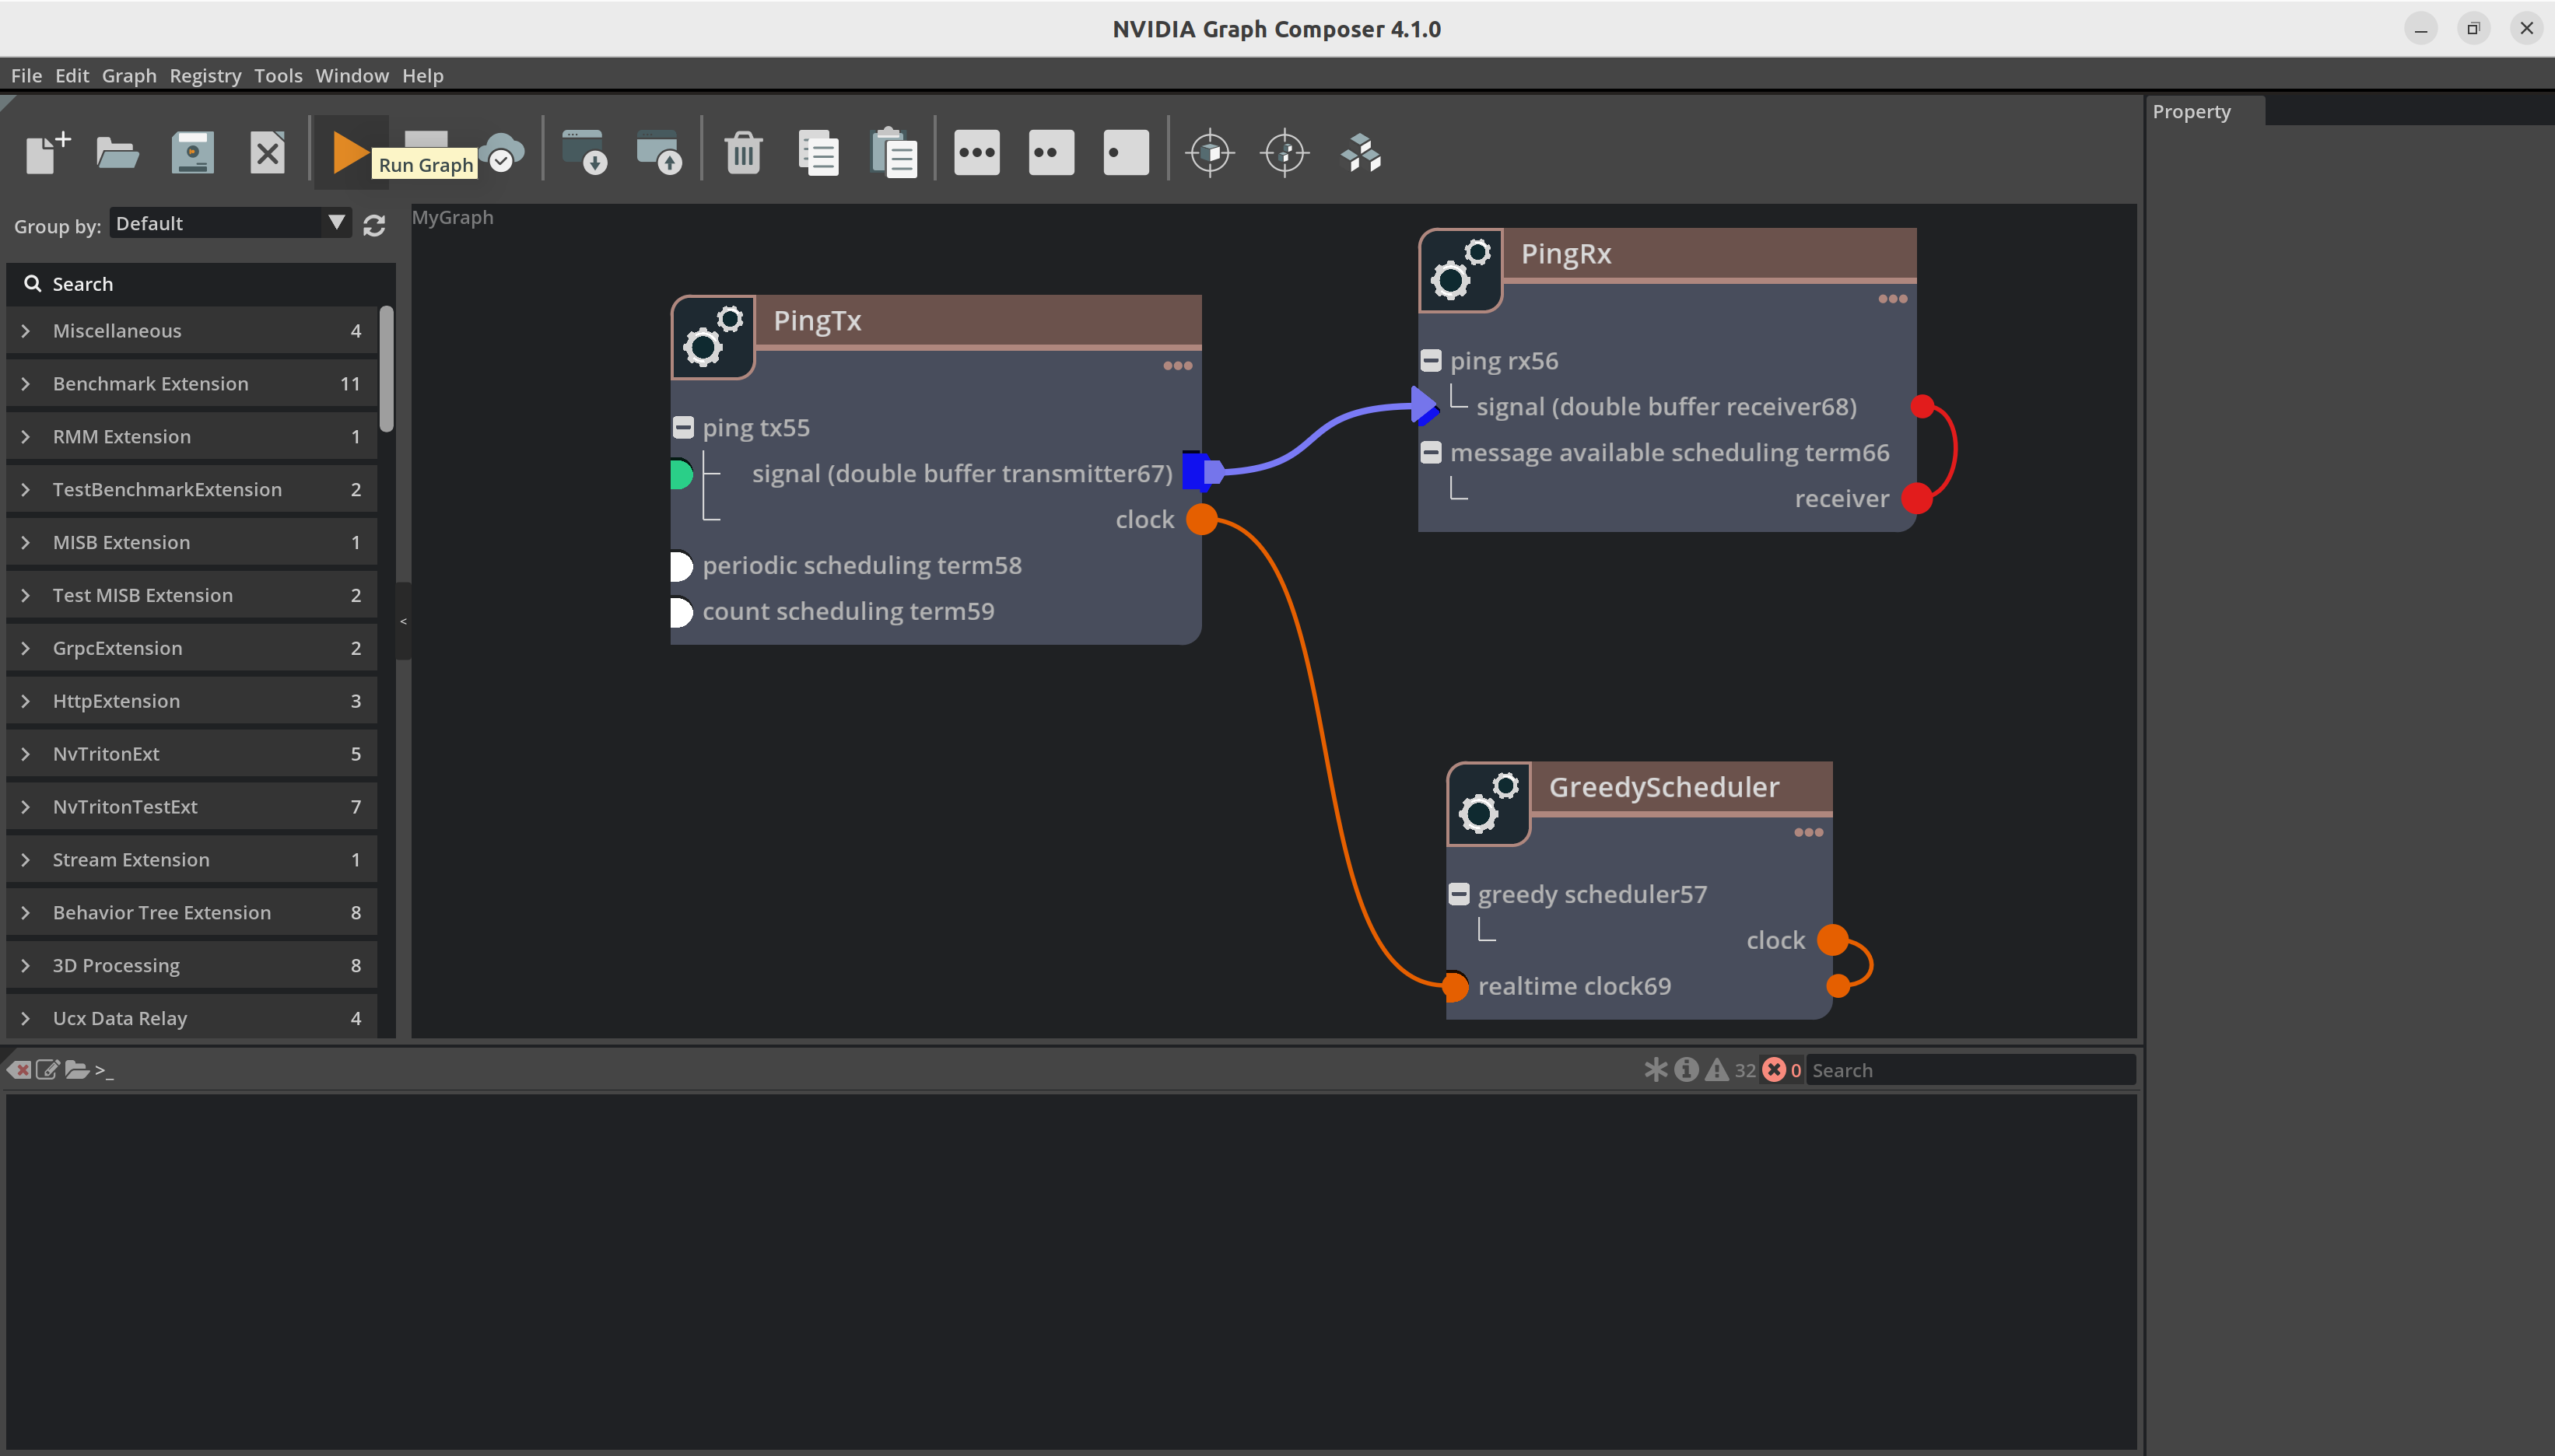
通过从组件面板将 PingTx、PingRx 和 GreedyScheduler 拖放到图窗口中,添加它们。
通过拖放到相应的实体节点中,添加其余组件,例如 CountSchedulingTerm、PeriodicSchedulingTerm 和 MessageAvailableSchedulingTerm。
现在,右键单击 PingTx 中的信号,然后单击“创建 DoubleBufferTransmitter”。对 PingRx 的信号和 GreedyScheduler 的时钟执行相同的步骤。
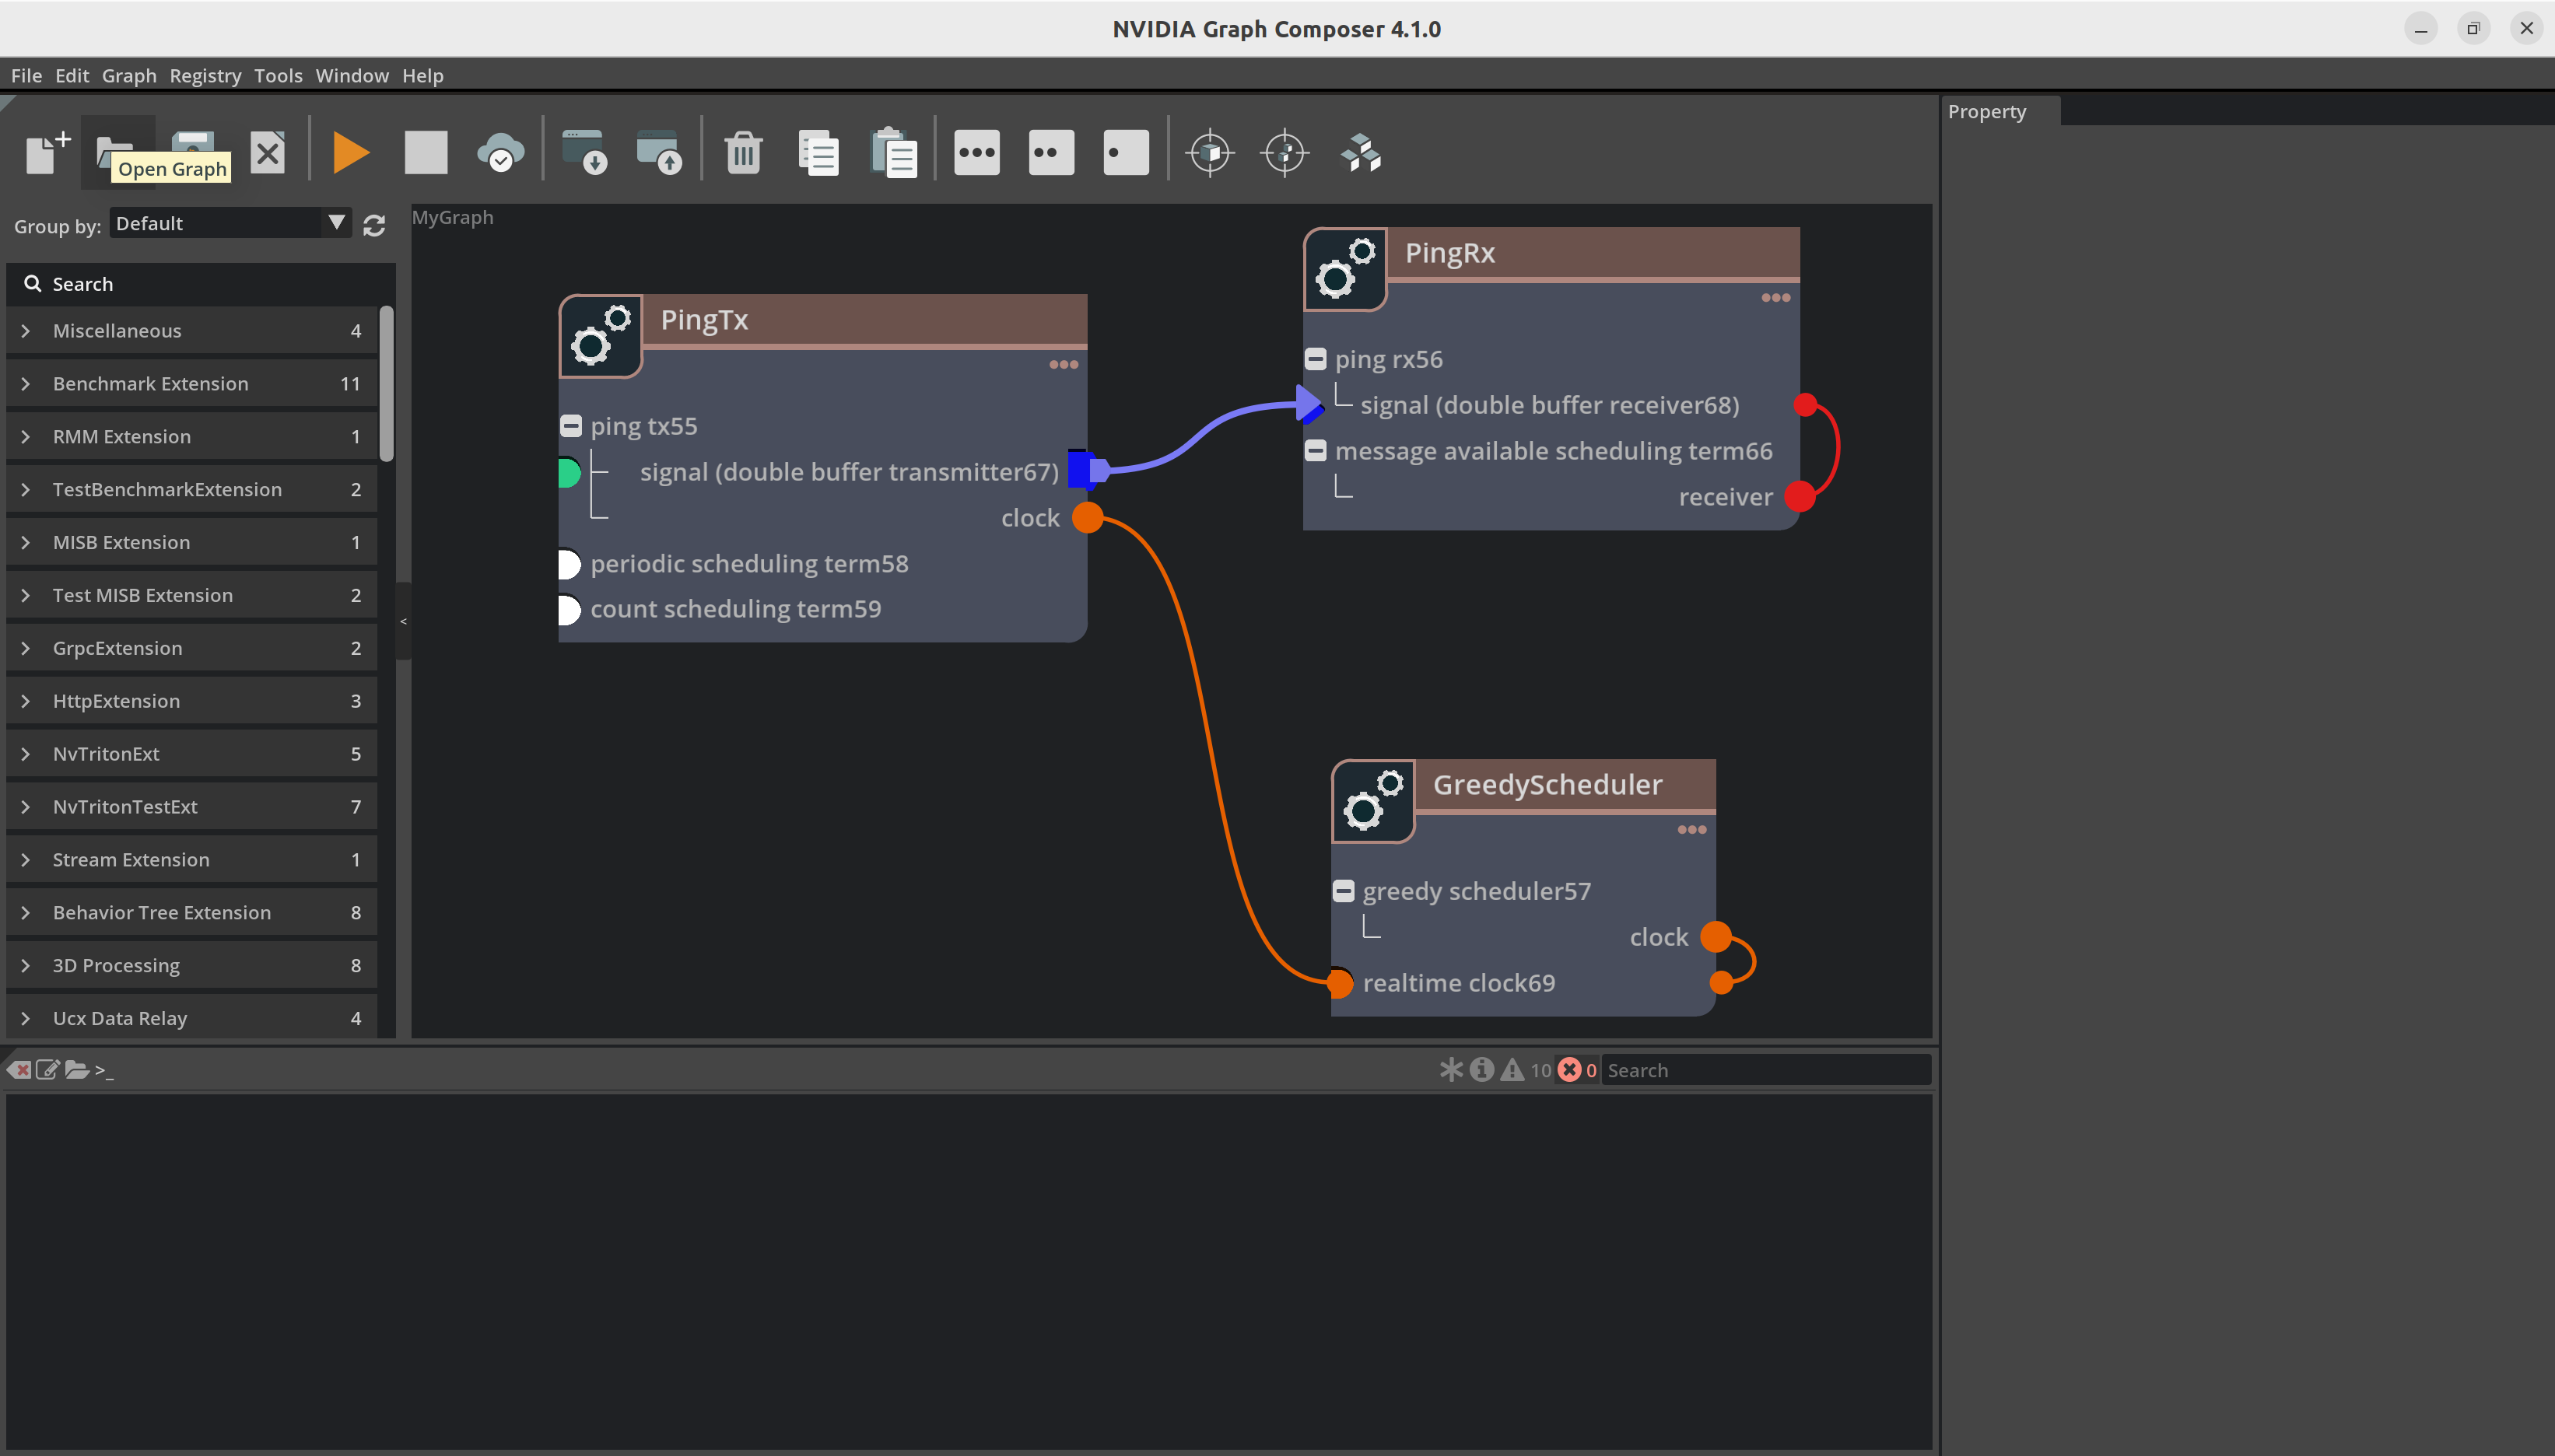
我们可以通过简单地从组件面板拖放组件来创建图,并向其中添加更多组件。
添加组件后,您的图将如下图所示
现在我们建立组件之间的连接。例如,您必须将 DoubleBufferTransmitter 连接到 DoubleBufferReceiver 以在它们之间传递消息。PingTx/clock 需要链接到 GreedyScheduler/RealtimeClock。这些连接通过在组件之间创建边来完成,如下所示
最后,我们必须设置组件所需的参数
在
PingRx/MessageAvailableSchedulingTerm中:将 min_size 设置为1在
PingTx/CountSchedulingTerm中:将 count 设置为5在
PingTx/PeriodicSchedulingTerm中:将 recess_period 设置为5

现在您可以使用 File -> Save Graph (as) 保存图。这将创建一个 yaml 文件,其中包含所有组件和连接。
application:
  name: MyGraph
---
dependencies:
- extension: SampleExtension
  uuid: a6ad78b6-1682-11ec-9621-0242ac130002
  version: 1.5.0
- extension: StandardExtension
  uuid: 8ec2d5d6-b5df-48bf-8dee-0252606fdd7e
  version: 2.5.0
---
components:
- name: ping_tx0
  parameters:
    clock: GreedyScheduler/realtime_clock12
    signal: double_buffer_transmitter10
  type: nvidia::gxf::PingTx
- name: periodic_scheduling_term3
  type: nvidia::gxf::PeriodicSchedulingTerm
- name: count_scheduling_term4
  type: nvidia::gxf::CountSchedulingTerm
- name: double_buffer_transmitter10
  type: nvidia::gxf::DoubleBufferTransmitter
name: PingTx
ui_property:
  position:
    x: 56.0
    y: 103.0
---
components:
- name: ping_rx1
  parameters:
    signal: double_buffer_receiver11
  type: nvidia::gxf::PingRx
- name: message_available_scheduling_term5
  parameters:
    receiver: double_buffer_receiver11
  type: nvidia::gxf::MessageAvailableSchedulingTerm
- name: double_buffer_receiver11
  type: nvidia::gxf::DoubleBufferReceiver
name: PingRx
ui_property:
  position:
    x: 489.0
    y: 106.0
---
components:
- name: greedy_scheduler2
  parameters:
    clock: realtime_clock12
  type: nvidia::gxf::GreedyScheduler
- name: realtime_clock12
  type: nvidia::gxf::RealtimeClock
name: GreedyScheduler
ui_property:
  position:
    x: 486.0
    y: 314.0
---
components:
- name: connection13
  parameters:
    source: PingTx/double_buffer_transmitter10
    target: PingRx/double_buffer_receiver11
  type: nvidia::gxf::Connection
name: node1
从 Graph Composer 运行图#
您可以使用以下方法之一部署图

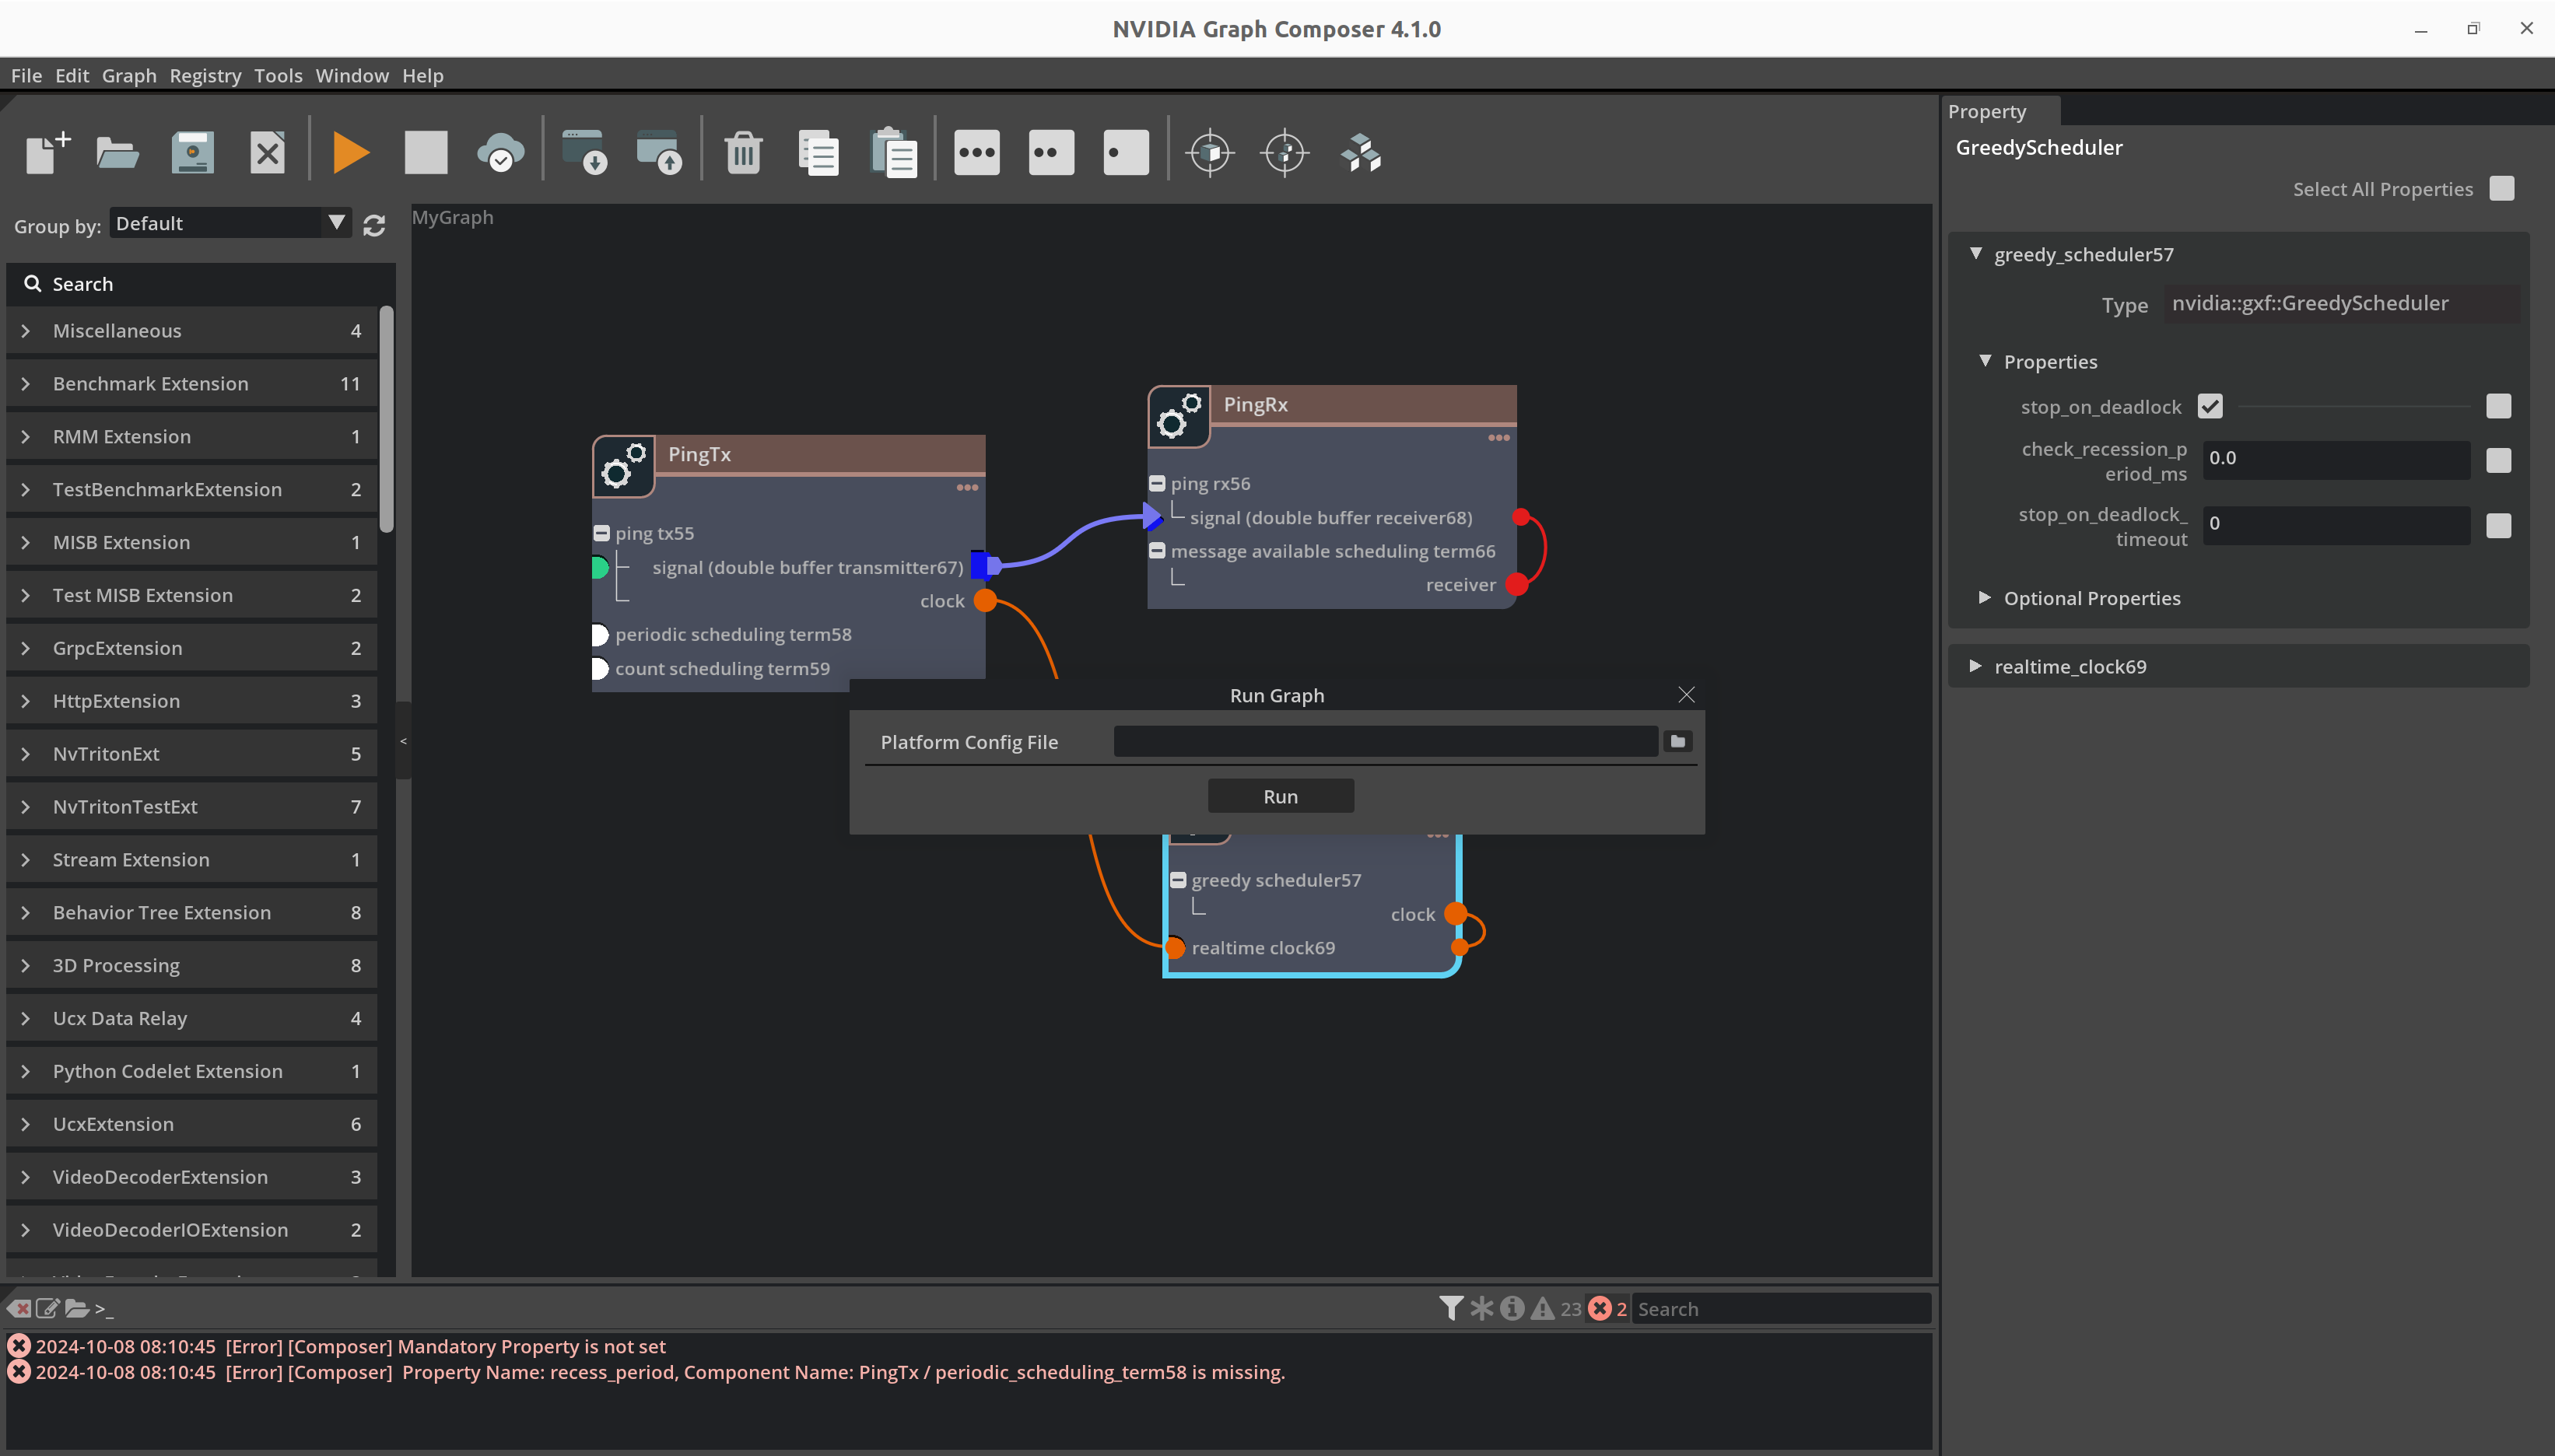
要执行当前打开的图,请单击左侧工具栏上的 Run Graph 按钮。这将打开 Run Graph 对话框。
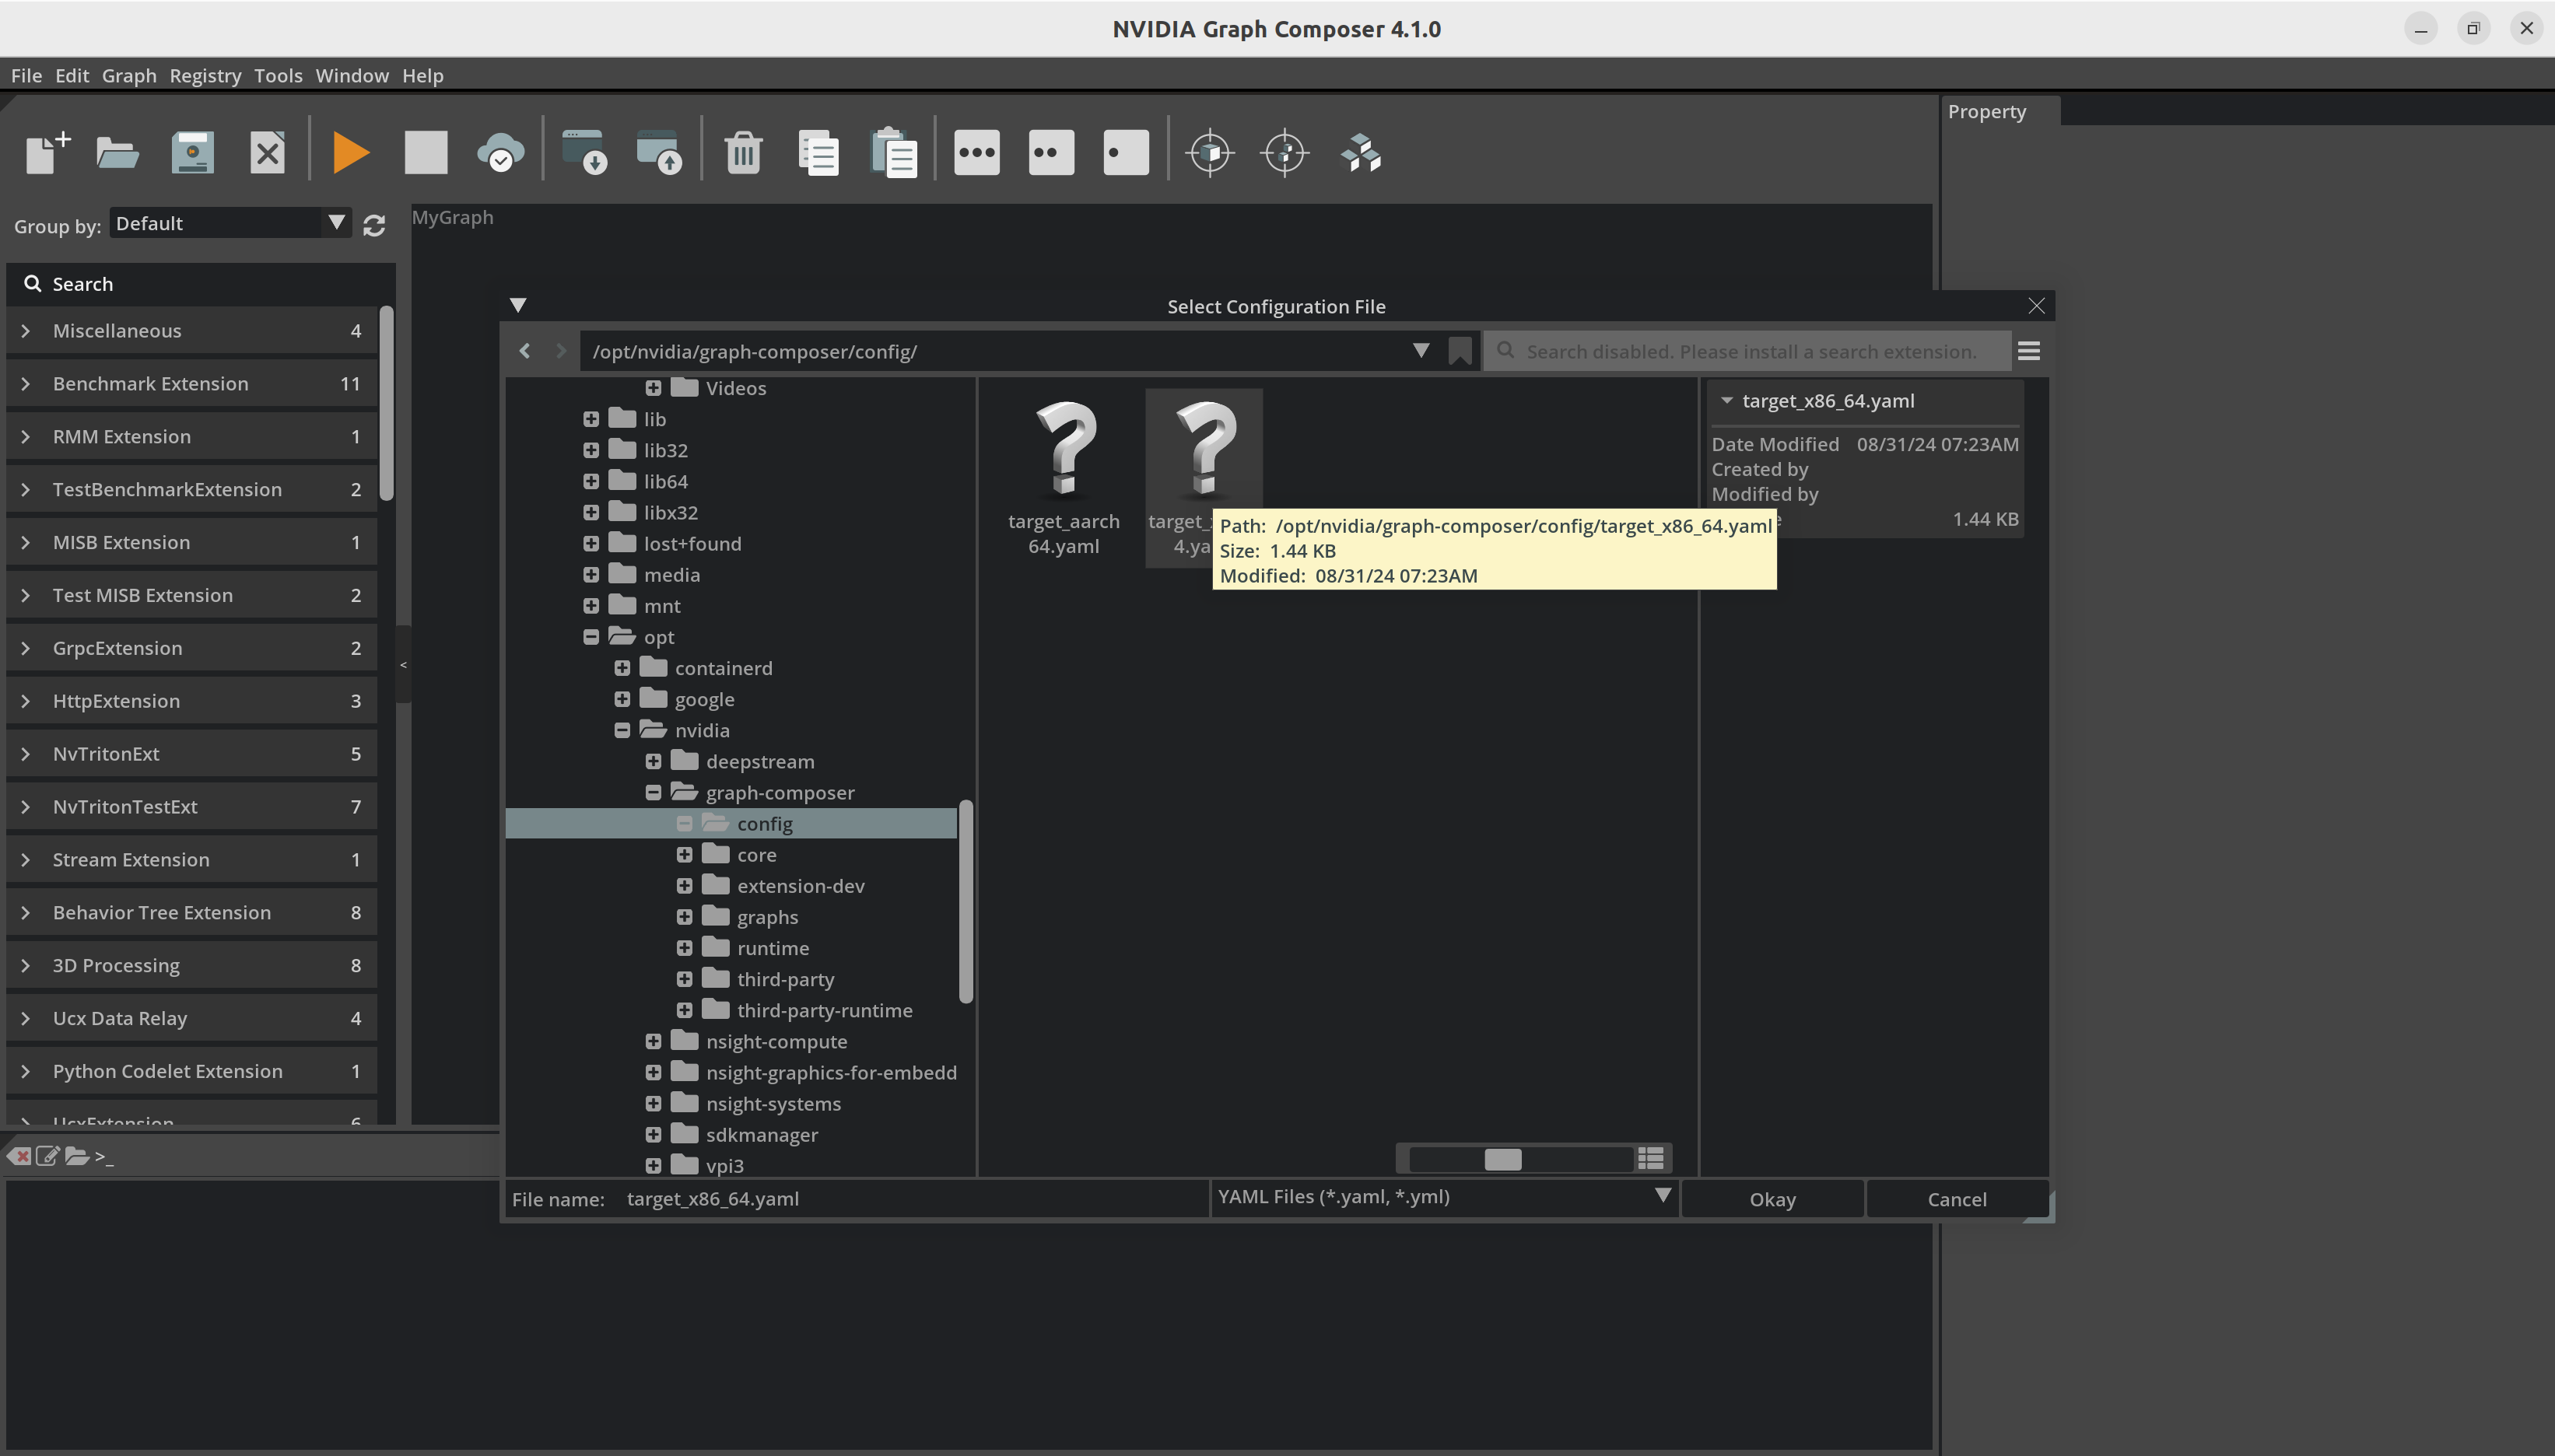
本地系统#
确保
gxf_server在本地系统上运行,并且“编辑/首选项”中的 IP 地址是本地主机地址。使用文件浏览器选择合适的平台配置文件。
单击
Run。图执行进度将通过控制台窗口中的日志报告。
远程系统#
在 Jetson 或其他远程系统上执行
确保
gxf_server在远程系统上运行,并且“编辑/首选项”中的 IP 地址是远程主机地址。根据远程机器配置,选择合适的平台配置文件(aarch64 或 x86_64)。
单击
Run。图执行进度将通过控制台窗口中的日志报告。
请注意,这需要在远程系统上安装 Graph Composer 包。
通过 Windows 在 Jetson 或其他远程系统上执行
通过 Windows 执行图与在 Jetson 或其他远程系统上执行图非常相似。请注意,这需要在远程系统上安装 Graph Composer 包。
从命令行运行图#
使用命令行(execute_graph.sh 脚本)执行图
Graph Composer 提供的 execute_graph.sh 脚本有助于图执行并提供附加功能。
完整用法参考
Usage: /opt/nvidia/graph-composer/execute_graph.sh [options] <graph-file> [additional graph files]

Options:
  -d, --graph-target "<graph-target-file>"    [Required] Graph target config file
  -s, --subgraphs <subgraph1>,<subgraph2>,... [Optional] Paths of subgraphs used by the application, comma-separated list
      --resources <graph-resources-file>      [Optional] Graph resources file
  -f, --fresh-manifest                        [Optional] Re-install graph and generate a new manifest file
  -g, --with-gdb                              [Optional] Execute the graph under gdb
  -m, --use-manifest <existing-manifest>      [Optional] Use an existing manifest file
  -r, --remove-install-dir                    [Optional] Remove graph installation directory during exit
  -t, --target <username@host>                [Optional] Target to execute the graph on. SSH will be used
      --target-env-vars "<env-vars>"          [Optional] Separated list of environment variables to be set before running on target
  -a  --app-root <app-root>                   [Optional] Root path for gxe to search subgraphs
注意
要在远程目标上执行图:* 目标上必须已安装 Graph Composer 包 * 建议使用无密码登录方法进行 SSH
要在本地执行图,请运行
     /opt/nvidia/graph-composer/execute_graph.sh <graph-file> -d <graph-target>

For example, on dGPU host, run:

.. code-block:: text

     /opt/nvidia/graph-composer/execute_graph.sh <graph-file> -d /opt/nvidia/graph-composer/config/target_x86_64.yaml
要在远程 Jetson 目标上执行,请运行
/opt/nvidia/graph-composer/execute_graph.sh <graph-file> -d /opt/nvidia/graph-composer/config/target_aarch64.yaml \
-t <username@host> --target-env-vars "DISPLAY=:0"
注意
如果图具有与其关联的资源(在资源 YAML 文件中描述),则可以将附加参数 --resources <resources.yaml> 传递给脚本。资源将在图执行之前复制到远程目标
注意
当执行使用子图的图时,您必须传递附加参数 -s <subgraph1>,<subgraph2>,...,其中包含子图文件的路径。您不得在没有选项的情况下将子图作为图文件参数传递。
注意
要在远程机器上运行图,请安装以下软件包
openssh-client
sshfs
使用 ssh-keygen 生成 ssh 密钥对。使用 ssh-copy-id ${TARGET} 将密钥复制到目标
从 Graph Composer 创建容器镜像#
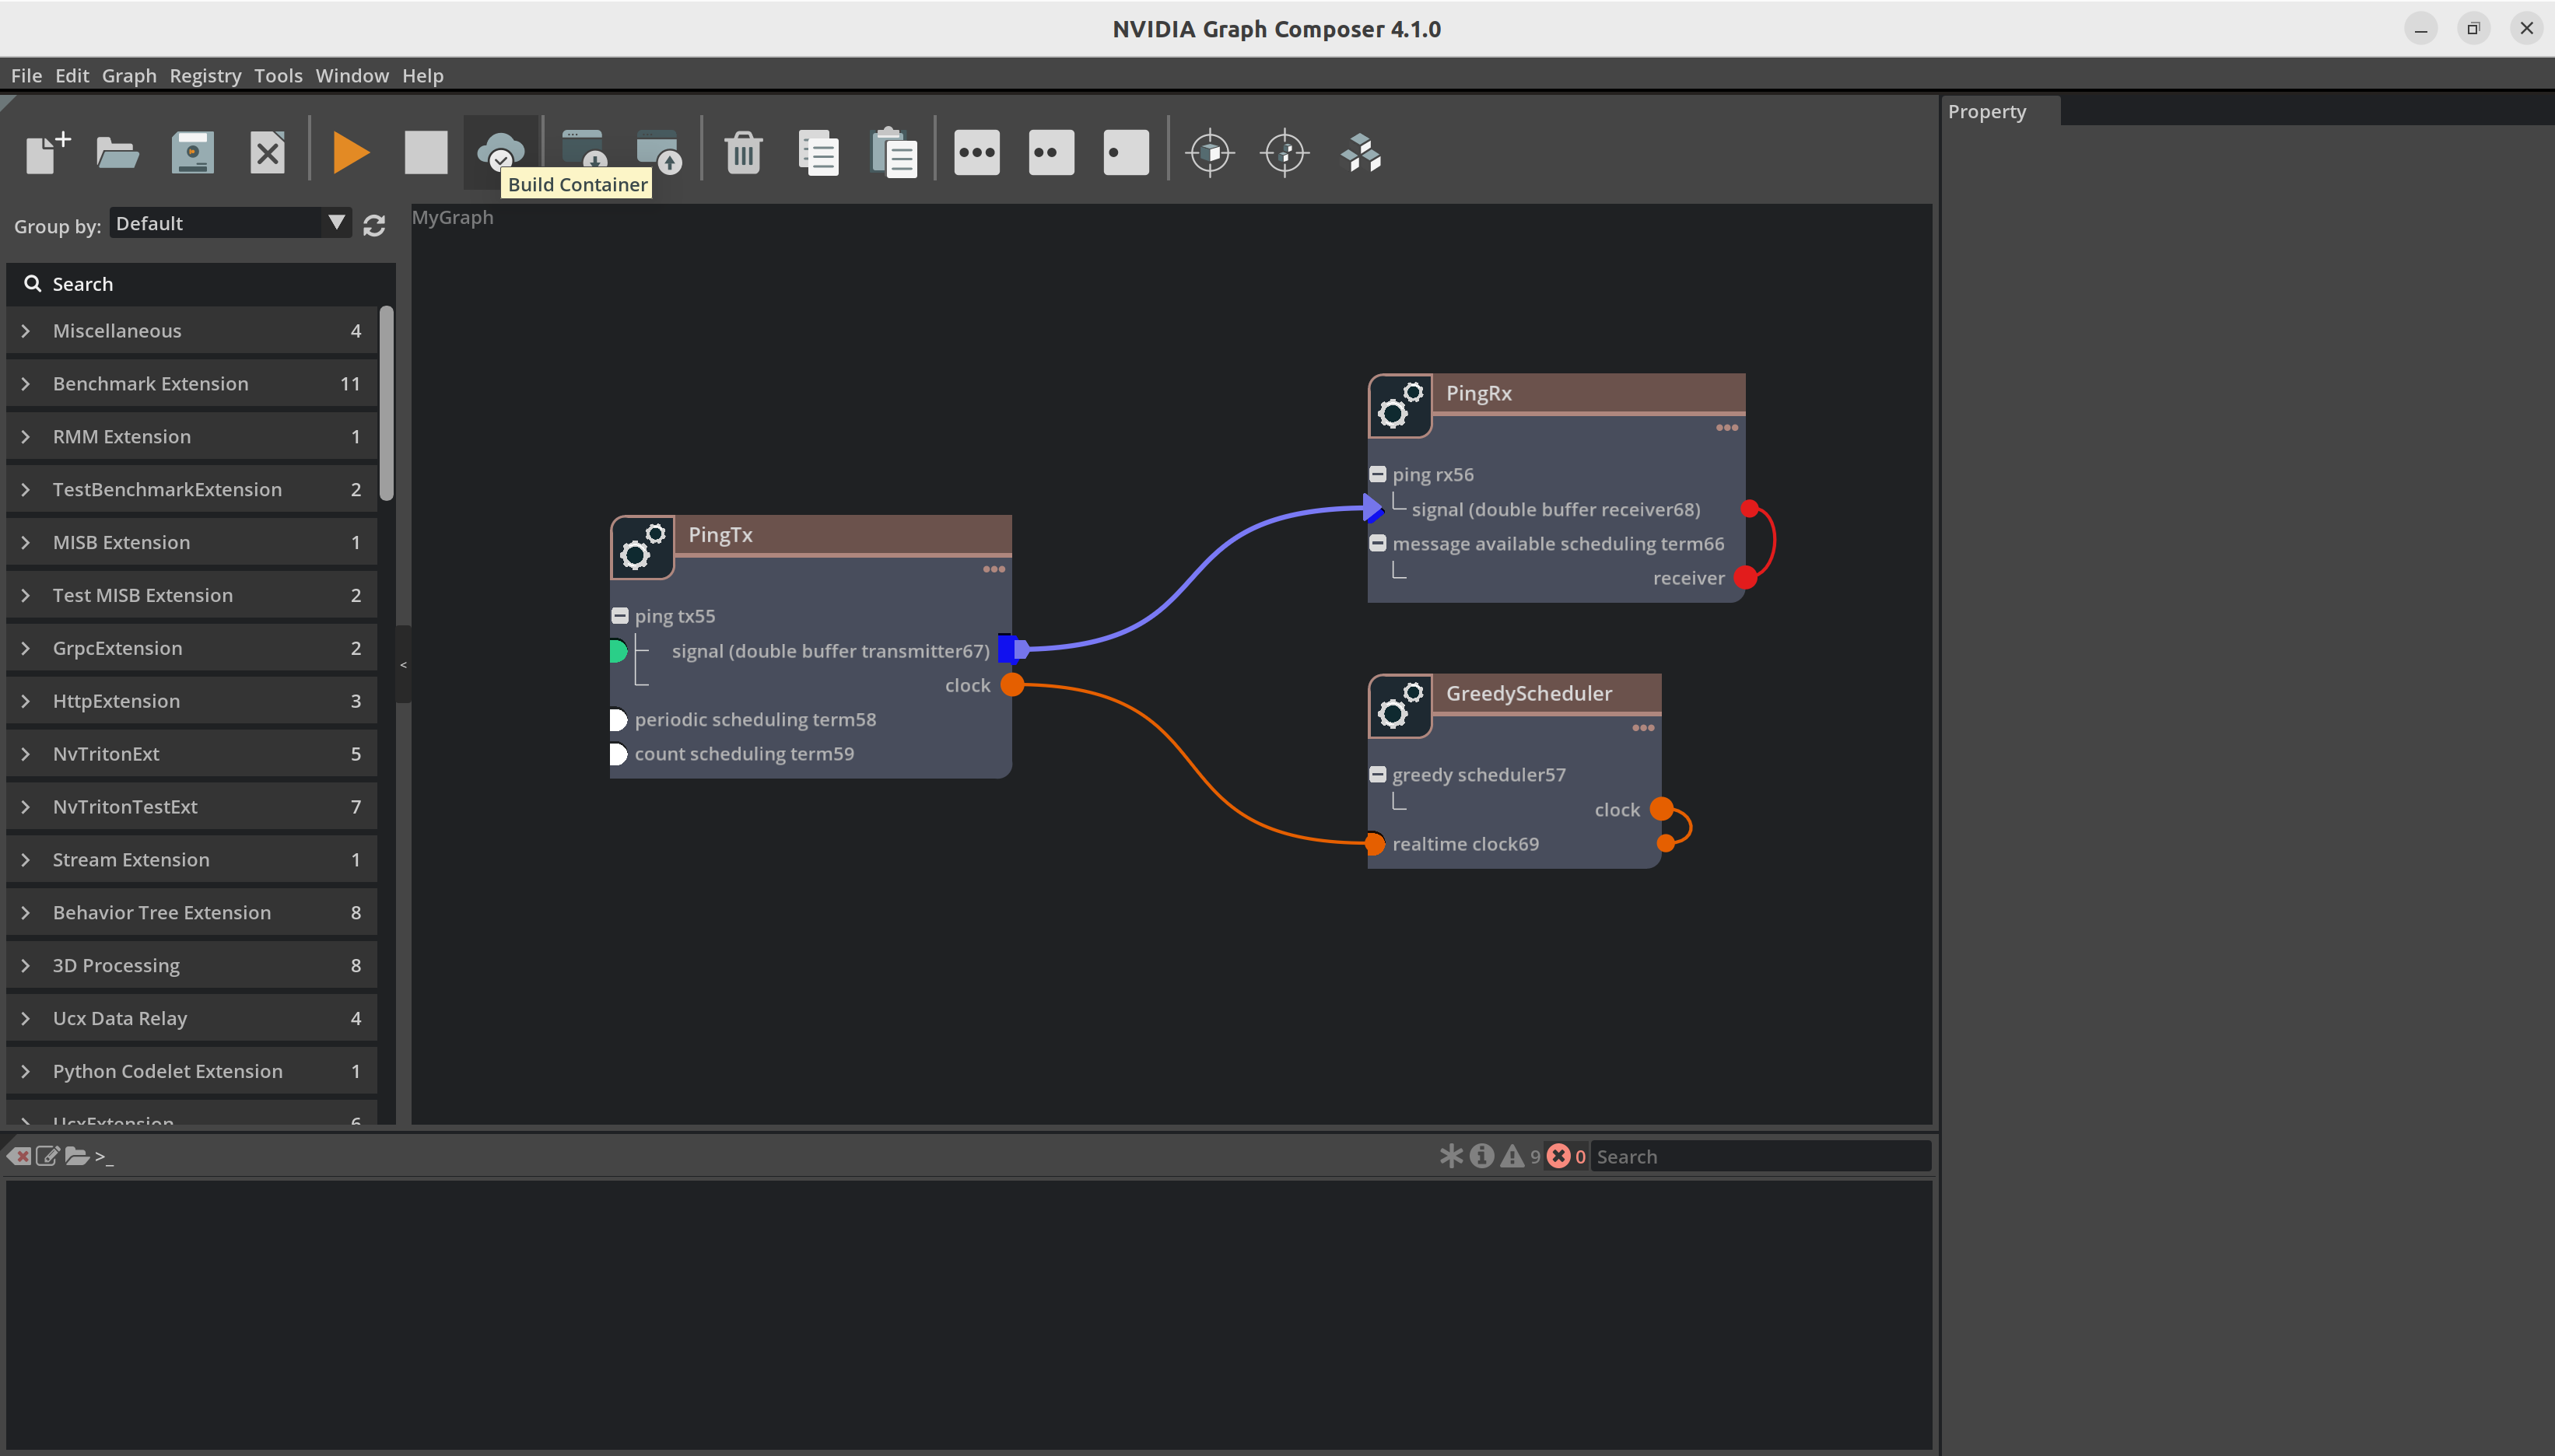
可以为 Ubuntu 22.04 x86_64 或 Jetson 创建容器镜像,但仅在 Ubuntu 22.04 x86_64 上支持创建。以下场景受支持。

要构建容器,首先单击顶部工具栏上的 Build Container 按钮。这将打开 Build Container 窗口。
本地系统#
要在本地系统上创建容器,
确保
gxf_server在本地系统上运行,并且“编辑/首选项”中的 IP 地址是本地主机地址。使用
Configuration File输入旁边的按钮启动文件浏览器。
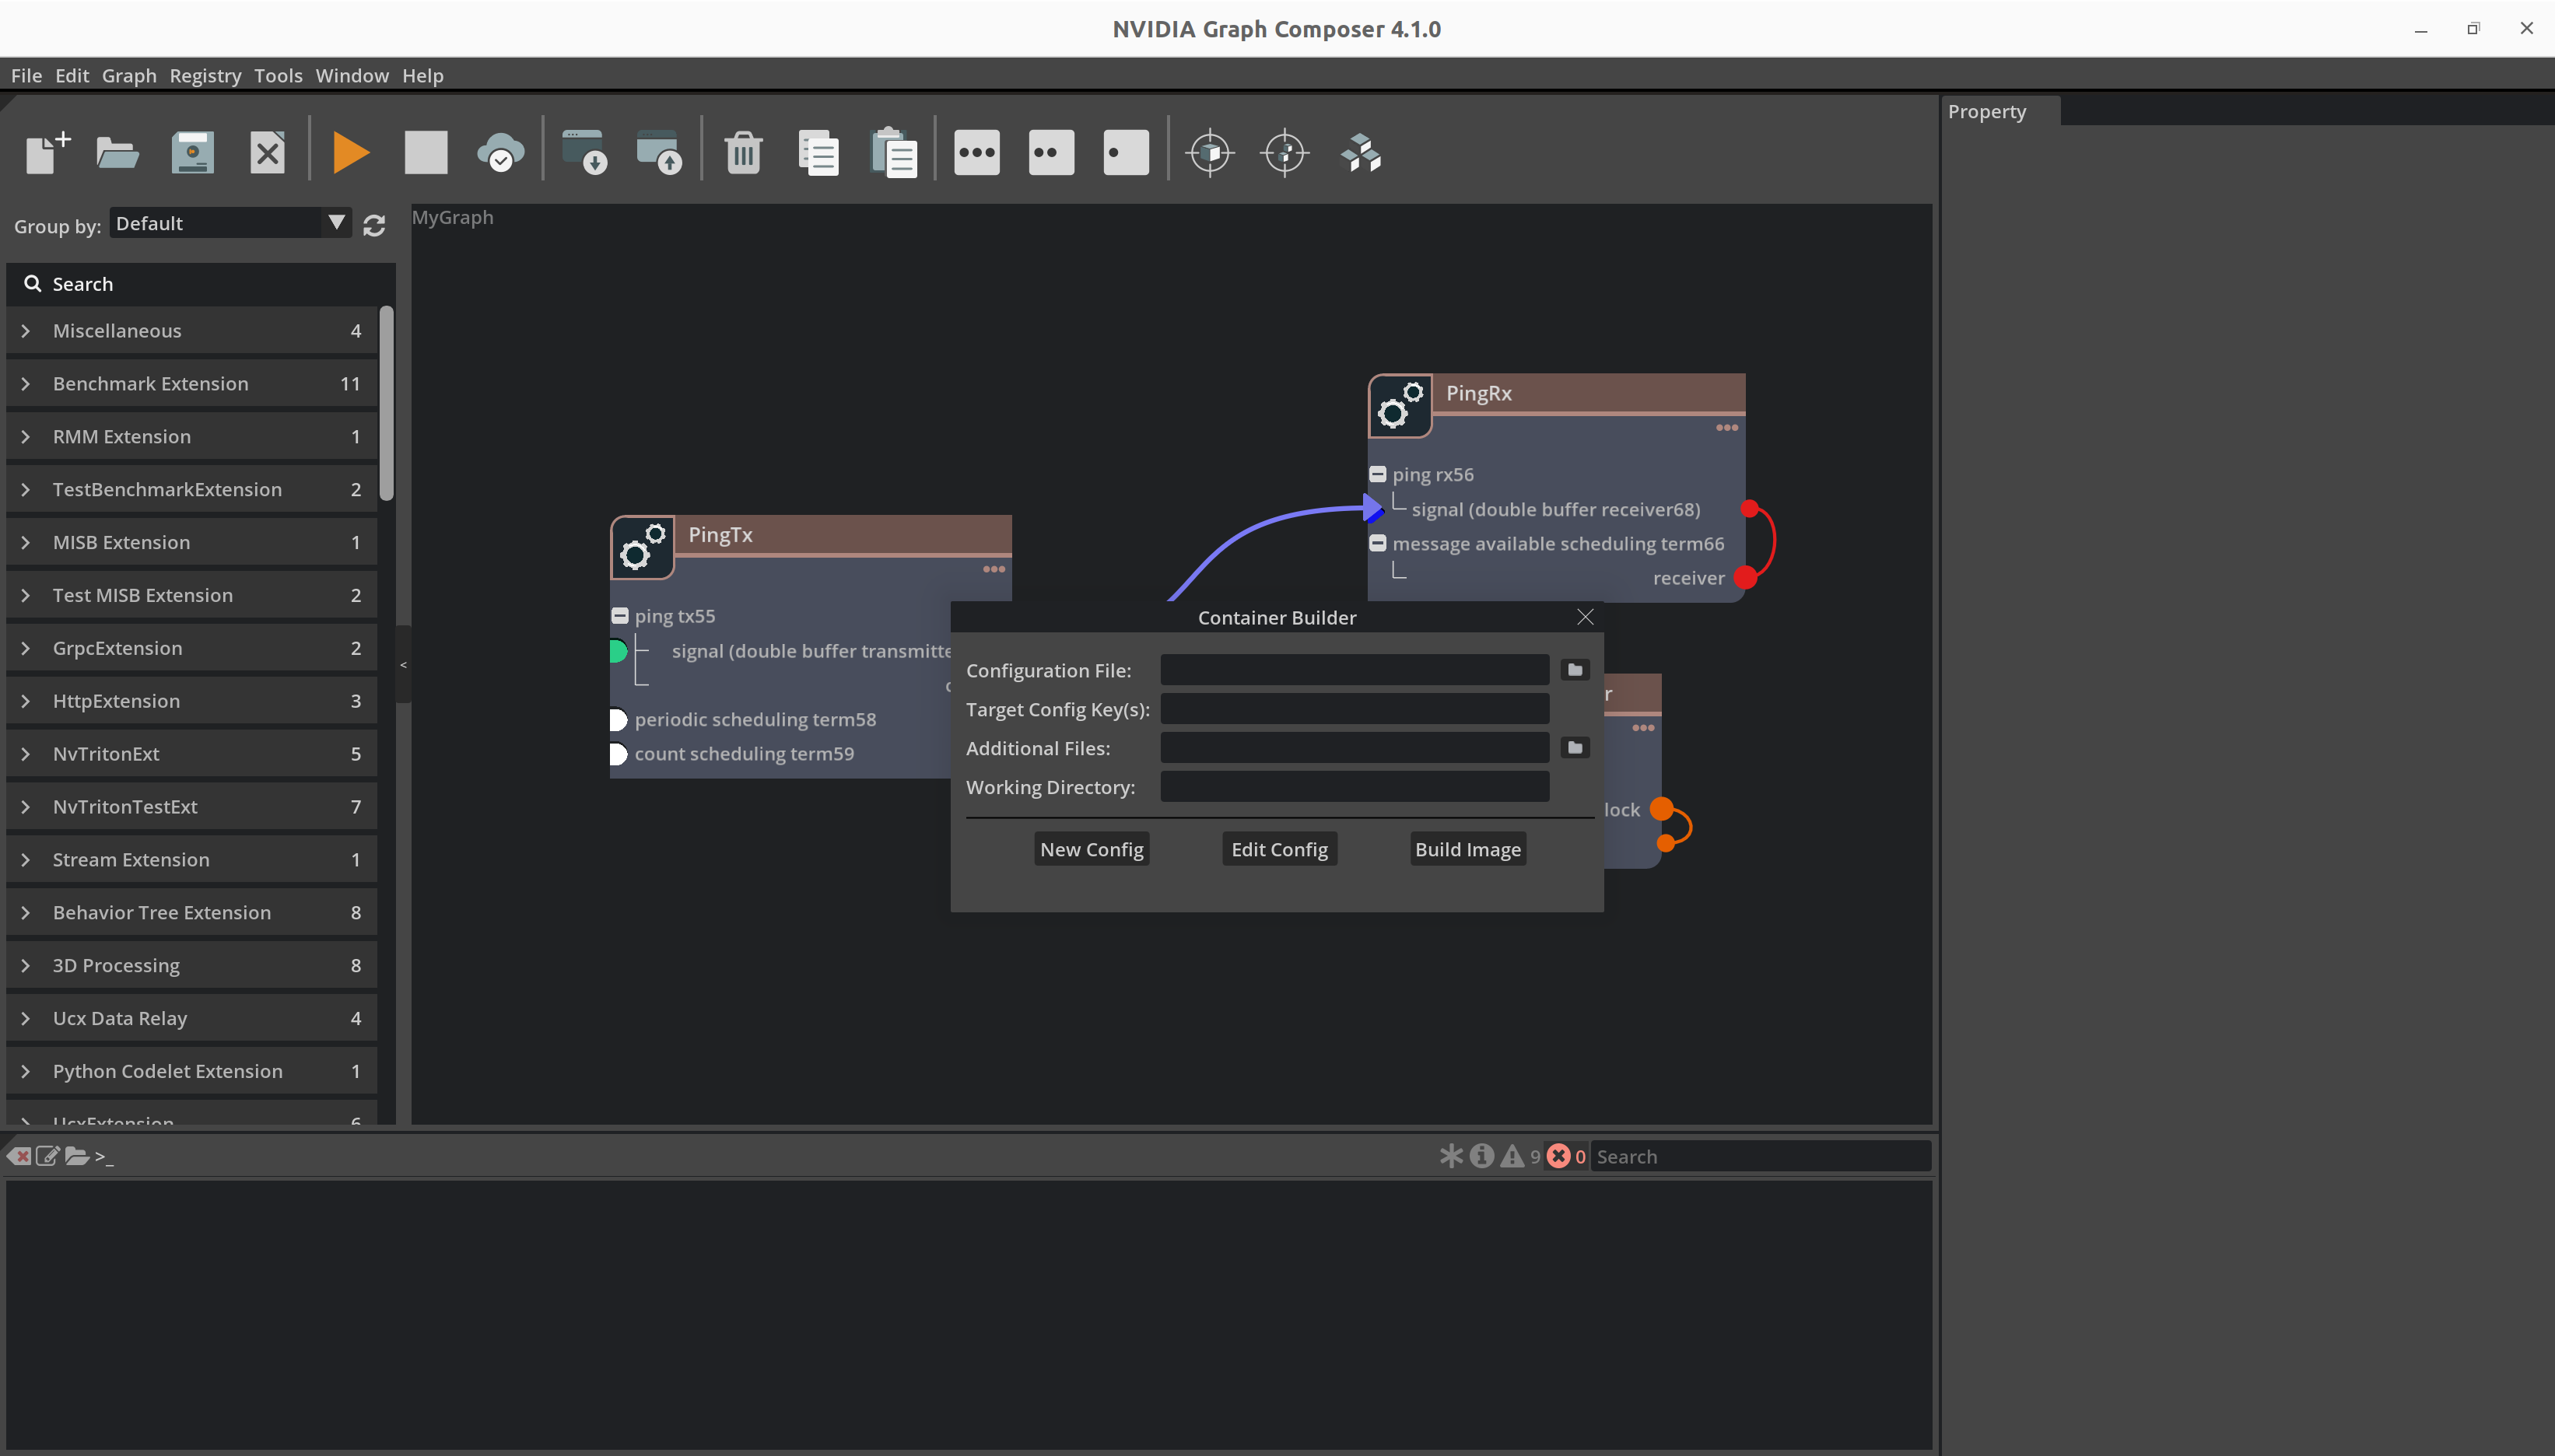
选择容器构建器配置文件并打开它。
单击
Platform config File输入旁边的按钮以启动文件浏览器。选择平台配置文件并打开它。
单击
Build以启动构建过程。Composer 使用进度条报告容器构建状态。
成功完成后,Composer 将显示成功消息。
远程系统 (Windows)#
通过 Windows 构建容器镜像与在 Linux 系统上构建容器镜像非常相似。
在“编辑/首选项”窗口的“服务器”选项卡中添加远程系统的 IP 地址和端口号。
要在远程系统上创建容器,请选择容器构建器配置文件和目标配置文件,然后单击 Build Image。
请注意,这需要在远程系统上安装 Graph Composer 包。
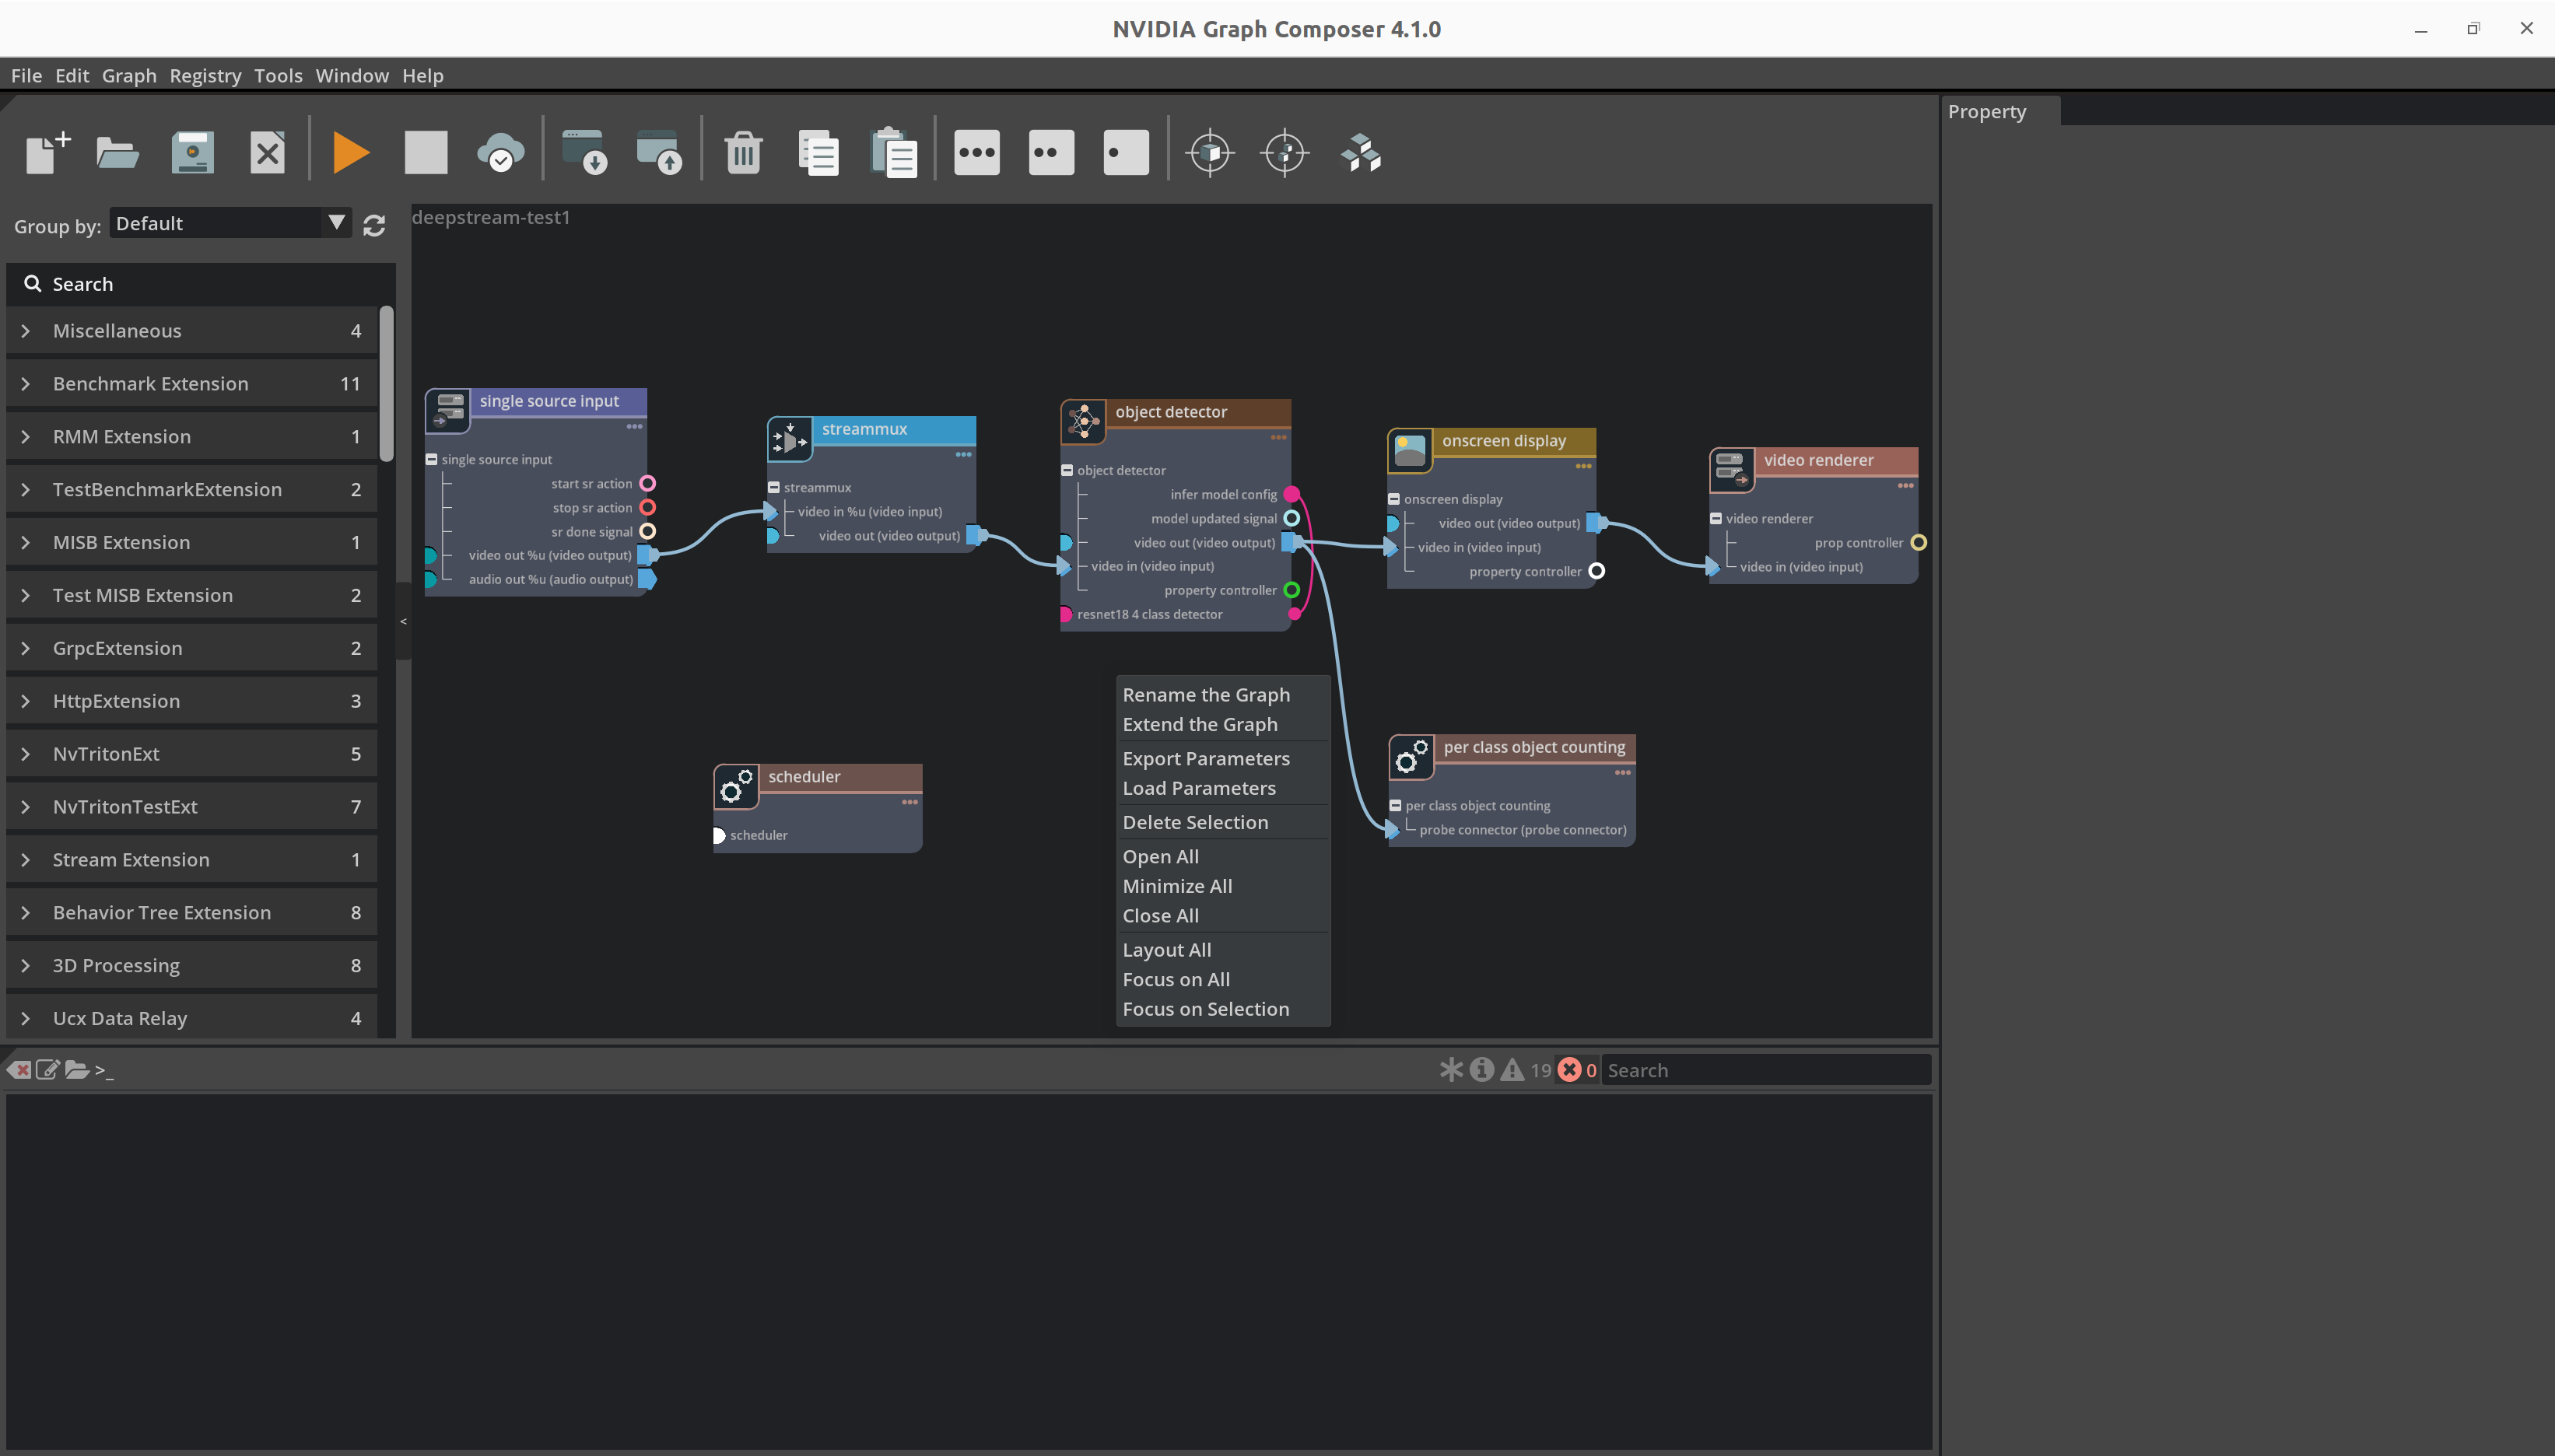
DeepStream 应用程序#
之前的应用程序是一个简单的演示应用程序工作流程。类似的工作流程可用于使用 GXF 创建、加载和运行 DeepStream 应用程序。它要求系统上安装了 DeepStream 7.1 和参考图包以及所有依赖项。
从顶部菜单栏中打开
File菜单,然后单击Open Graph以启动文件浏览器。您也可以使用Ctrl + O组合键。
浏览到有效的图文件,选择它,然后单击
Okay以打开图。
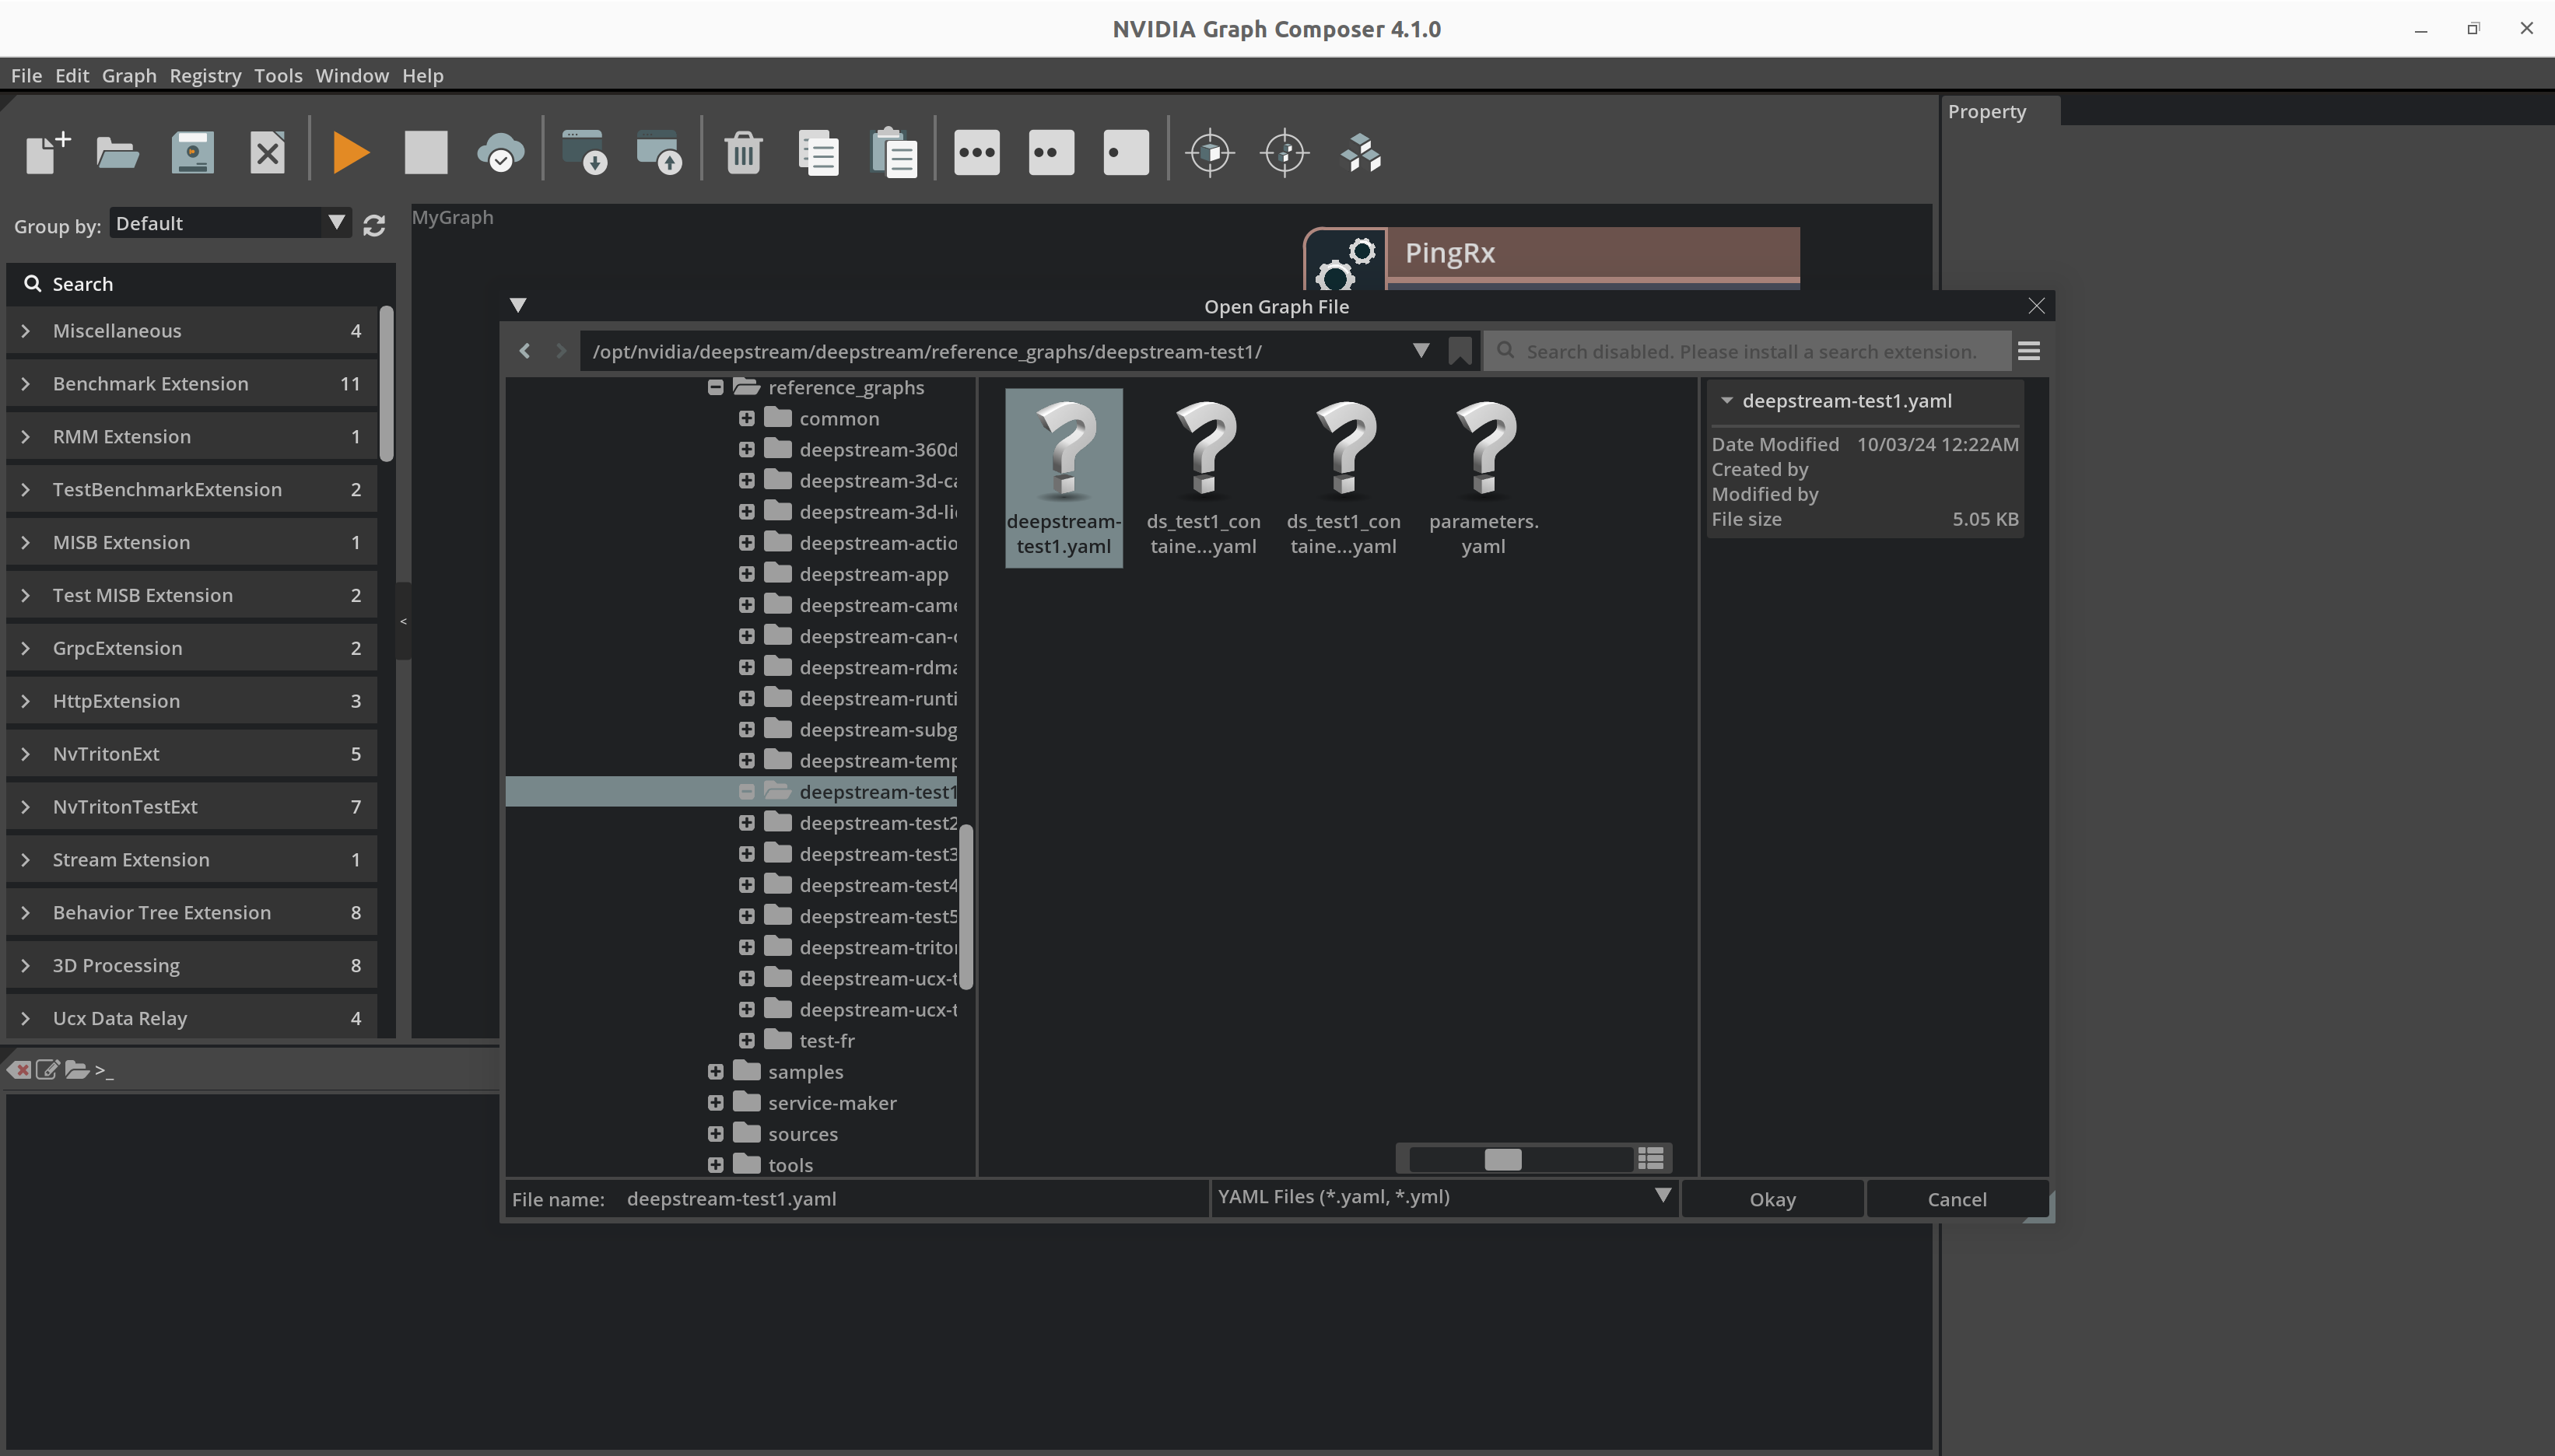
Composer 现在应该显示应用程序图。

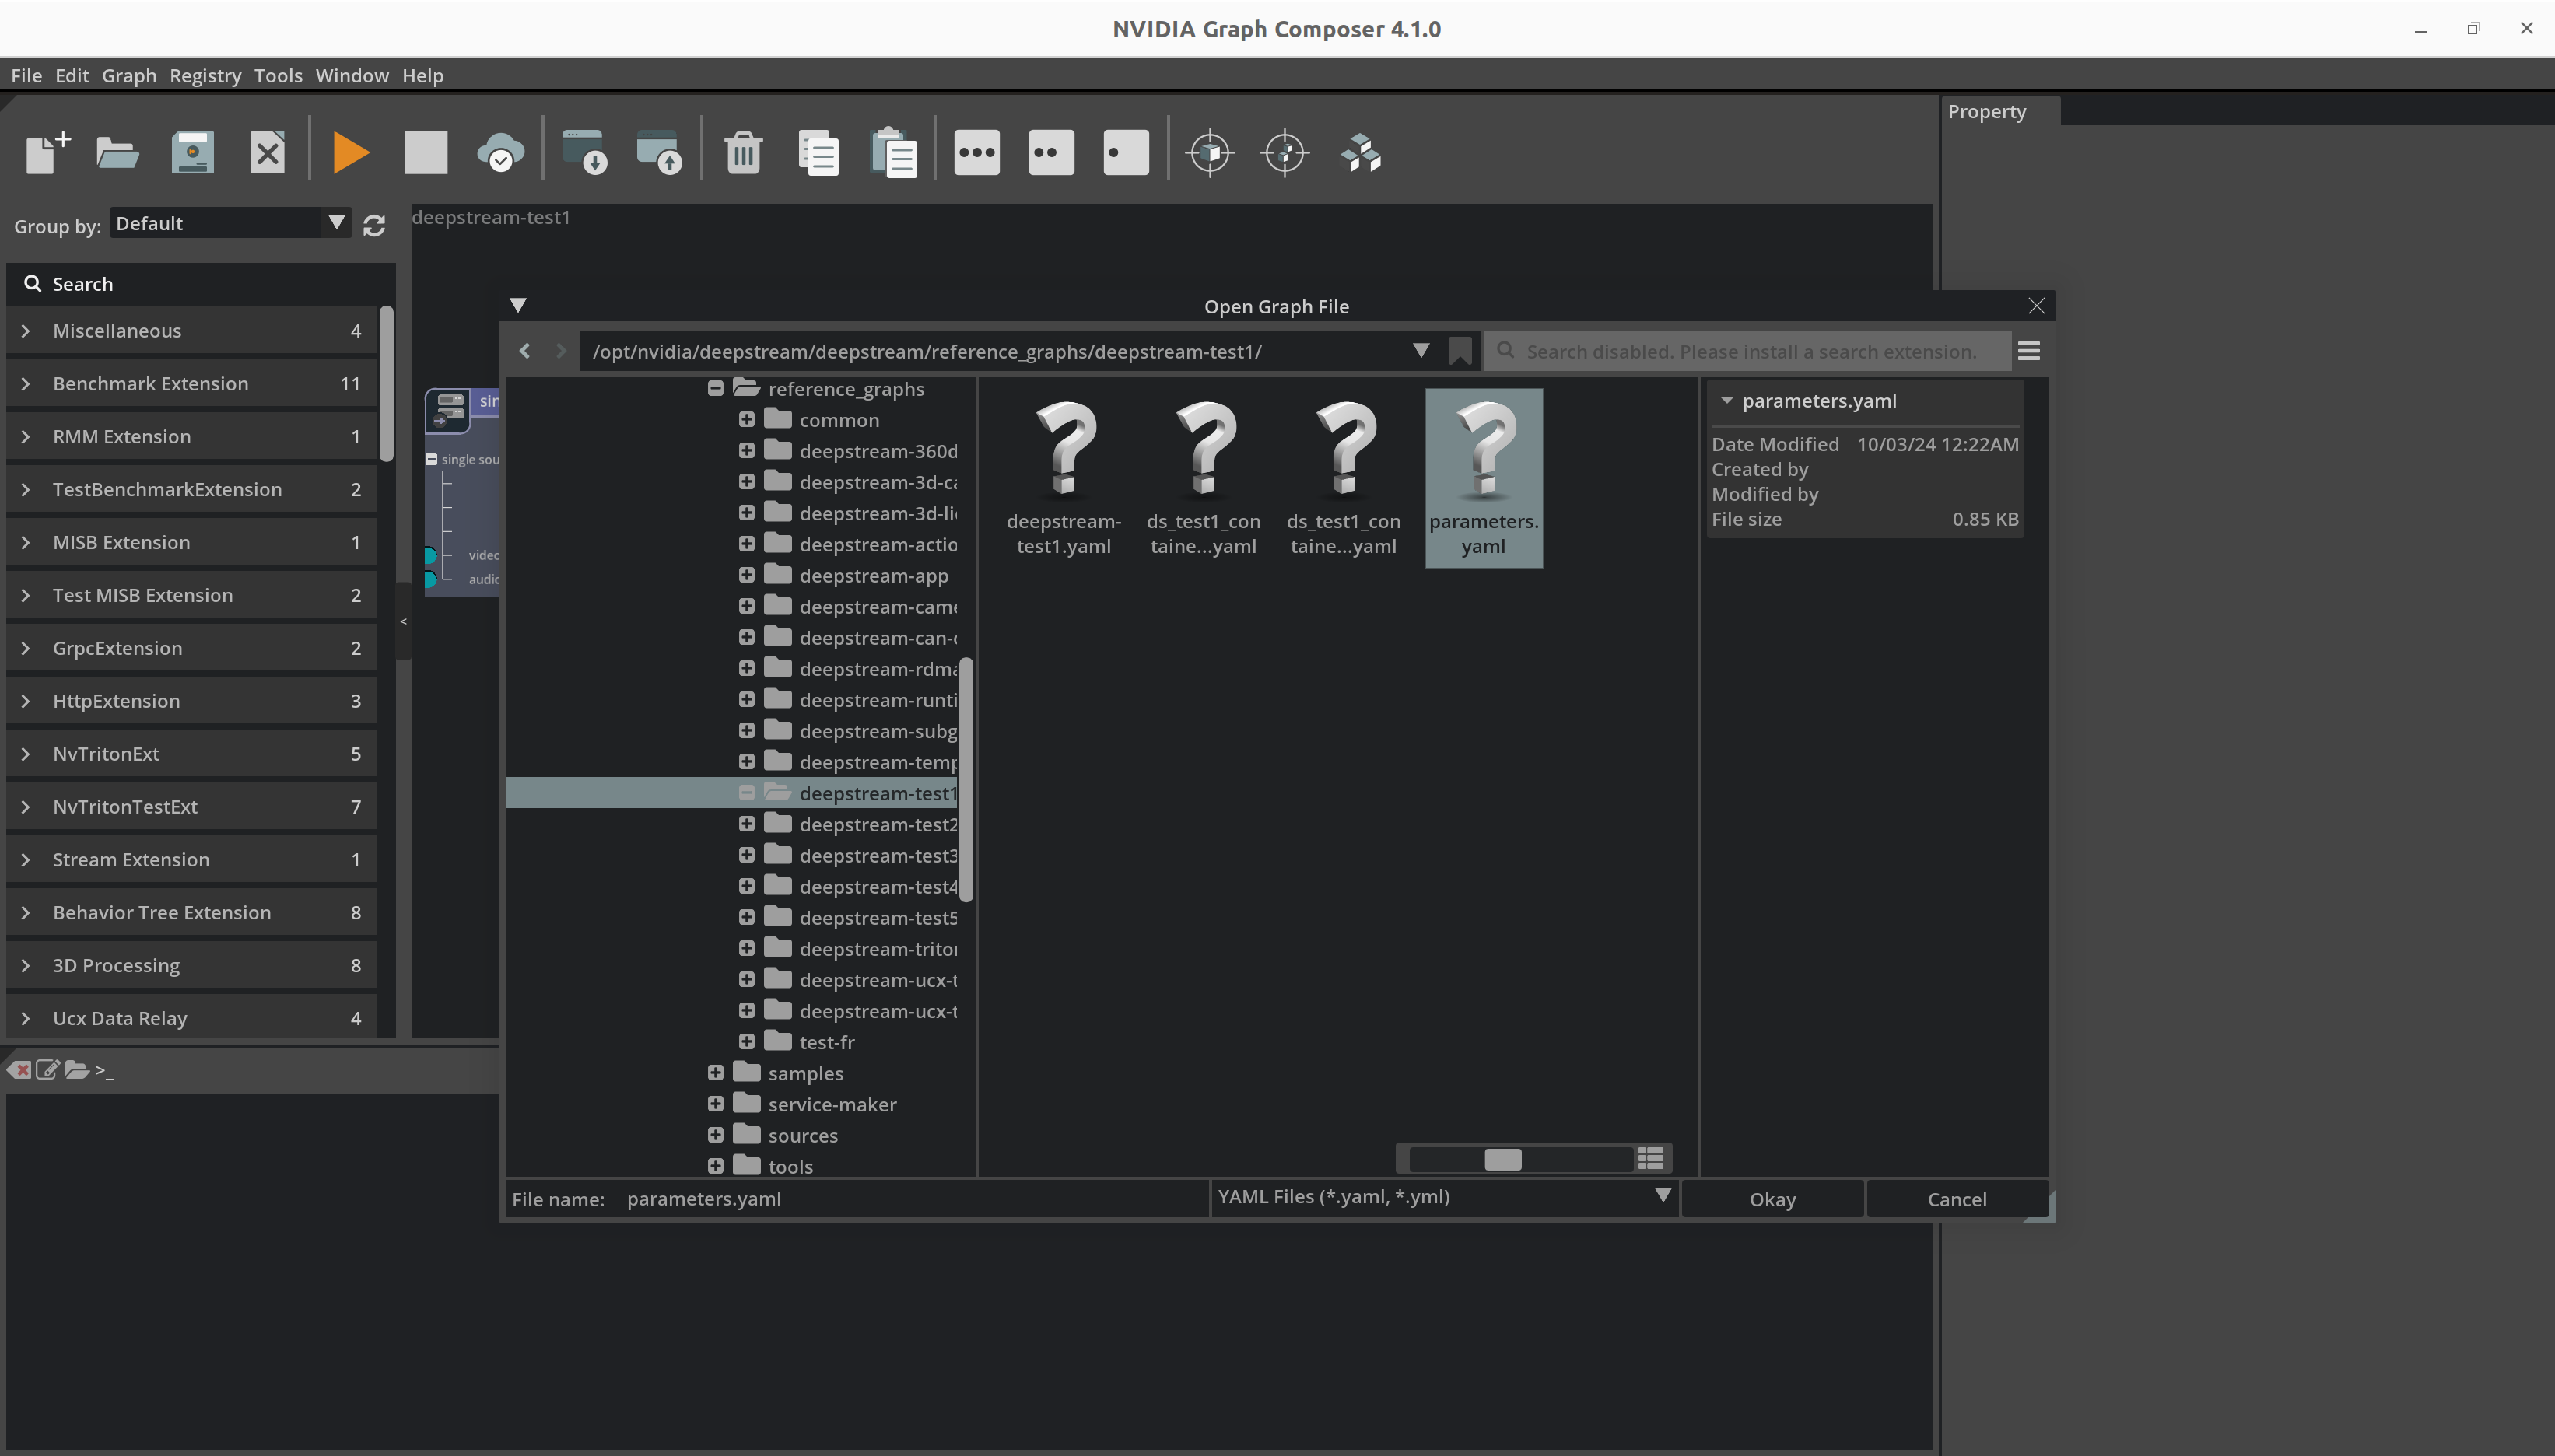
要从单独的文件加载组件参数,请右键单击图并从上下文菜单中选择
Load parameters以启动文件浏览器。
浏览到当前打开和可见的图的适当参数文件,选择它,然后单击
Okay以从文件加载参数值。
运行应用程序或构建容器镜像的其余步骤与之前演示的相同。