6. MLOps 集成示例#
在本节中,我们提供了在 DGX Cloud 集群上的 Run:ai 上部署 集成 的示例。这些示例需要管理员权限,如 管理员高级 Kubernetes 用法 章节中所述。但对于给定的 集成,非管理员用户也可以使用,具体情况已注明。
超出此处文档范围的其他 集成 也是可能的,只要它们可以部署在 dgxc-customer-app-admin-access 角色提供的能力范围内。
6.1. Argo Workflows 集成#
Argo Workflows 是一个工作流引擎,支持容器原生作业编排。它以 Kubernetes 自定义资源定义 (CRD) 的形式实现,可以作为 集成 部署到 DGX Cloud 集群中。
6.1.1. 先决条件和要求#
管理员已被授予 管理员高级 Kubernetes 用法 中记录的角色
任何将使用 Argo Workflows 的用户都必须分配研究员角色(L1 研究员、研究经理 或 L2 研究员),并有权访问目标 Run:ai 项目
任何将部署或使用 Argo Workflows 的管理员或用户都已遵循 访问 Run:ai CLI 中记录的
kubectl和runai工具安装过程已确定要使用的 Run:ai 项目命名空间(新的或现有的)
这应该是工作流计划运行的命名空间
6.1.2. 安装 Argo Workflows CLI#
要为您的版本安装 argo 命令行界面 (CLI) 工具(如果尚未安装),请导航到 Argo Workflow 发布页面 中的目标版本,并按照适用于您的工作站操作系统的说明进行操作。
运行命令 argo version 以确认您的安装和版本。以下是示例输出。
1argo: v3.5.11
2BuildDate: 2024-09-20T14:48:48Z
3GitCommit: 25bbb71cced32b671f9ad35f0ffd1f0ddb8226ee
4GitTreeState: clean
5GitTag: v3.5.11
6GoVersion: go1.21.13
7Compiler: gc
8Platform: darwin/amd64
6.1.3. 配置目标命名空间#
对于管理员和用户,配置一个包含您的目标命名空间的环境变量,用于所有特定于命名空间的命令。在后续使用您的命名空间时,它将作为命令的输入被引用。
NAMESPACE=your-namespace-here
6.1.4. 安装 Argo Workflows(仅限管理员)#
文档中描述的安装过程是命名空间安装,这将导致工作流只能在安装 Argo 的命名空间内运行。
首先,为目标 Argo Workflows 版本下载
namespace-install.yaml到您的工作站,以便将其配置为在 DGX Cloud 上安装。NVIDIA 建议使用版本v3.5.11。wget https://github.com/argoproj/argo-workflows/releases/download/v3.5.11/namespace-install.yaml在文本编辑器中打开
namespace-install.yaml文件。删除或注释掉argo-roleYAML 段中的以下行,以与 DGX Cloud 提供的功能保持一致。persistentvolumeclaims/finalizers
在
argo-roleYAML 段的底部,为 kubeflow 资源添加以下资源请求。此示例请求所有支持的 kubeflow 资源,但如果需要,可以限制为子集。1- apiGroups: 2 - kubeflow.org 3 resources: 4 - pytorchjobs 5 - mpijobs 6 - tfjobs 7 - xgboostjobs 8 verbs: 9 - get 10 - list 11 - create 12 - delete 13 - patch 14 - update
要将 Argo Workflows 安装到您的目标命名空间,请使用本地修改的
namespace-install.yaml文件运行以下命令。kubectl apply -n $NAMESPACE -f ./namespace-install.yaml
6.1.5. Argo Workflows 基本用法#
为了运行一些基本示例,我们可以利用 Argo Workflows GitHub 项目。这些示例可以由管理员或具有研究员角色并有权访问目标项目命名空间的用户运行。
首先,将存储库克隆到您的本地工作站,如下所示。
git clone https://github.com/argoproj/argo-workflows.git
必须修改所有工作流示例以使用作为 Argo Workflows 部署一部分创建的服务帐户。
6.1.5.1. Hello World#
将
hello-world.yaml示例复制到一个名为hello-world-runai.yaml的文件中。cp ./argo-workflows/examples/hello-world.yaml ./hello-world-runai.yaml
打开文件路径
./hello-world-runai.yaml并进行以下更改。将
serviceAccountName键和值添加到spec字典。除非 Argo Workflows 部署通过自定义服务帐户进行增强,否则该值将为argo。添加
schedulerName键,并将关联值设置为runai-scheduler。如果未指定,工作流将使用默认的 Kubernetes 调度器运行。管理员可以按照 将 Run:ai 设置为每个命名空间的默认调度器 下的指南调整此行为。修改后的文件内容如下所示。
 1apiVersion: argoproj.io/v1alpha1
 2kind: Workflow
 3metadata:
 4  generateName: hello-world-
 5  labels:
 6    workflows.argoproj.io/archive-strategy: "false"
 7  annotations:
 8    workflows.argoproj.io/description: |
 9      This is a simple hello world example.
10spec:
11  entrypoint: hello-world
12  serviceAccountName: argo
13  schedulerName: runai-scheduler
14  templates:
15  - name: hello-world
16    container:
17      image: busybox
18      command: [echo]
19      args: ["hello world"]
使用
argo submit提交 Hello World 示例,如下所示,Pending状态结果表示提交成功。1argo submit hello-world-runai.yaml -n $NAMESPACE 2Name: hello-world-9dqgn 3Namespace: your-namespace-here 4ServiceAccount: argo 5Status: Pending 6Created: Thu Oct 17 14:43:10 -0500 (now) 7Progress:
要列出提交到目标命名空间的所有工作流,请使用
argo list命令。1argo list -n $NAMESPACE 2NAME STATUS AGE DURATION PRIORITY MESSAGE 3hello-world-9dqgn Running 8s 8s 0
您可以使用
argo watch命令跟踪工作流的状态,直到它终止。下面显示了成功的结果。1argo watch hello-world-9dqgn -n $NAMESPACE 2Name: hello-world-9dqgn 3Namespace: your-namespace-here 4ServiceAccount: argo 5Status: Succeeded 6Conditions: 7PodRunning False 8Completed True 9Created: Thu Oct 17 14:43:10 -0500 (20 hours ago) 10Started: Thu Oct 17 14:43:10 -0500 (20 hours ago) 11Finished: Thu Oct 17 14:43:41 -0500 (20 hours ago) 12Duration: 31 seconds 13Progress: 1/1 14ResourcesDuration: 0s*(1 cpu),7s*(100Mi memory) 15 16STEP TEMPLATE PODNAME DURATION MESSAGE 17✔ hello-world-9dqgn hello-world hello-world-9dqgn 20s
6.1.5.2. Hello GPU#
要创建使用 NGC 容器并请求 GPU 资源的自定义工作流,请创建一个名为
hello-gpu-runai.yaml的文件,并在您喜欢的文本编辑器中打开它。添加以下内容。1apiVersion: argoproj.io/v1alpha1 2kind: Workflow 3metadata: 4 generateName: hello-gpu- 5 labels: 6 workflows.argoproj.io/archive-strategy: "false" 7 annotations: 8 workflows.argoproj.io/description: | 9 This is a hello world example using NGC containers and requesting GPU resources. 10spec: 11 schedulerName: runai-scheduler 12 entrypoint: hello-gpu 13 serviceAccountName: argo 14 templates: 15 - name: hello-gpu 16 container: 17 image: nvcr.io/nvidia/pytorch:24.09-py3 18 command: [nvidia-smi] 19 resources: 20 limits: 21 nvidia.com/gpu: 1
使用
argo submit提交 Hello GPU 示例,如下所示,Pending状态结果表示提交成功。1argo submit hello-gpu-runai.yaml -n $NAMESPACE 2Name: hello-gpu-d4lr6 3Namespace: your-namespace-here 4ServiceAccount: argo 5Status: Pending 6Created: Fri Oct 18 12:33:47 -0500 (now) 7Progress:
使用
argo watch命令跟踪工作流的状态直到终止。下面显示了成功的结果,为简洁起见,删除了中间状态。由于 NGC 容器拉取,此示例可能需要几分钟才能完成。1argo watch hello-gpu-d4lr6 -n $NAMESPACE 2Name: hello-gpu-d4lr6 3Namespace: your-namespace-here 4ServiceAccount: argo 5Status: Succeeded 6Conditions: 7PodRunning False 8Completed True 9Created: Fri Oct 18 12:33:47 -0500 (2 minutes ago) 10Started: Fri Oct 18 12:33:47 -0500 (2 minutes ago) 11Finished: Fri Oct 18 12:36:37 -0500 (now) 12Duration: 2 minutes 50 seconds 13Progress: 1/1 14ResourcesDuration: 14s*(1 cpu),40s*(10Gi ephemeral-storage),2m25s*(100Mi memory),2s*(1 nvidia.com/gpu) 15 16STEP TEMPLATE PODNAME DURATION MESSAGE 17✔ hello-gpu-d4lr6 hello-gpu hello-gpu-d4lr6 2m
要查看生成的
nvidia-smi输出,应使用argo log命令,如下所示。1argo logs hello-gpu-d4lr6 -n $NAMESPACE 2hello-gpu-d4lr6: Fri Oct 18 17:36:27 2024 3hello-gpu-d4lr6: +-----------------------------------------------------------------------------------------+ 4hello-gpu-d4lr6: | NVIDIA-SMI 550.90.07 Driver Version: 550.90.07 CUDA Version: 12.4 | 5hello-gpu-d4lr6: |-----------------------------------------+------------------------+----------------------+ 6hello-gpu-d4lr6: | GPU Name Persistence-M | Bus-Id Disp.A | Volatile Uncorr. ECC | 7hello-gpu-d4lr6: | Fan Temp Perf Pwr:Usage/Cap | Memory-Usage | GPU-Util Compute M. | 8hello-gpu-d4lr6: | | | MIG M. | 9hello-gpu-d4lr6: |=========================================+========================+======================| 10hello-gpu-d4lr6: | 0 NVIDIA H100 80GB HBM3 Off | 00000000:05:00.0 Off | 0 | 11hello-gpu-d4lr6: | N/A 32C P0 69W / 700W | 4MiB / 81559MiB | 0% Default | 12hello-gpu-d4lr6: | | | Disabled | 13hello-gpu-d4lr6: +-----------------------------------------+------------------------+----------------------+ 14hello-gpu-d4lr6: 15hello-gpu-d4lr6: +-----------------------------------------------------------------------------------------+ 16hello-gpu-d4lr6: | Processes: | 17hello-gpu-d4lr6: | GPU GI CI PID Type Process name GPU Memory | 18hello-gpu-d4lr6: | ID ID Usage | 19hello-gpu-d4lr6: |=========================================================================================| 20hello-gpu-d4lr6: | No running processes found | 21hello-gpu-d4lr6: +-----------------------------------------------------------------------------------------+ 22hello-gpu-d4lr6: time="2024-10-18T17:36:28.268Z" level=info msg="sub-process exited" argo=true error="<nil>"
6.1.6. 访问 Argo Workflows Web 界面#
Argo Workflows 还提供由 argo-server 服务集成的 Web 界面。
使用 kubectl describe service 命令验证 argo-server 服务是否正在运行,并记下
TargetPort值。1kubectl describe service argo-server -n $NAMESPACE 2Name: argo-server 3Namespace: your-namespace-here 4... 5Port: web 2746/TCP 6TargetPort: 2746/TCP 7...
要从您的工作站访问 argo-server,请使用 kubectl port-forward 命令,如果需要,请更新冒号前的
2746值以使用不同的本地端口。请注意,这将影响本节中所有以端口2746为目标的后续命令。此示例使用&在后台持久运行该命令。1kubectl port-forward service/argo-server 2746:2746 -n $NAMESPACE & 2[1] 23192 3Forwarding from 127.0.0.1:2746 -> 2746 4Forwarding from [::1]:2746 -> 2746
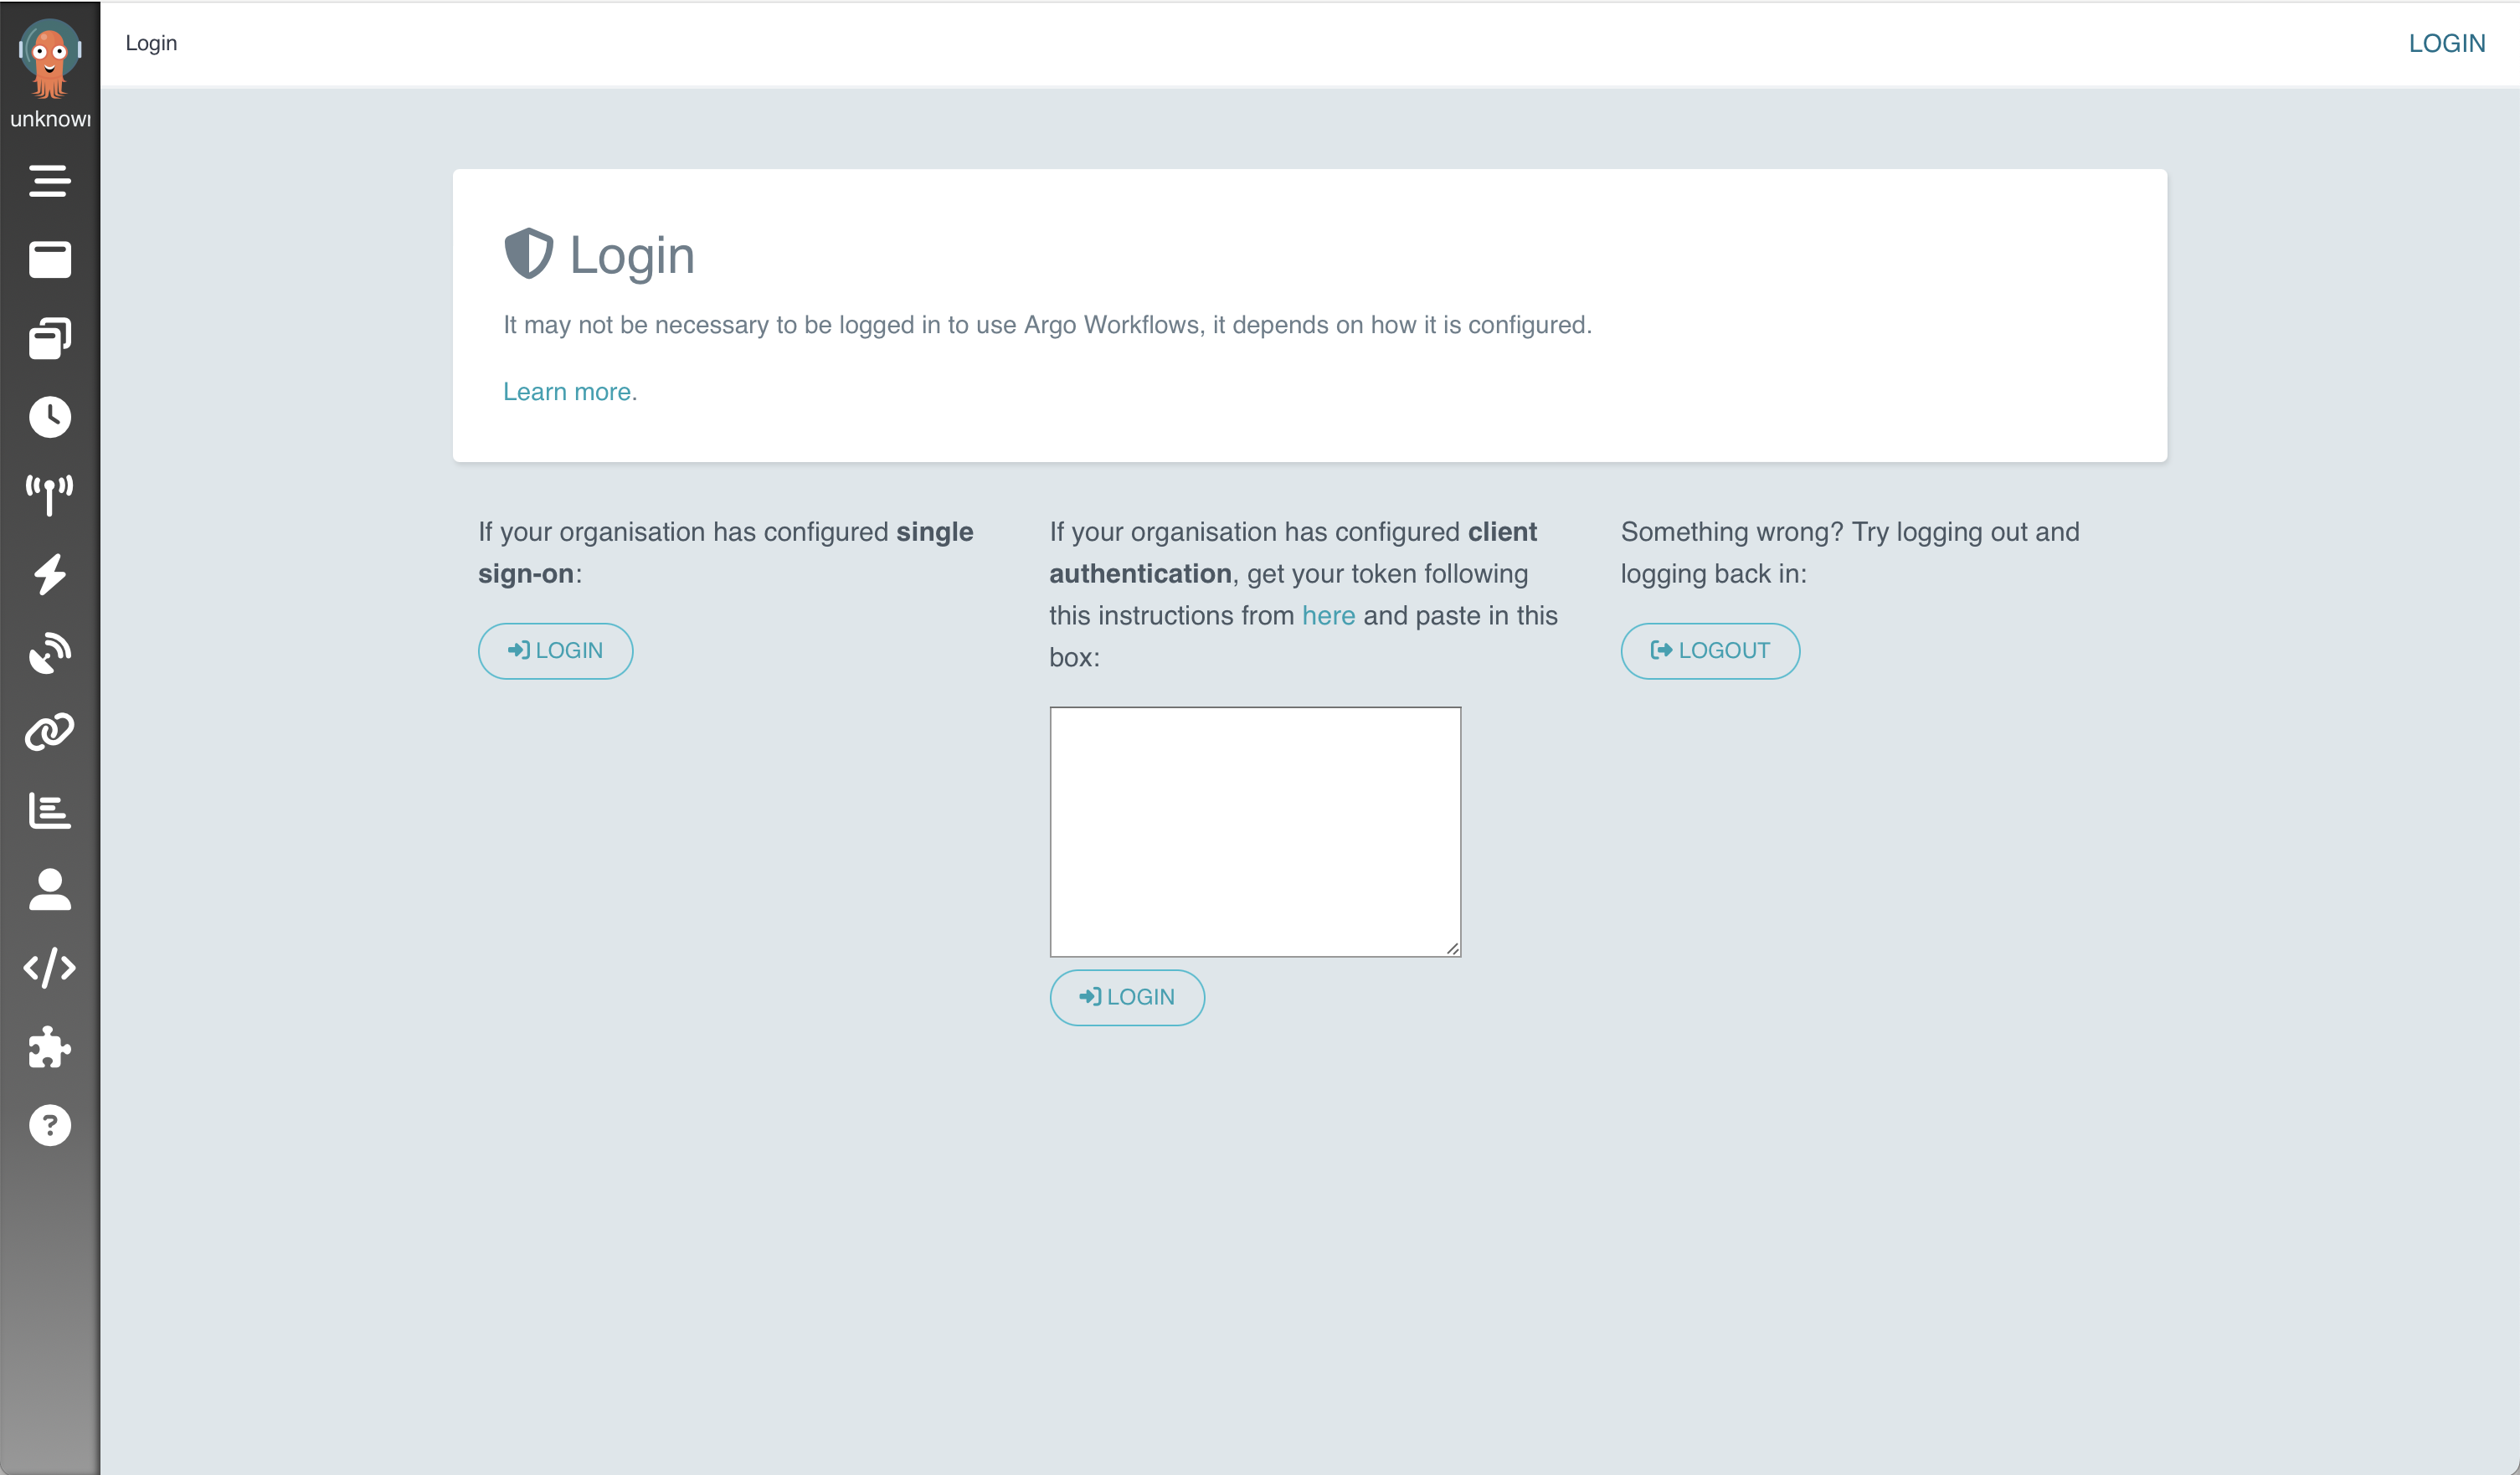
Argo Workflows Web 界面现在可以在 https://:2746 上访问。但是,必须使用持有者令牌进行身份验证才能继续进入登录屏幕。
通过使用 kubectl apply 创建密钥开始身份验证过程。将下面的整段文本作为单个命令提交。
1kubectl apply -n $NAMESPACE -f - <<EOF
2apiVersion: v1
3kind: Secret
4metadata:
5  name: gui-account-token
6  annotations:
7    kubernetes.io/service-account.name: argo-server
8type: kubernetes.io/service-account-token
9EOF
创建一个本地环境变量,其中包含 argo-server 要求的正确格式的持有者令牌。
ARGO_TOKEN="Bearer $(kubectl get secret gui-account-token -n $NAMESPACE -o=jsonpath='{.data.token}' | base64 --decode)"
通过以下 curl 命令使用生成的持有者令牌测试您与 argo-server 的身份验证。
curl -k "https://:2746/api/v1/workflows/$NAMESPACE" -H "Authorization: $ARGO_TOKEN"
如果身份验证成功,则生成的输出将非常长,并且结构上类似于以下示例。
{"metadata":{"resourceVersion":"153974789"},"items":[...]}
从
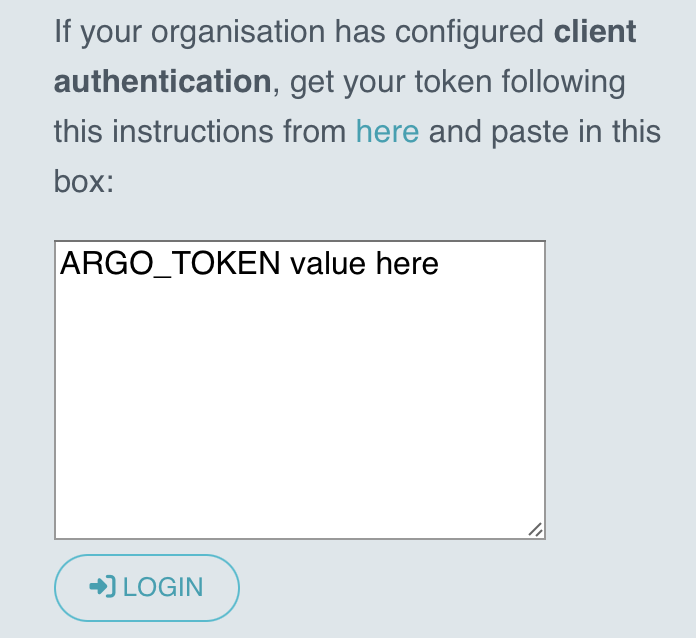
ARGO_TOKEN环境变量中获取输出,并将其插入 Argo Workflows Web 界面中心的 客户端身份验证 框中,使用 kubectl port-forward 命令时,可在 https://:2746 上访问。单击 登录 按钮以提交令牌。echo $ARGO_TOKEN
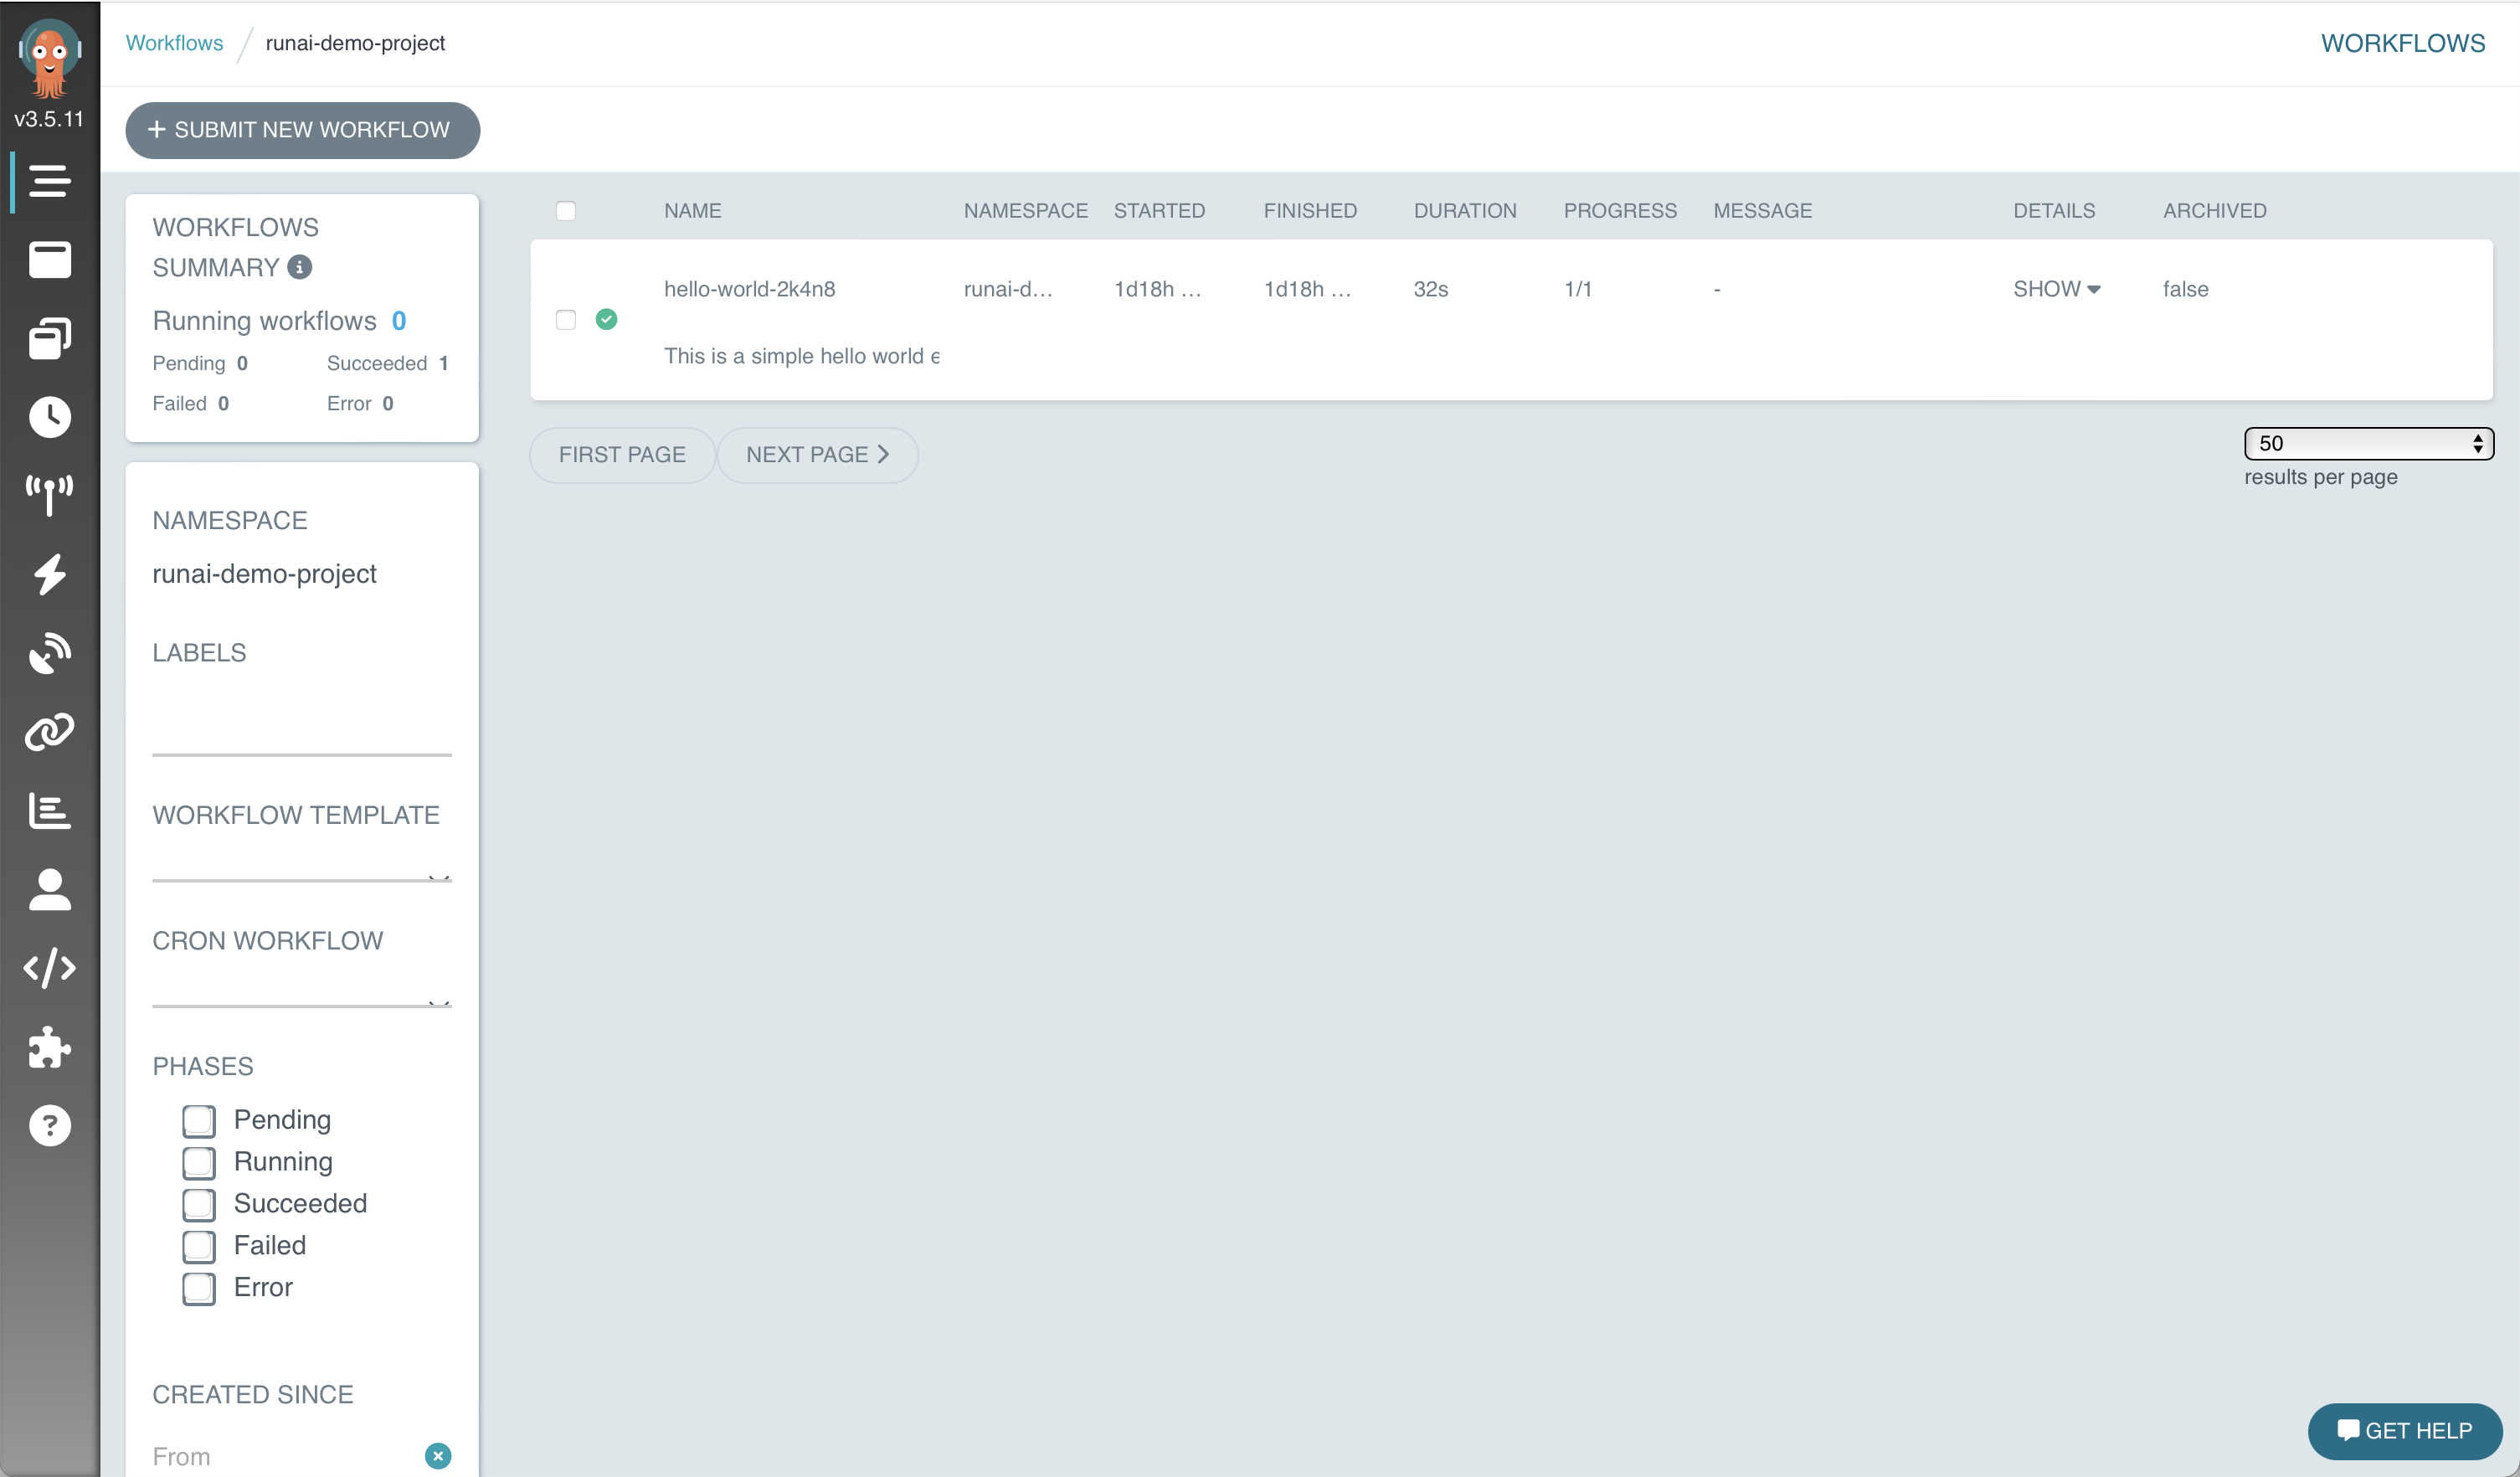
如果身份验证成功,您应该看到以下屏幕,现在可以通过 argo-server 服务提供的 Web 界面与 Argo Workflows 交互。
6.1.7. 清理#
要删除测试工作流,请为您要删除的每个工作流执行 argo delete。以下命令删除先前描述的两个工作流示例。
1argo delete hello-world-9dqgn -n $NAMESPACE
2argo delete hello-gpu-d4lr6 -n $NAMESPACE
要停止 Web 界面端口转发,请使用 ps 查找端口转发进程的进程号。
1ps | grep port-forward
230590 ttys000    0:00.01 grep port-forward
323192 ttys002    1:20.68 kubectl -n $NAMESPACE port-forward service/argo-server 2746:2746
在上面的示例中,该端口是 23192,因此使用 kill 停止该进程。
kill 23192
6.1.8. 后续步骤#
现在 Argo Workflows 集成 已在您的 DGX Cloud 集群中安装和验证,用户可以将 Argo Workflows 与 Nemo 端到端工作流示例 示例一起使用。
6.2. Ray 集群集成#
Ray 是一个开源统一框架,用于扩展 AI 和 Python 应用程序,如机器学习。它为并行处理提供计算层,因此您无需成为分布式系统专家。Ray 可以使用 KubeRay Operator 作为 Run:ai 的 集成。
有关更多信息,请参阅 Kubernetes 上的 Ray。
6.2.1. 先决条件和要求#
管理员已被授予 管理员高级 Kubernetes 用法 中记录的角色。
任何将使用 KubeRay 的用户都必须分配研究员角色(L1 研究员、研究经理 或 L2 研究员),并有权访问目标 Run:ai 项目。
任何将部署或使用 KubeRay 的管理员或用户都已遵循 访问 Run:ai CLI 中记录的
kubectl和runai工具安装过程。已确定要使用的 Run:ai 项目命名空间(新的或现有的)。
这应该是工作流计划运行的命名空间。
6.2.2. 部署 KubeRay Operator#
从 Helm 安装页面 安装 Helm CLI。
使用 Helm chart 存储库 部署 KubeRay Operator。
helm repo add kuberay https://ray-project.github.io/kuberay-helm/
helm repo update

# Install both CRDs and KubeRay operator v1.2.2.
helm install kuberay-operator kuberay/kuberay-operator --version 1.2.2

# Confirm that the operator is running your desired namespace
kubectl get pods
# NAME                                READY   STATUS    RESTARTS   AGE
# kuberay-operator-7fbdbf8c89-pt8bk   1/1     Running   0          27s
6.2.3. 部署 KubeRay 集群#
要将 KubeRay Operator 与 Run:ai 集成,您需要修改集群配置以使用 Run:ai 调度器。请按照以下步骤操作。
获取包含 GPU 资源的示例集群配置。
wget https://raw.githubusercontent.com/ray-project/ray/master/doc/source/cluster/kubernetes/configs/ray-cluster.gpu.yaml要在 Run:ai 中运行此配置,需要在与 Run:ai 项目关联的命名空间中运行。我们还必须修改配置并将调度器名称设置为 Run:ai。将
schedulerName: runai-scheduler添加到headGroupSpec.template.spec和workerGroupSpecs.template.spec。您的最终 YAML 文件应如下所示
apiVersion: ray.io/v1alpha1
kind: RayCluster
metadata:
labels:
   controller-tools.k8s.io: "1.0"
   # A unique identifier for the head node and workers of this cluster.
name: raycluster
spec:
# The version of Ray you are using. Make sure all Ray containers are running this version of Ray.
rayVersion: '2.2.0'
######################headGroupSpec#################################
# head group template and specs, (perhaps 'group' is not needed in the name)
headGroupSpec:
   # logical group name, for this called headgroup, also can be functional
   # pod type head or worker
   # rayNodeType: head # Not needed since it is under the headgroup
   # the following params are used to complete the ray start: ray start --head --block ...
   rayStartParams:
      dashboard-host: '0.0.0.0'
   #pod template
   template:
      spec:
         schedulerName: runai-scheduler
         containers:
         # The Ray head pod
         - name: ray-head
            image: rayproject/ray-ml:2.2.0-gpu
            lifecycle:
               preStop:
               exec:
                  command: ["/bin/sh","-c","ray stop"]
            resources:
               limits:
               cpu: "4"
               memory: "24G"
               requests:
               cpu: "4"
               memory: "12G"
workerGroupSpecs:
# the pod replicas in this group typed worker
- replicas: 1
   minReplicas: 1
   maxReplicas: 300
   # logical group name, for this called small-group, also can be functional
   groupName: small-group
   rayStartParams:
      num-gpus: "1"
   #pod template
   template:
      metadata:
      labels:
         key: value
      # annotations for pod
      annotations:
         key: value
      spec:
         schedulerName: runai-scheduler
         containers:
         - name: machine-learning # must consist of lower case alphanumeric characters or '-', and must start and end with an alphanumeric character (e.g. 'my-name',  or '123-abc'
            image: rayproject/ray-ml:2.2.0-gpu
            lifecycle:
               preStop:
               exec:
                  command: ["/bin/sh","-c","ray stop"]
            resources:
               limits:
               cpu: "8"
               memory: "24G"
               nvidia.com/gpu: 1
               requests:
               cpu: "4"
               memory: "12G"
               nvidia.com/gpu: 1
此配置现在可以部署到您的 Run:ai 集群上。运行以下命令以创建您的 Ray 集群。
kubectl apply -f ray-cluster.gpu.yaml

# Confirm your Ray cluster is starting
kubectl get pods
一旦您的 Ray 集群 Pod 启动,您就可以开始端口转发以查看 Ray 集群的仪表板。
kubectl port-forward services/raycluster-head-svc 8265:8265
6.2.4. 提交 Ray 作业#
现在您将能够在您的 Ray 集群上启动应用程序。
6.2.4.1. 在 Head Pod 中执行 Ray 作业#
试验 Ray 集群最直接的方法是使用 Kubernetes 直接 exec 进入 Head Pod。
确定您的 Ray 集群的 Head Pod,并使用 kubectl exec 在您的 Head Pod 中执行命令。
export HEAD_POD=$(kubectl get pods --selector=ray.io/node-type=head -o custom-columns=POD:metadata.name --no-headers)
echo $HEAD_POD
# raycluster-kuberay-head-vkj4n

# Print the cluster resources.
kubectl exec -it $HEAD_POD -- python -c "import ray; ray.init(); print(ray.cluster_resources())"

# 2023-04-07 10:57:46,472 INFO worker.py:1243 -- Using address 127.0.0.1:6379 set in the environment variable RAY_ADDRESS
# 2023-04-07 10:57:46,472 INFO worker.py:1364 -- Connecting to existing Ray cluster at address: 10.244.0.6:6379...
# 2023-04-07 10:57:46,482 INFO worker.py:1550 -- Connected to Ray cluster. View the dashboard at http://10.244.0.6:8265
# {'object_store_memory': 802572287.0, 'memory': 3000000000.0, 'node:10.244.0.6': 1.0, 'CPU': 2.0, 'node:10.244.0.7': 1.0}
6.2.4.2. 通过 Ray Job Submission SDK 向 Ray 集群提交 Ray 作业#
使用先前创建的端口转发,我们能够将 Ray 作业提交到正在端口 8265 上侦听的 Ray 仪表板。您可以使用 Ray Job CLI 提交作业。
ray job submit --address https://:8265 -- python -c "import ray; ray.init(); print(ray.cluster_resources())"
6.2.5. 清理#
使用以下命令删除您的 Ray 集群和 KubeRay
kubectl delete raycluster raycluster

# Please make sure the ray cluster has already been removed before delete the operator.
helm uninstall kuberay-operator