nvImageCodec 与 cuPy#
[1]:
import os
import cv2
import cupy as cp
from matplotlib import pyplot as plt
设置资源文件夹
[2]:
resources_dir = os.getenv("PYNVIMGCODEC_EXAMPLES_RESOURCES_DIR", "../assets/images/")
导入 nvImageCodec 模块并创建解码器和编码器
[3]:
from nvidia import nvimgcodec
decoder = nvimgcodec.Decoder()
encoder = nvimgcodec.Encoder()
使用 nvImageCodec 加载 jpeg2000 图像
[4]:
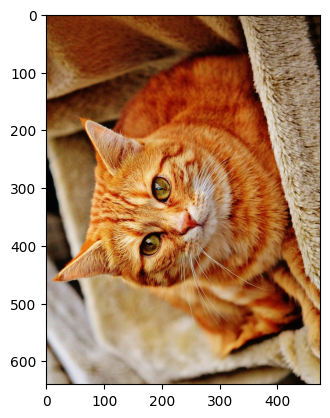
nv_img = decoder.read(resources_dir + "cat-1046544_640.jp2")
print(nv_img.__cuda_array_interface__)
{'shape': (475, 640, 3), 'strides': None, 'typestr': '|u1', 'data': (12918456320, False), 'version': 3, 'stream': 1}
将 nvImageCodec 图像传递给 cupy asarray,因为它接受 __cuda_array_interface__
[5]:
%%time
cp_img = cp.asarray(nv_img)
print(cp_img.__cuda_array_interface__)
{'shape': (475, 640, 3), 'typestr': '|u1', 'descr': [('', '|u1')], 'stream': 1, 'version': 3, 'strides': None, 'data': (12918456320, False)}
CPU times: user 796 µs, sys: 716 µs, total: 1.51 ms
Wall time: 1.26 ms
转换为 numpy 并显示
[6]:
np_img4k = cp.asnumpy(cp_img)
plt.imshow(np_img4k)
[6]:
<matplotlib.image.AxesImage at 0x7f55c4f97fa0>

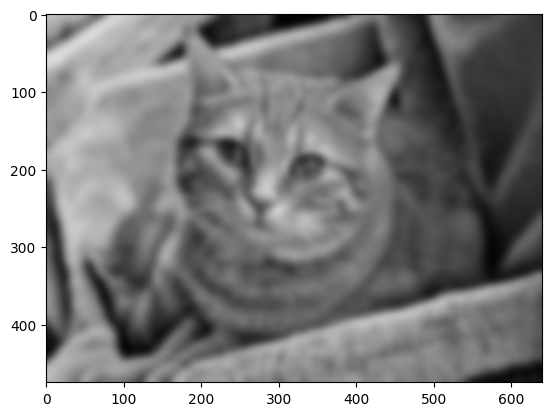
让我们在 GPU 上使用 cupyx.scipy 对图像进行一些操作
[7]:
import cupyx.scipy.ndimage
[8]:
cp_img_rotated = cupyx.scipy.ndimage.rotate(cp_img, 90)
cp_img_gaussian = cupyx.scipy.ndimage.gaussian_filter(cp_img, sigma = 5)

print(cp_img_rotated.__cuda_array_interface__)
{'shape': (640, 475, 3), 'typestr': '|u1', 'descr': [('', '|u1')], 'stream': 1, 'version': 3, 'strides': None, 'data': (140001566883840, False)}
[9]:
np_img = cp.asnumpy(cp_img_rotated)
plt.imshow(np_img)
[9]:
<matplotlib.image.AxesImage at 0x7f55b748de20>

[10]:
np_img = cp.asnumpy(cp_img_gaussian)
plt.imshow(np_img)
[10]:
<matplotlib.image.AxesImage at 0x7f55b740dee0>

使用 __cuda_array_interface__ 将 cupy 图像转换为 nvImageCodec 图像
[11]:
%%time
nv_rotated_img = nvimgcodec.as_image(cp_img_rotated)
CPU times: user 43 µs, sys: 29 µs, total: 72 µs
Wall time: 76.1 µs
检查内容
[12]:
plt.imshow(nv_rotated_img.cpu())
[12]:
<matplotlib.image.AxesImage at 0x7f55b738b820>
保存为 Jpeg2000
[13]:
encoder.write("rotated.j2k", nv_rotated_img)
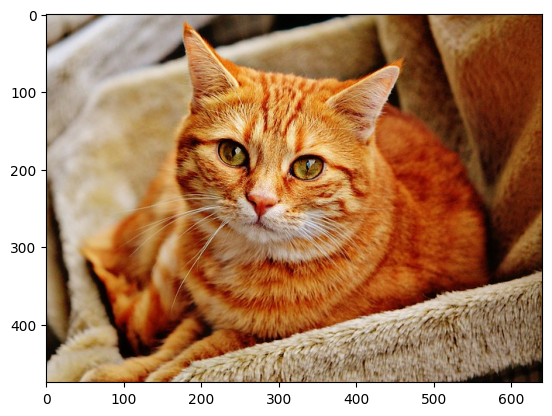
使用 OpenCV 加载以验证
[14]:
image = cv2.imread("rotated.j2k")
image = cv2.cvtColor(image, cv2.COLOR_BGR2RGB)
plt.imshow(image)
[14]:
<matplotlib.image.AxesImage at 0x7f55b72fd5e0>

使用 nvImageCodec 将 cupy 图像保存为 jpg
[15]:
nv_img_gaussian = nvimgcodec.as_image(cp_img_gaussian)
encoder.write("gaussian.jpg", nv_img_gaussian)
使用 OpenCV 重新读取以验证
[16]:
image = cv2.imread("gaussian.jpg")
image = cv2.cvtColor(image, cv2.COLOR_BGR2RGB)
plt.imshow(image)
[16]:
<matplotlib.image.AxesImage at 0x7f55b7270f40>
DLPack#
使用 DLPack 将 cuPy ndarray 传递给 nvImageCodec。cuPy ndarray 同时具有 __cuda_array_interface__ 和 __dlpack__ 接口。默认情况下,当我们使用 as_image 函数将 cuPy ndarray 传递给 nvImageCodec 时,将首选 __cuda_array_interface__ 并使用它。如果我们想使用 DLPack,首先需要从 cuPy ndarray 中获取 PyCapsule,然后将其传递给 nvImageCodec。
[17]:
dlpack_img = cp_img_gaussian.toDlpack()
nv_img_gaussian = nvimgcodec.as_image(dlpack_img)
encoder.write("gaussian_dlpack.jpg", nv_img_gaussian)
[18]:
image = cv2.imread("gaussian_dlpack.jpg")
image = cv2.cvtColor(image, cv2.COLOR_BGR2RGB)
plt.imshow(image)
[18]:
<matplotlib.image.AxesImage at 0x7f55b71e9c70>

使用 DLPack 将 nvImageCodec 图像传递给 cuPy
[19]:
nv_img = decoder.read(resources_dir + "cat-1046544_640.jp2")
cp_img = cp.from_dlpack(nv_img)
[20]:
np_img = cp.asnumpy(cp_img)
plt.imshow(np_img)
[20]:
<matplotlib.image.AxesImage at 0x7f55b71e44c0>
或者,可以先获取 PyCapsule,然后将其传递给 cuPy
[21]:
nv_img = decoder.read(resources_dir + "cat-1046544_640.jp2")
py_cap = nv_img.__dlpack__()
cp_img = cp.from_dlpack(py_cap)
[22]:
np_img = cp.asnumpy(cp_img)
plt.imshow(np_img4k)
[22]:
<matplotlib.image.AxesImage at 0x7f55b7159310>
