步骤 #2:选择资源
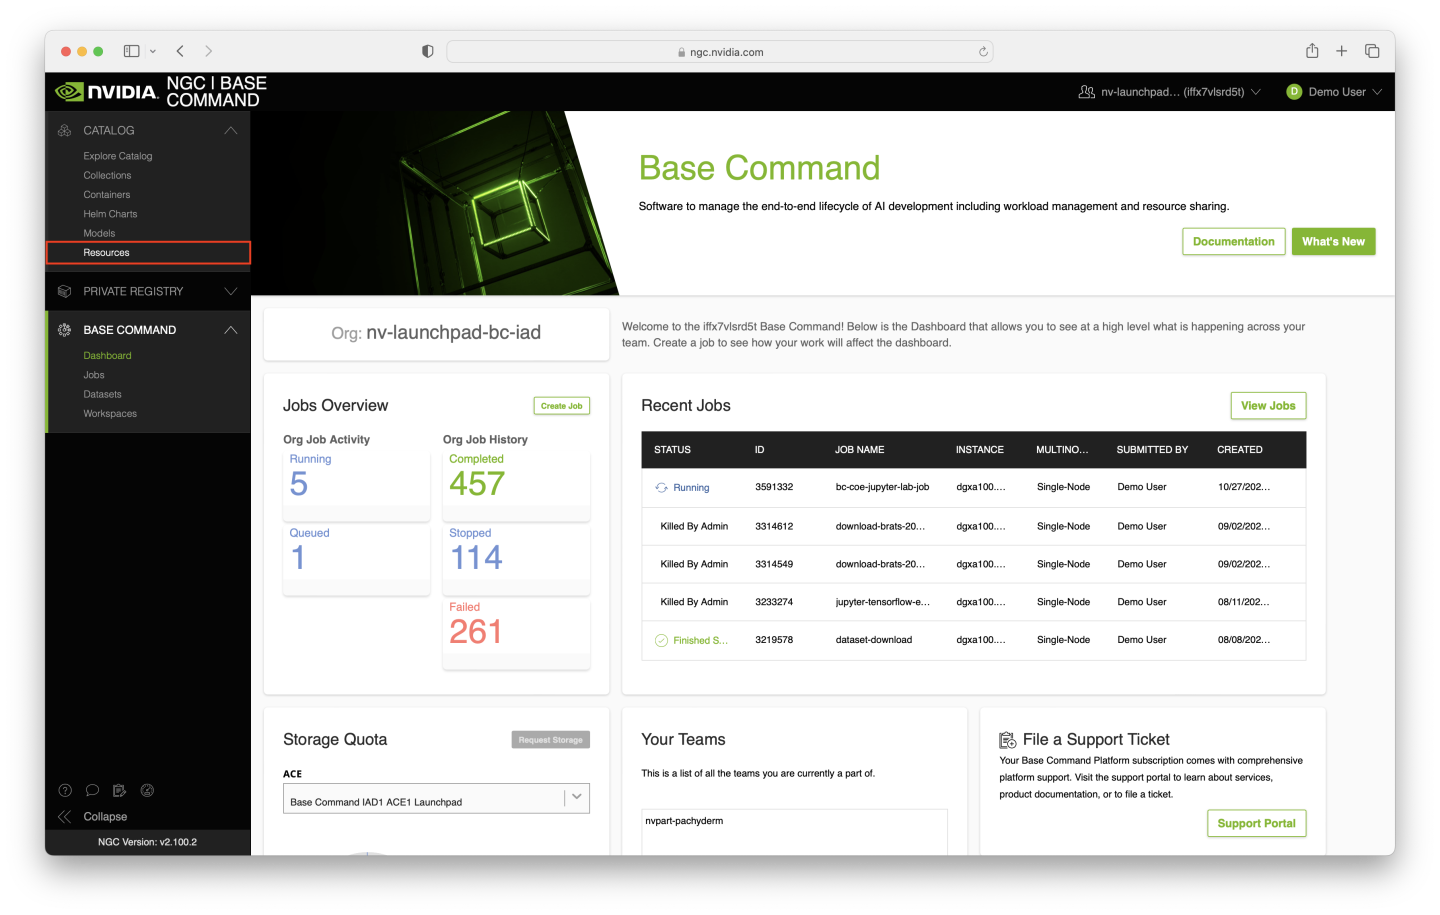
要选择资源,我们首先需要使用左侧导航窗格导航到 NGC Catalog 的 Resources 页面。

进入 Resources 页面后,您可能会注意到有很多资源可供选择,内容类型各异 - 代码、模型,以及目前为了我们的目的,Jupyter Notebooks。
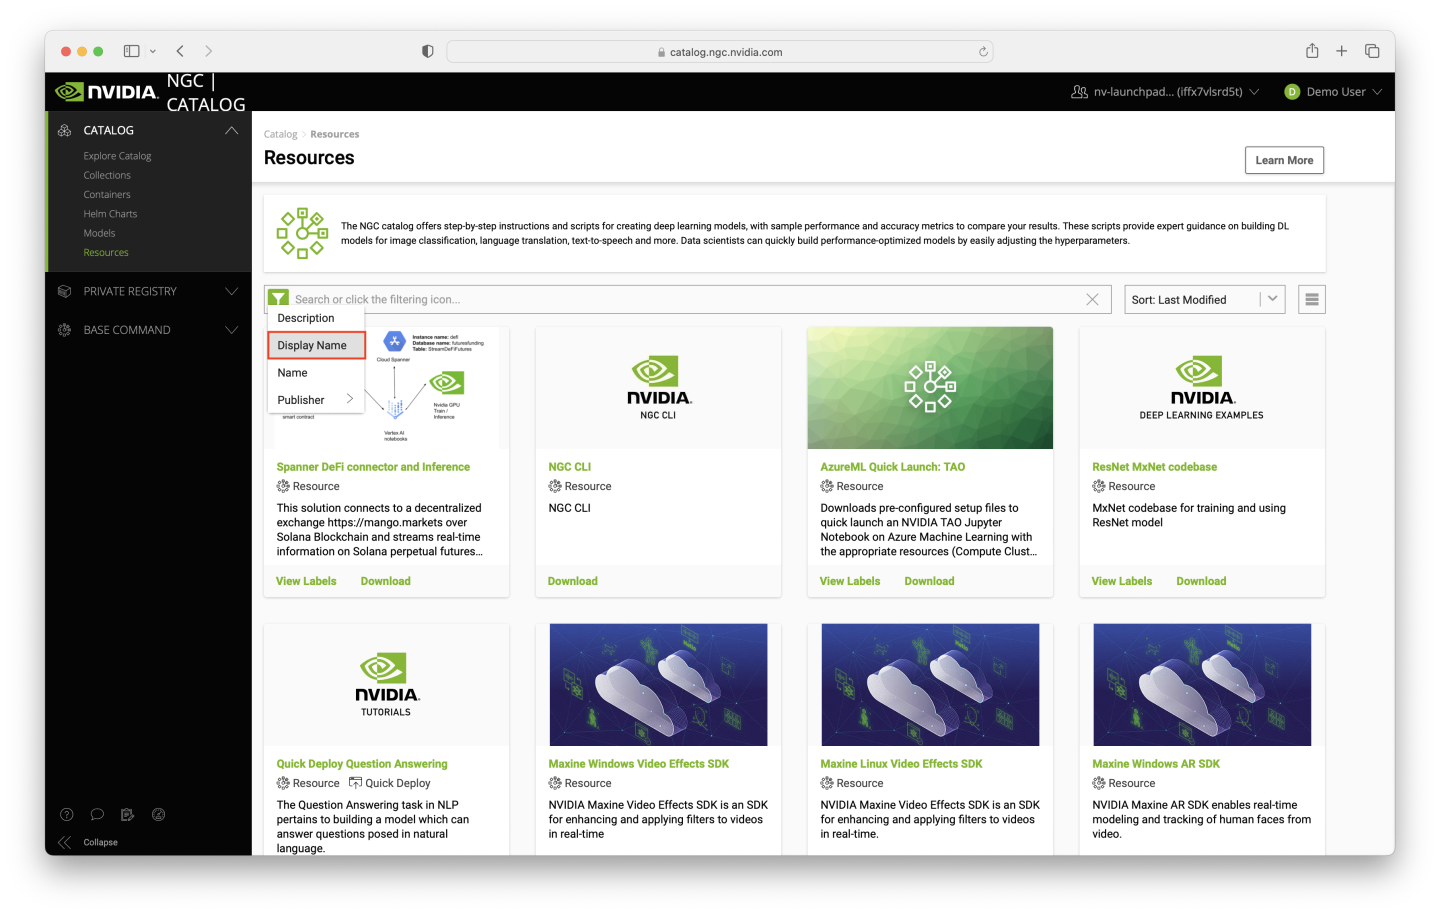
为了更好地筛选我们想要查找的内容,请单击 Resource 页面搜索框左侧的 Filter 图标,然后选择 Display Name。

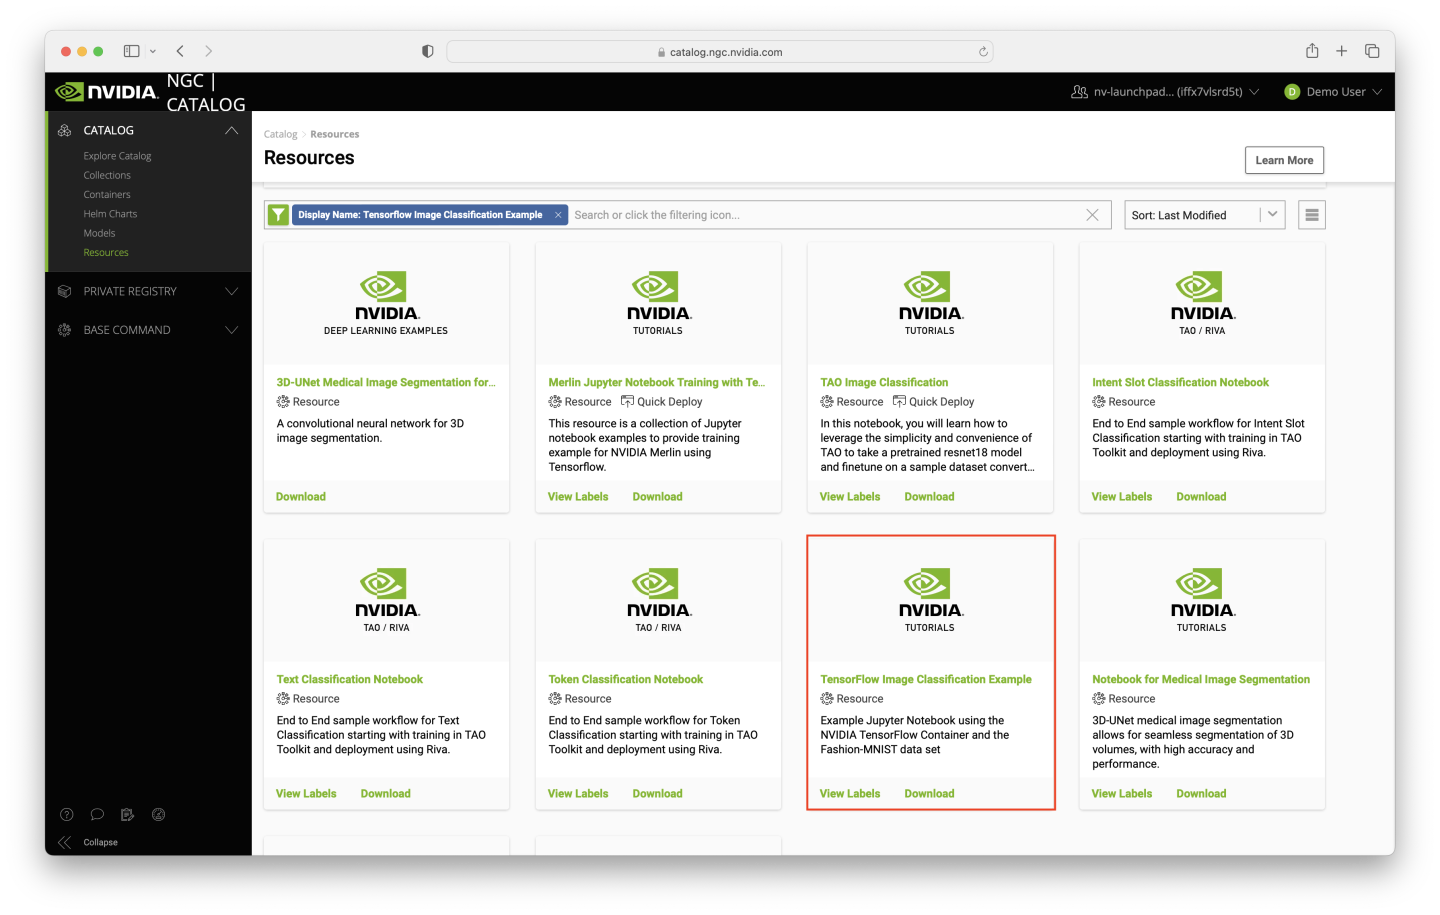
在新的 Display Name 搜索字段中,输入 Tensorflow Image Classification Example,然后按 Enter 键。
选择与您刚刚输入的搜索文本完全匹配的 Resource。

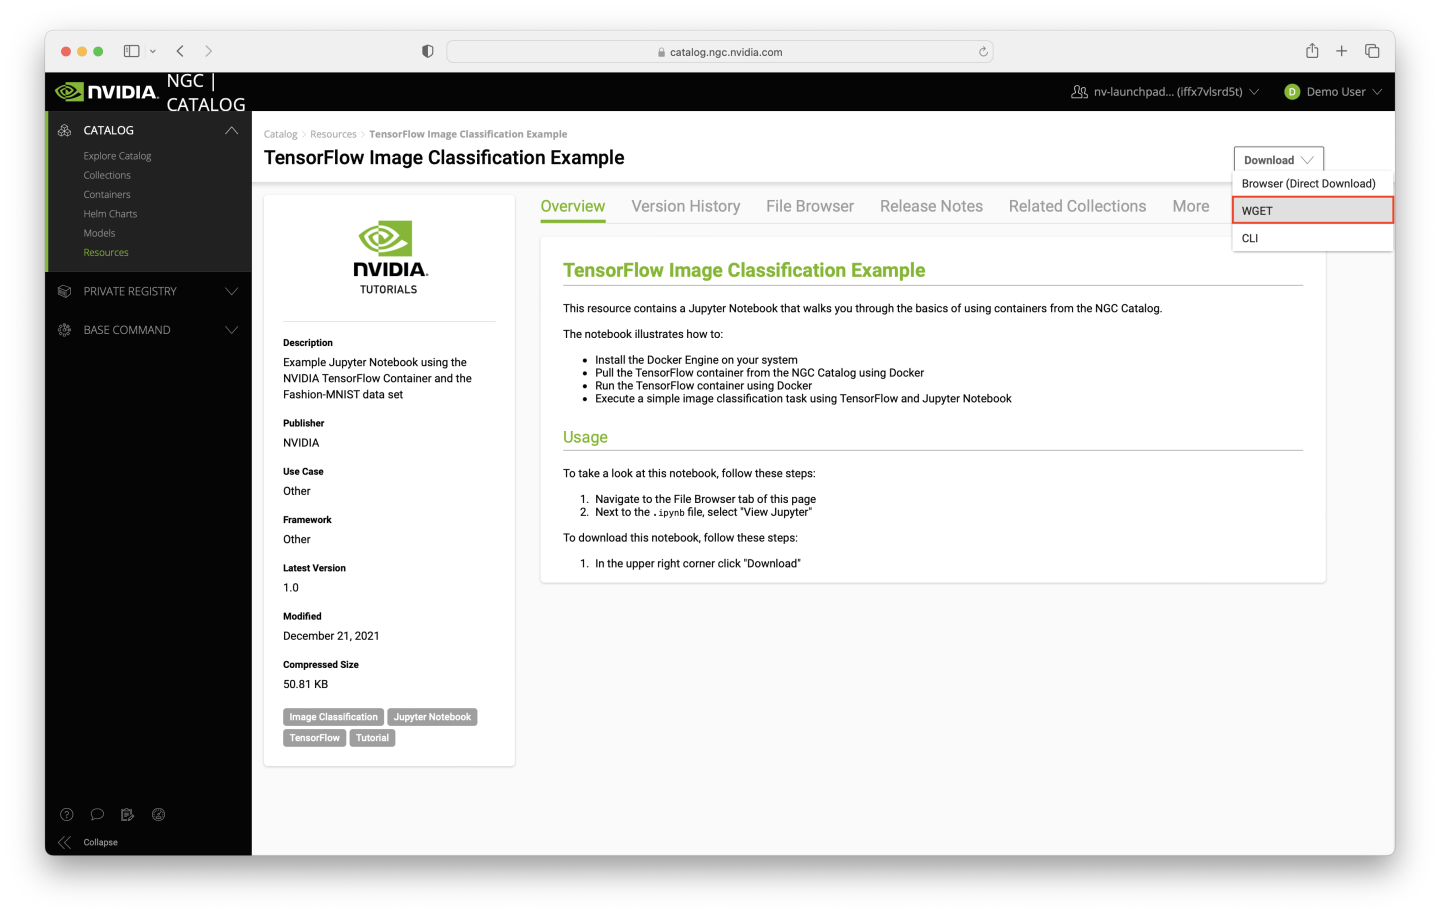
当您单击 Resource 时,您将看到一个 Overview,以及包含有用信息的其他几个选项卡。
要继续使用此 Notebook,请单击 Resource 页面右上角的 Download 下拉按钮,然后选择 WGET 选项。

这会将以下命令填充到您本地机器的剪贴板中,我们将在下一步中使用该命令将 Notebook 下载到我们在步骤 1 中启动的作业中。
wget --content-disposition https://api.ngc.nvidia.com/v2/resources/nvidia/fashion_mnist_tf_example/versions/1.0/zip -O fashion_mnist_tf_example_1.0.zip