入门指南#
VISTA-3D 的核心工作流程#
分割一切:此功能可以全面探索全身,这对于理解影响多个器官的复杂疾病以及制定整体治疗计划至关重要。
使用类别分割:它根据特定类别提供详细的剖面视图,这对于有针对性的疾病分析或器官mapping至关重要,例如查明关键器官中的肿瘤。
交互式点提示分割:通过允许用户引导的、基于点击的选择,此工作流程显著提高了分割精度,从而有助于快速创建用于医学影像分析的准确的ground-truth数据。
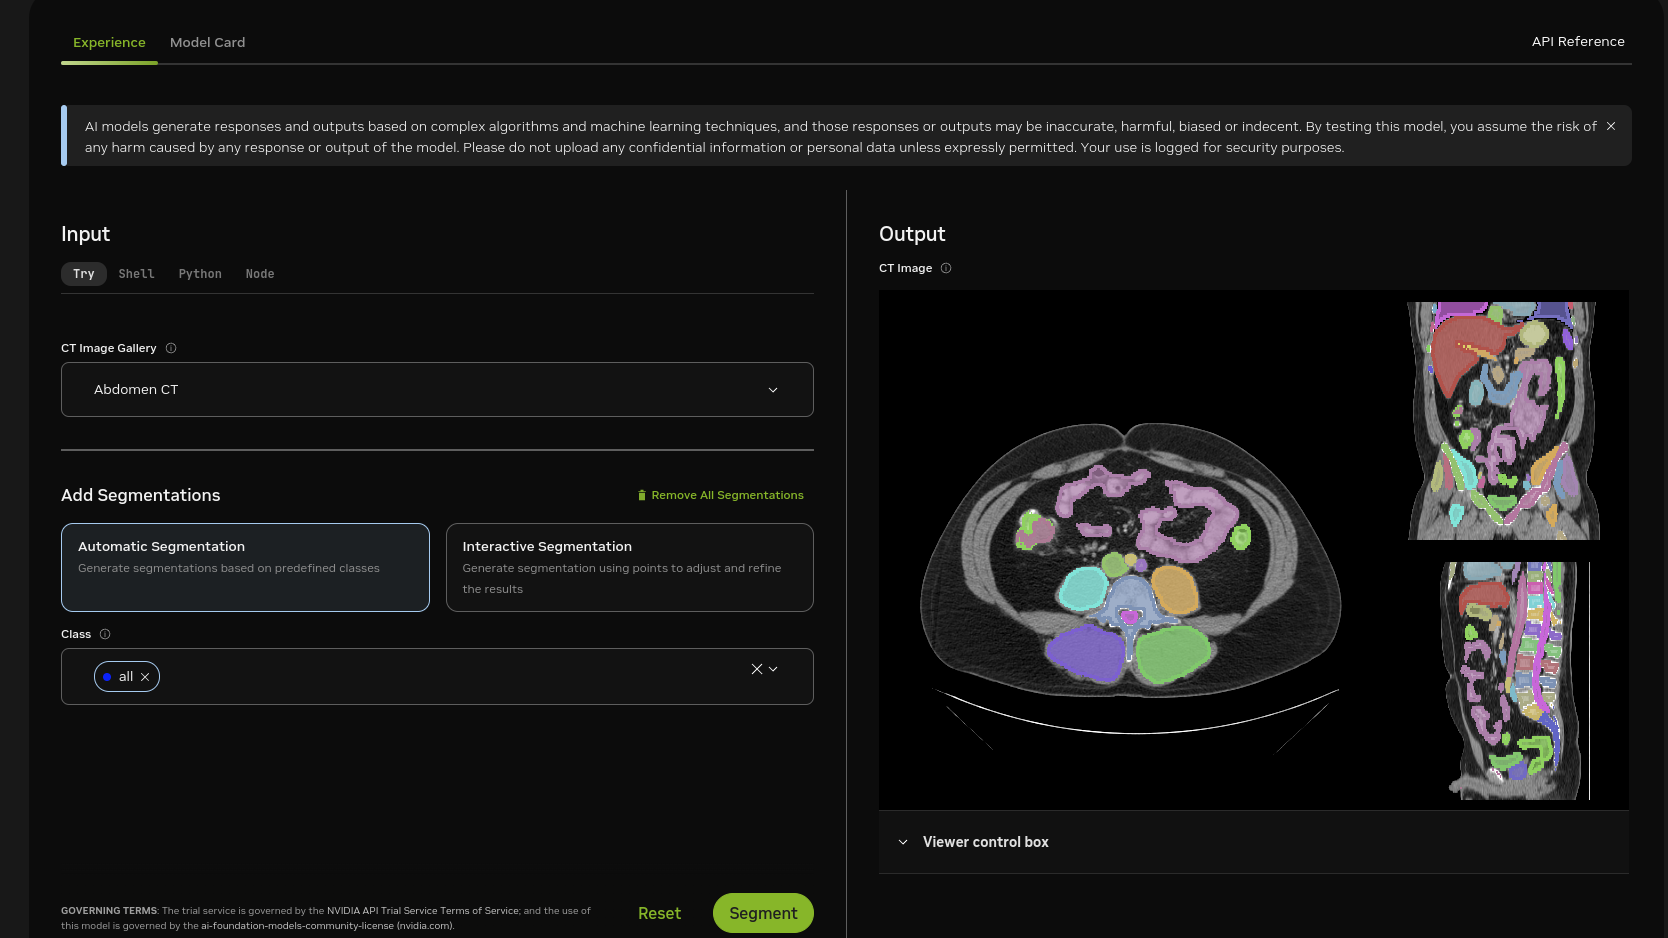
演示 Playground: https://build.nvidia.com/nvidia/vista-3d
设置和先决条件#
硬件要求#
最低 GPU 内存 (GB):48 GB
CPU x86-64 >= 8 核(推荐)
内存 >= 32 GB(推荐)
最低存储空间:20 GB(8 GB 容器大小)
已在 A100、H100 和 L40 上验证
软件要求#
最低 NVIDIA 驱动程序版本:470
安装 Docker
NGC (NVIDIA GPU Cloud) 账户设置#
设置
NGC_API_KEYexport NGC_API_KEY=<Your NGC API Key>
使用您的 NGC API 密钥通过
docker login nvcr.io --username='$oauthtoken' --password=$NGC_API_KEY进行 Docker 登录
NGC CLI 工具设置#
为您的操作系统下载 NGC CLI 工具。
在本地设置您的 NGC CLI 工具(您需要您的 API 密钥!)
ngc config set
输入 API 密钥后,您可能会看到组织和团队的多个选项。根据需要选择,或按 Enter 键接受默认值。
使用说明#
运行 NIM#
拉取 NIM 容器
docker pull nvcr.io/nim/nvidia/vista3d:1.0.0
运行 NIM 容器
docker run --rm -it --name vista3d \
   --runtime=nvidia -e CUDA_VISIBLE_DEVICES=0 \
   --shm-size=8G \
   -p 8000:8000 \
   -e NGC_API_KEY=$NGC_API_KEY \
   nvcr.io/nim/nvidia/vista3d:1.0.0
使用 docker logs 监控进度
docker logs --follow vista3d
健康和活动性检查#
就绪检查
curl localhost:8000/v1/health/ready活动性检查
curl localhost:8000/v1/health/live等待健康检查返回状态代码
200Bash
base_url="https://:8000"
endpoint="/v1/health/ready"

response=$(curl -s -o /dev/null -w "%{http_code}" "$base_url$endpoint")

while [ "$response" -ne 200 ]; do
   echo "Waiting for the service to be ready..."
   sleep 5
   response=$(curl -s -o /dev/null -w "%{http_code}" "$base_url$endpoint")
done

echo "Service is ready!"
Python
import requests
import time

base_url = "https://:8000"

while True:
    try:
        response = requests.get(f"{base_url}/v1/health/ready")
        if response.status_code == 200:
            print("Server is ready")
            break
    except requests.exceptions.ConnectionError:
        print("Server is not ready yet, waiting...")
    time.sleep(5)
运行推理#
准备您的 NIfTI 图像或使用示例图像。
(可选)下载并安装 3D Slicer 以查看结果。
注意:有关设置数据的更详细说明,请参阅我们的博客 Running VISTA-3D with your data
注意:对于感兴趣区域,通常用户的数据不包含所有包含所有解剖结构的组件,如果图像不包含类别甚至错误的类别,则类别可能为空。 例如,“大脑”和“肝脏”可能不会同时存在,提供这两个类别提示可能会导致错误的预测。 参考图像 (example-1.nii.gz) 是腹部 CT 扫描,其中包含大多数腹部器官、血管和椎骨类别。
方法 1:分割所有标签#
Bash
LOCAL_URL='https://:8000/v1/vista3d/inference'
DATA=$(cat <<EOF
{
    "image": "https://assets.ngc.nvidia.com/products/api-catalog/vista3d/example-1.nii.gz"
}
EOF
)
response=$(curl -s -o output.zip  -w "%{http_code}" -X POST -H "Content-Type: application/json" -d "$DATA" $LOCAL_URL)
if [ "$response" -eq 200 ]; then
  echo "Response Success, save inference results into folder: output"
  unzip -o "output.zip" -d "output"
else
  echo "Request failed with status $response"
fi
Python
import requests
import zipfile

base_url = "https://:8000"

data = {
    "image": "https://assets.ngc.nvidia.com/products/api-catalog/vista3d/example-1.nii.gz",
}

def unzip_file(zip_filepath, dest_dir):
    with zipfile.ZipFile(zip_filepath, 'r') as zip_ref:
        zip_ref.extractall(dest_dir)

response = requests.post(f"{base_url}/v1/vista3d/inference", json=data)
if response.status_code == 200:
    output_folder = "output"
    output_zip_name = "output.zip"

    with open(output_zip_name, "wb") as f:
        f.write(response.content)

    unzip_file(output_zip_name, output_folder)
方法 2:分割特定器官#
Bash
LOCAL_URL='https://:8000/v1/vista3d/inference'
DATA=$(cat <<EOF
{
    "image": "https://assets.ngc.nvidia.com/products/api-catalog/vista3d/example-1.nii.gz",
    "prompts": {"classes": ["spleen", "liver"]}
}
EOF
)
response=$(curl -s -o output.zip -w "%{http_code}" -X POST -H "Content-Type: application/json" -d "$DATA" $LOCAL_URL)

if [ "$response" -eq 200 ]; then
  echo "Response Success, save inference results into folder: output"
  unzip -o "output.zip" -d "output"
else
  echo "Request failed with status $response"
fi
Python
import requests
import zipfile

base_url = "https://:8000"

data = {
    "image": "https://assets.ngc.nvidia.com/products/api-catalog/vista3d/example-1.nii.gz",
    "prompts": {"classes": ["spleen", "liver"]}
}

def unzip_file(zip_filepath, dest_dir):
    with zipfile.ZipFile(zip_filepath, 'r') as zip_ref:
        zip_ref.extractall(dest_dir)

response = requests.post(f"{base_url}/v1/vista3d/inference", json=data)
if response.status_code == 200:
    output_folder = "output"
    output_zip_name = "output.zip"

    with open(output_zip_name, "wb") as f:
        f.write(response.content)

    unzip_file(output_zip_name, output_folder)
方法 3:使用用户点的单器官分割#
Bash
LOCAL_URL='https://:8000/v1/vista3d/inference'
DATA=$(cat <<EOF
{
    "image": "https://assets.ngc.nvidia.com/products/api-catalog/vista3d/example-1.nii.gz",
    "prompts": {"classes": ["spleen"], "points": {"spleen": [[97, 249, 87]]}}
}
EOF
)
response=$(curl -s -o output.zip  -w "%{http_code}" -X POST -H "Content-Type: application/json" -d "$DATA" $LOCAL_URL)
if [ "$response" -eq 200 ]; then
  echo "Response Success, save inference results into folder: output"
  unzip -o "output.zip" -d "output"
else
  echo "Request failed with status $response"
fi
Python
import requests
import zipfile

base_url = "https://:8000"

data = {
    "image": "https://assets.ngc.nvidia.com/products/api-catalog/vista3d/example-1.nii.gz",
    "prompts": {"classes": ["spleen"], "points": {"spleen": [[97, 249, 87]]}}
}

def unzip_file(zip_filepath, dest_dir):
    with zipfile.ZipFile(zip_filepath, 'r') as zip_ref:
        zip_ref.extractall(dest_dir)

response = requests.post(f"{base_url}/v1/vista3d/inference", json=data)
if response.status_code == 200:
    output_folder = "output"
    output_zip_name = "output.zip"

    with open(output_zip_name, "wb") as f:
        f.write(response.content)

    unzip_file(output_zip_name, output_folder)
停止容器#
要停止容器,请运行
docker stop vista3d
使用 3D Slicer 可视化#
用户可以使用 3D Slicer 等查看器可视化 VISTA3D NIM 生成的分割结果,在本文档中,我们提供了安装 3D Slicer 和渲染 VISTA3D 分割的简单教程。
安装#
要开始使用 3D Slicer,您需要下载并安装稳定版和预览版。有关安装 3D Slicer 的更多信息,请查看 3D Slicer 文档。
解压压缩文件,双击“3D Slicer”应用程序,并按照不同操作系统上的必要安装步骤操作。
可视化和渲染#
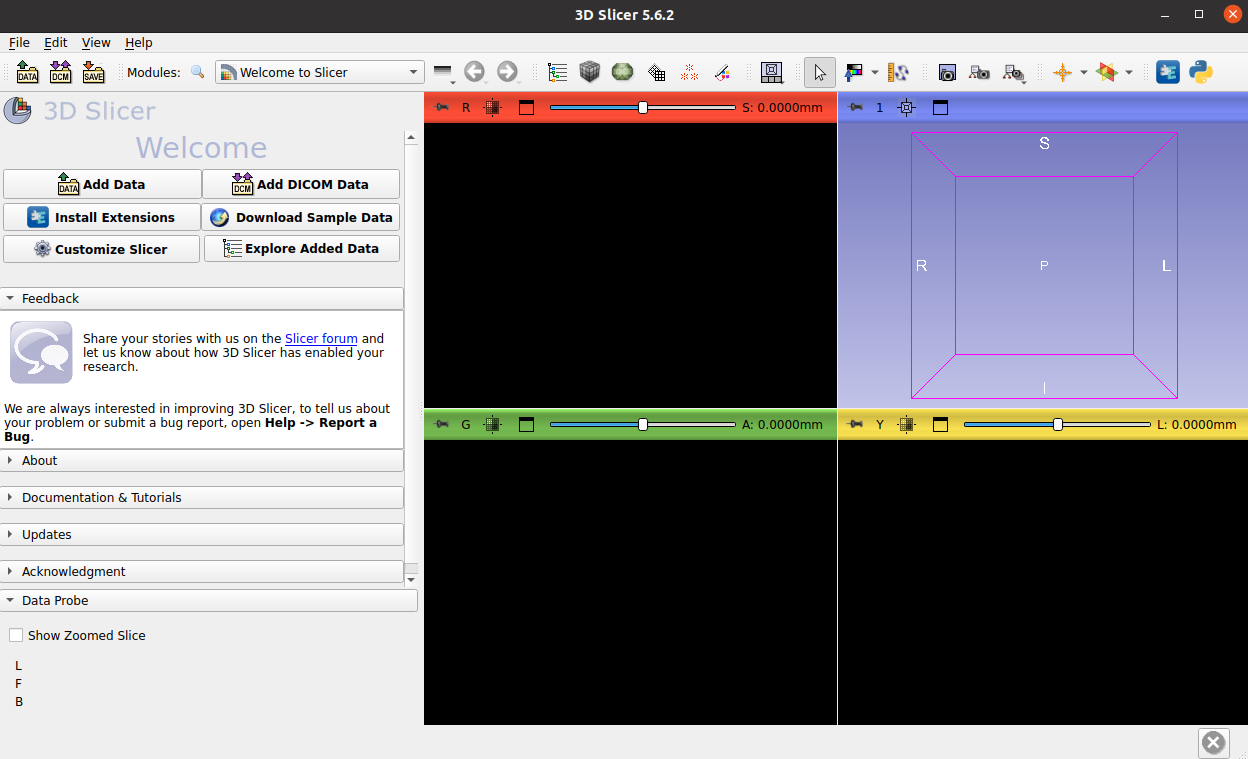
打开 3D Slicer 应用程序,在启动板查看器下:
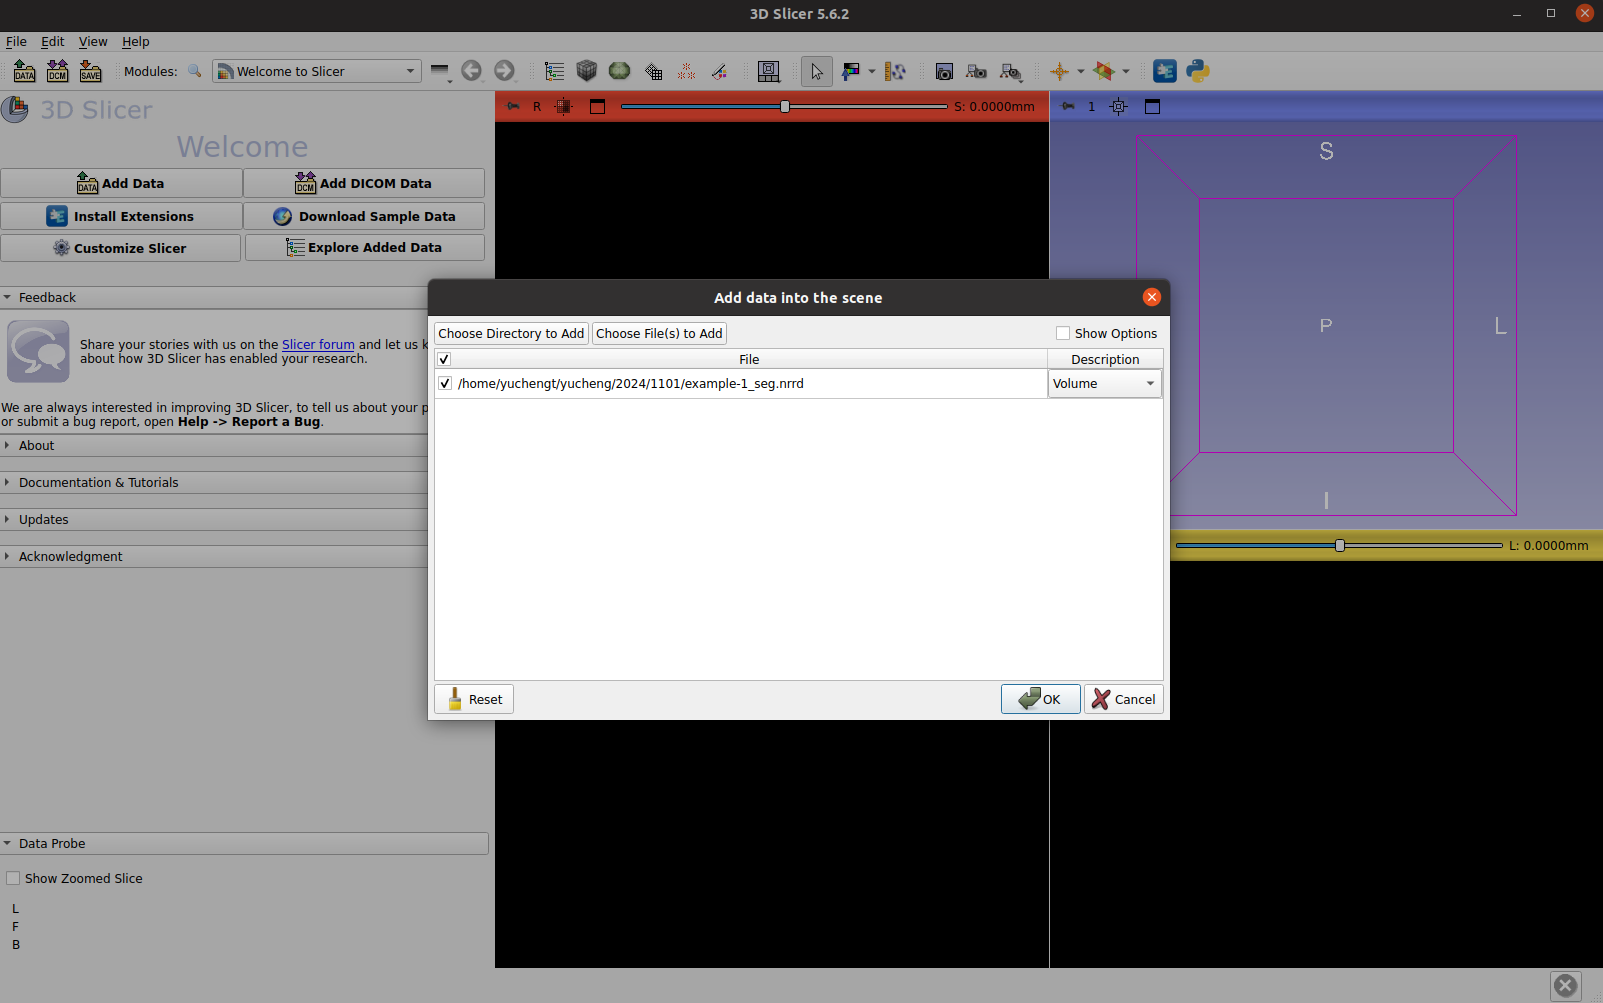
打开 VISTA3D NIM 生成的分割文件,它可以是 NRRD 或 NIFTI 文件。 拖动文件或从菜单导入。 在弹出窗口中,如果您只想加载文件,请选择“volume”选项。 或者,如果您想编辑分割,可以选择“segmentation”模式。
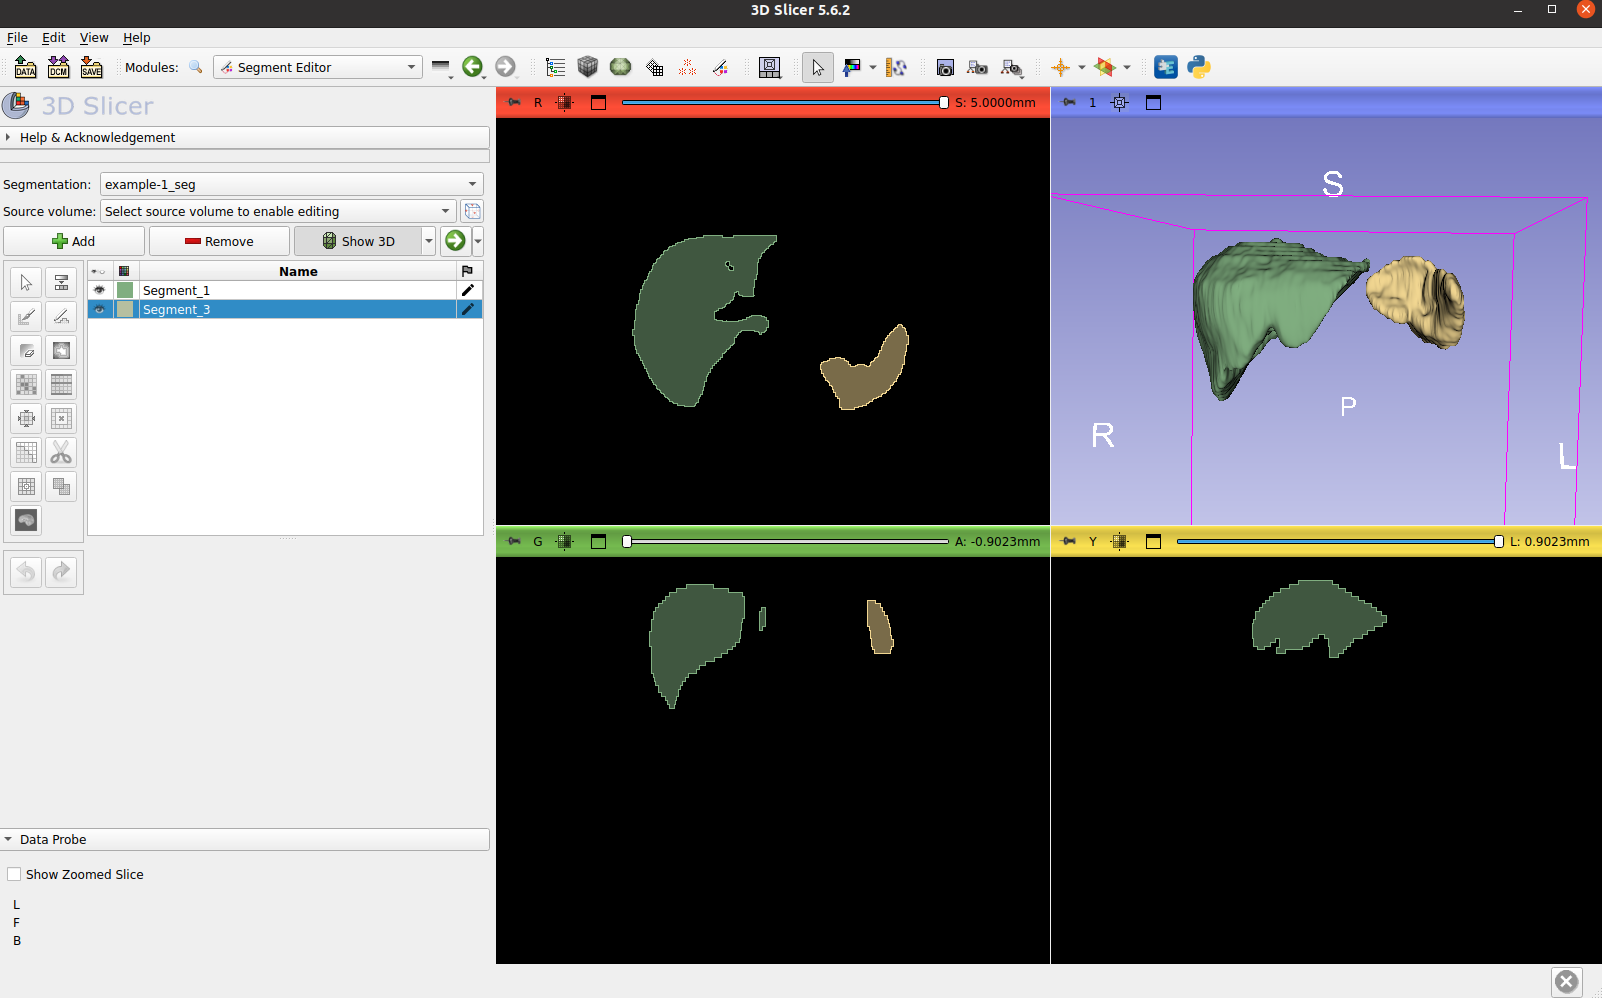
可视化生成的标签,例如肝脏和脾脏:
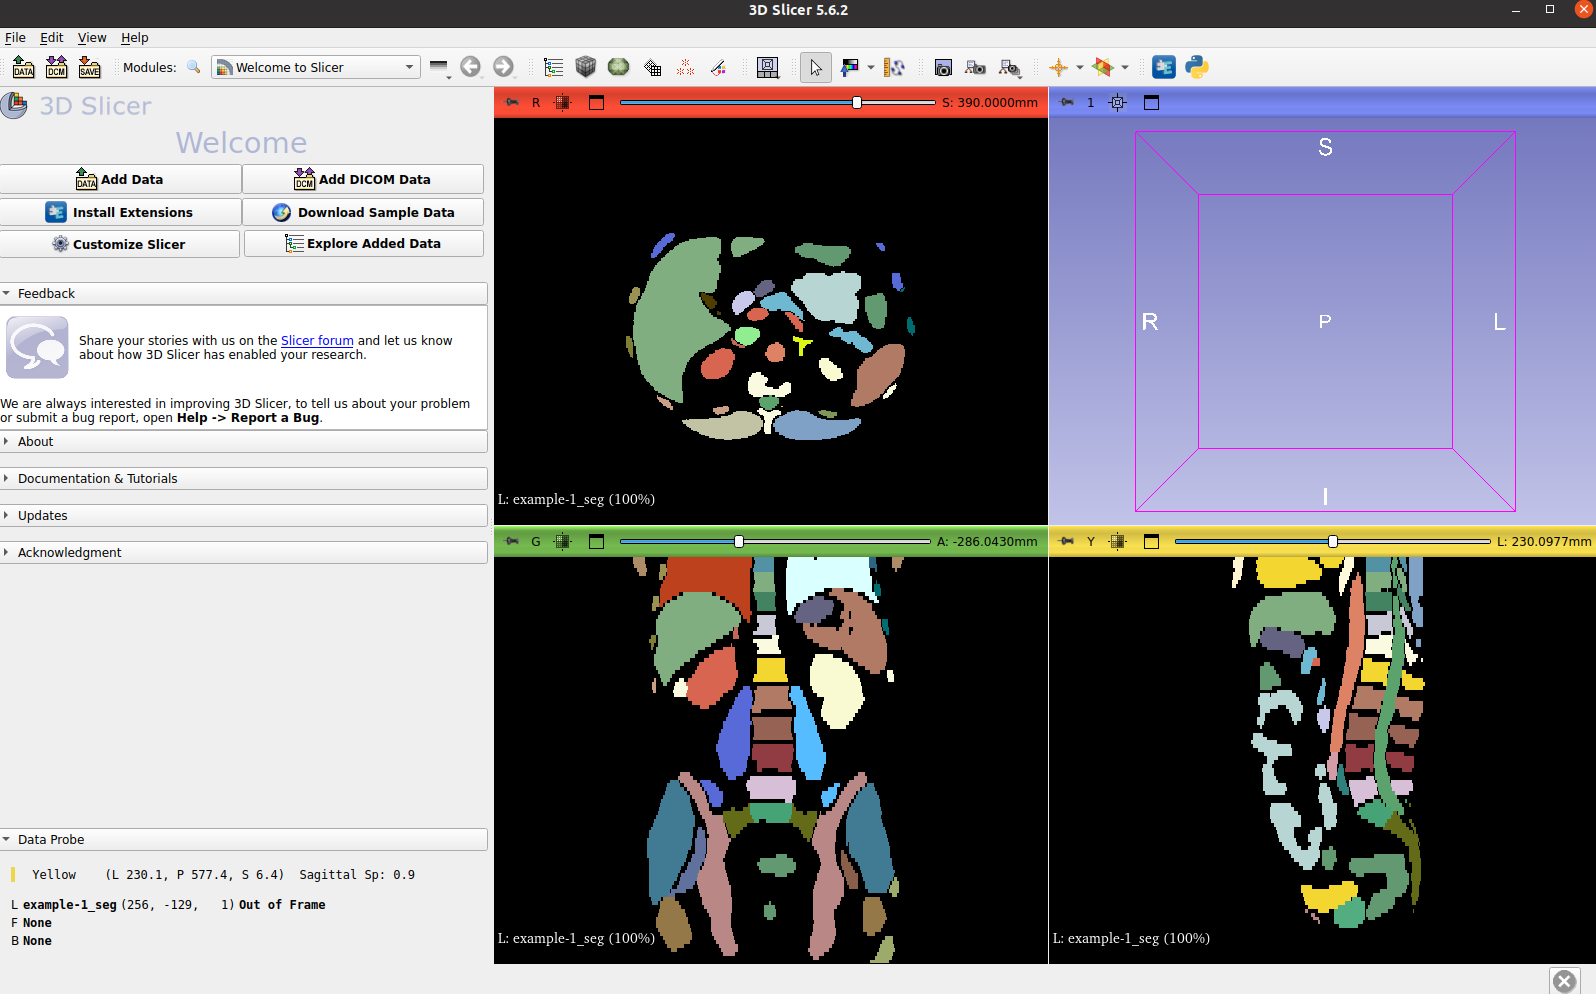
可视化生成的所有解剖结构:
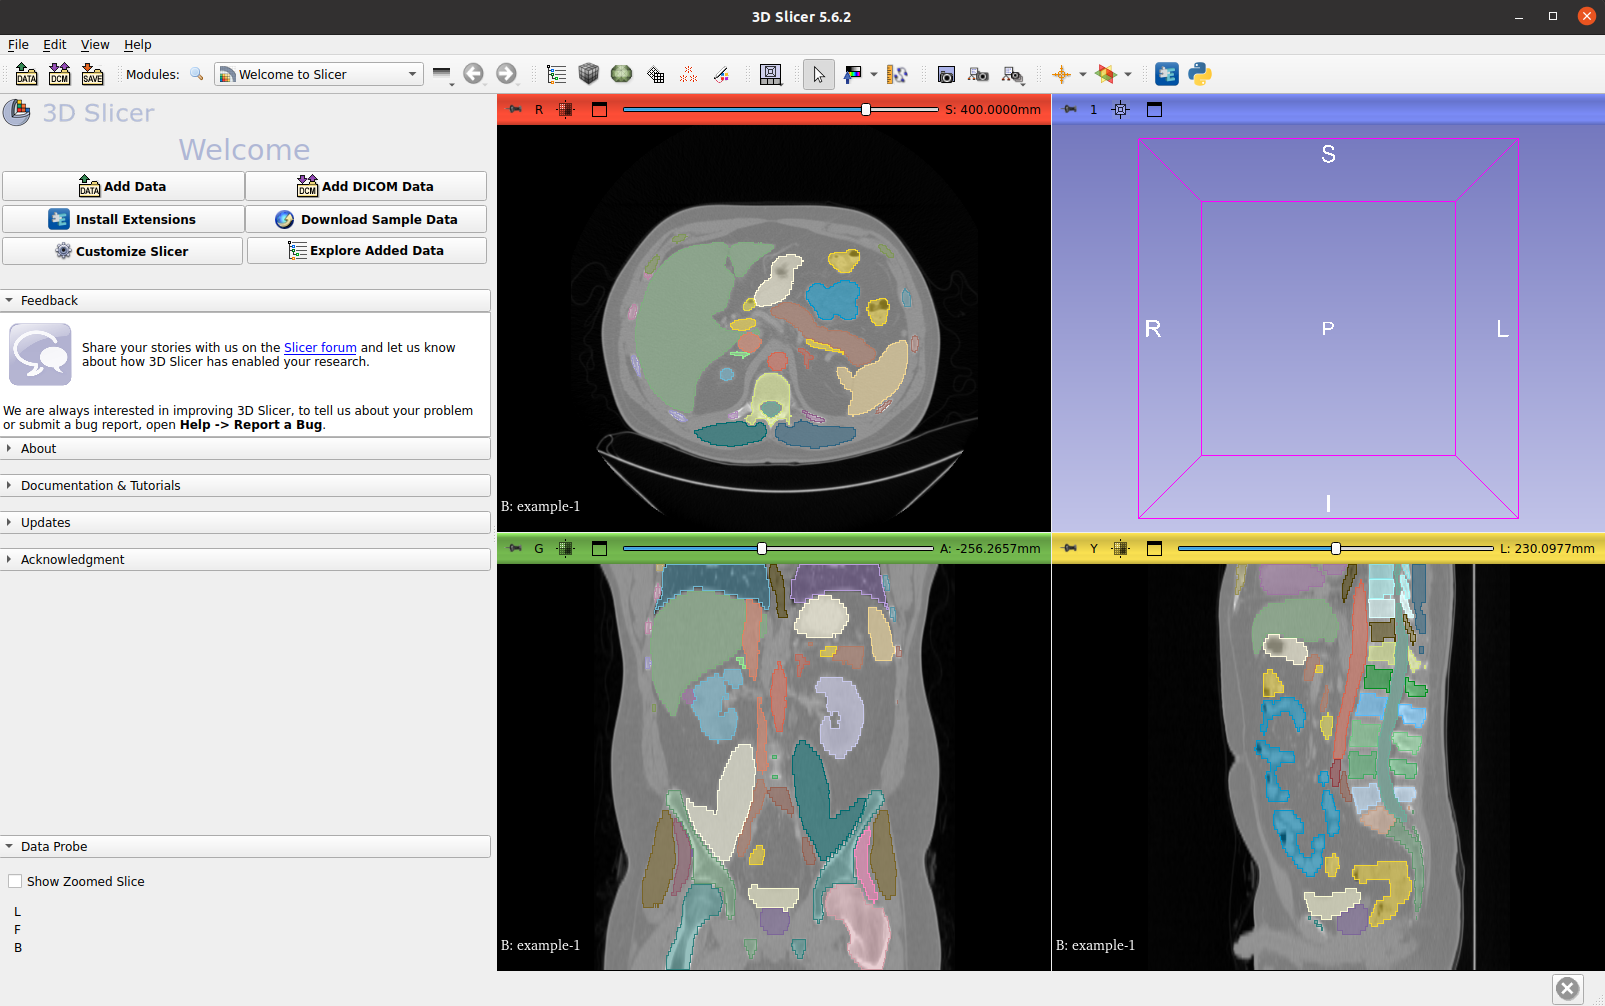
可视化 CT 图像及其 VISTA3D 推理标签:
可视化点提示patch:如果您想使用 3D Slicer 查看点提示推理结果,这些结果是基于patch的预测,格式为 NRRD 或 NIFTI。 您可以将其作为“volume”模式加载到 Slicer 中,然后单击顶部 3D Slicer 菜单上的“volume”面板。 然后调整 0-3 左右的对比度和阈值,因为来自点提示的预测值范围为 0-1。 然后您可以看到结果。
